Tokyo Day 5 (23 May 24): DisneySea – The Land (or shall I say the Sea) of Happiness

I originally did not plan to visit any of the Disneys, partly because we would waste time queuing for the rides. However, my sister thought not going to Tokyo Disney was like not coming to Japan. Thus, I set aside today for our Disney trip. There are two Disneys in Tokyo: Disneyland and DisneySea. We opted for the Japan-exclusive Tokyo DisneySea, the world’s only sea-themed Disney theme park.

Getting to Tokyo DisneySea

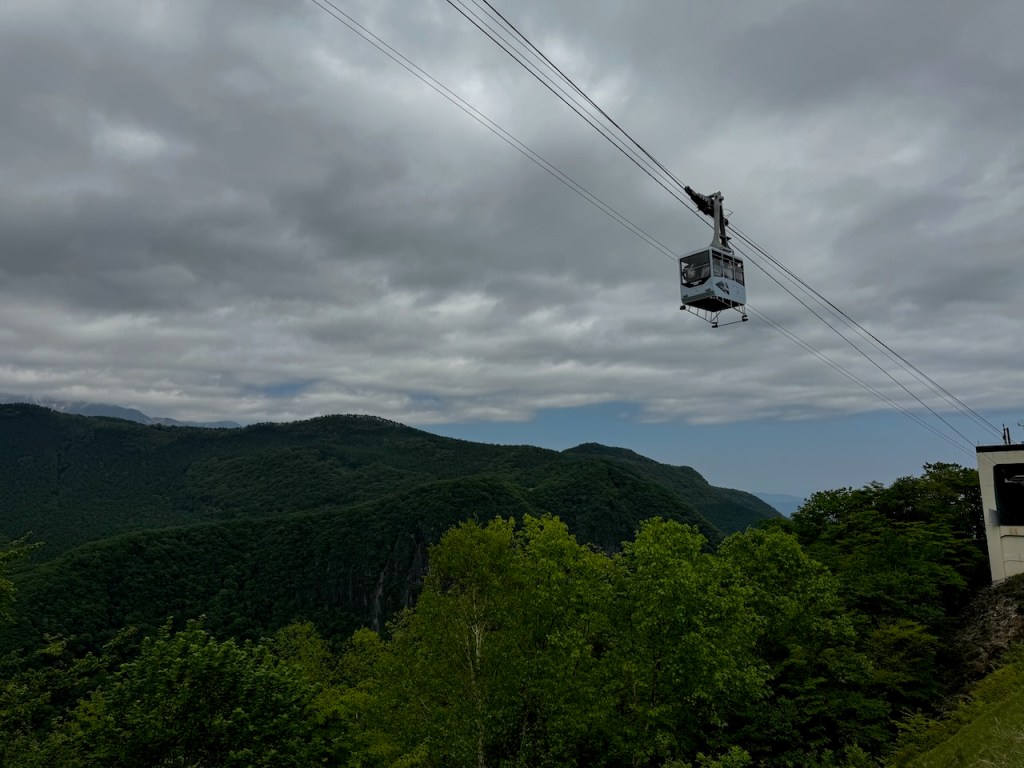
Both Disneyland and DisneySea are located next to each other. To get to Tokyo Disney, we took the Yamanote Line to Tokyo Station, transferred to the Keiyo Line, and alighted at Maihama Station. We exited Maihama Station and took a 2-minute walk to the Disney Resort Line. The Toko Disney Line has only four stops. Of interest were Stop #1 for Tokyo Disneyland and Stop #3 for Tokyo DisneySea.

Into the “Sea” of Happiness

We arrived at DisneySea around 11 am, which wasn’t crowded at the entrance. We opted to arrive at this time to avoid the insane crowds at the entrance before opening, like what we saw on social media. Coming at this time meant we would forgo some of the rides people came here early to snatch the priority pass (paid and complimentary) for. As there were some issues with my Disney app (which was essential for us to book rides), we spent the next 20 minutes at the Guest Relations to sort out and get the paid Disney Premier Access pass for the Journey to the Centre of the Earth ride at the same time.

Mediterranean Harbour and Amercian HarbourFront – Getting our Bearings Around Tokyo DisneySea

Passing under the European-styled buildings after the arrival plaza, the first area visitors will visit is the Meddiratiran Harbour with its signature large lake. We used this lake to get our bearings and figured out which rides were in which area. The Mediterranean Harbour is modelled after Venice. It does not seem to have much going on as it is dominated by restaurants, a bridge that links the front entrance to the rest of the park, and the only attraction – a Gondola ride. Despite not being overly crowded, the gondola ride still requires a quime of 30 minutes.

We passed the Mediterranean Harbour and came to the American Harbourfront. This area is dominated by a high-rise train ride and a replica of a ship – the S.S Columbia that resembles Titanic (my nephew insisted that the ship was Queen Mary, which he was right!). I had read about the long queues in the restaurant in the park and wanted to settle for lunch as soon as we arrived. Seeing there was no information about the queue time in the restaurants at S.S Columbia, we went inside and were surprised to find a short queue. As we were queuing, we were able to watch the Disney Parade from the windows inside the ship near the queue. After spending about 10 mins in the queue for the restaurant, we found out the queue time would take 1 hour after checking with the staff at the door. We thought it was a waste of time and gave up waiting. We walked around the ship a little before leaving the ship. The other attraction at American Harbourfront is the Tower of Terror, which has a queue time of 85 minutes. We checked the app and noticed a 5-minute queue at the Disney Sea Transit Steam Liner near S.S. Columbia. When we arrived at the attraction, we were disappointed to know that the attraction would be closed for a performance. We left the American Harbourfront and headed further into the park for our scheduled ride.

Port Discovery Area – A Place for Us to Kill Time

We came to a fortress attraction next to the American Harbourfront, which was technically the northern part of Mediterranean Harbour. We walked around this medieval fortress, which had four levels for people to walk around and explore. We mainly stayed on the upper outdoor floors of the castle, where we got a view of the roller coaster ride in Mysterious Island and the big lake we saw when we came in from the entrance. There seemed to be some treasure-hunting game ongoing, but not knowing where to queue for it, we left the fortress after taking some pictures.

We stumbled into the Port Discovery area, a little north of the Fortress, as we were walking to our ride. Other than the station for the train ride around the park and some carts selling snacks and popcorn, there was nothing much going on. We merely used this place as a thoroughfare to have some time to kill before our scheduled ride. As we walked past Miguel’s El Dorado Cantina, we saw the queue for this restaurant was short, so we settled for lunch. Miguel’s El Dorado Cantina mainly sells Mexican-inspired food in a fast-food style. We were unsure how big the portion was and ordered all four meals on the menu. The food was mediocre, sufficient for us to fill our stomachs. We found a seat in the corner of the restaurant next to the staff entrance and were surprised that Chip and Dale came past us and even tapped on our shoulders when they were going for their show. What a surprise we had.

Mysterious Island – Time for our First Ride

After the meal, we made our way for our Journey to the Centre of the Earth ride scheduled at 2.30 pm in the Mysterious Island area. Mysterious Island is the largest structure around the park, consisting of a man-made volcano and a large water-filled pit in the centre. We managed to find the entrance to the Journey to the Centre of the Earth ride. The Disney Premier Access pass allowed us to skip a majority of the queue and go pretty far in front of the queue. Journey to the Centre of the Earth ride was an indoor roller coaster ride, which was mainly very mild through the centre of the earth, where we were faced with fire and thunder effects. Towards the last part of the 3-minute ride, the roller coaster shot us up a ramp and out of the volcano, ending the ride with a short, sudden drop into the volcano. Despite his first-ever roller coaster ride, my nephew enjoyed the ride.

Mermaid Lagoon – Searching for the next Ride with the Shortest Queue

After the Journey to the Centre of the Earth ride, we saw on the app that the ride with the shortest queue time was the Whirlpool ride, which had a mere 10-minute queue time. The Whirlpool ride was in Mermaid Lagoon, next to the Mysterious Island area. Rides in the Mermaid Lagoon area are mostly inside King Triton’s Castle (except for the kid’s roller coaster). The centrepiece of Disneyland around the world is its castle; while Tokyo Disneyland has Cinderella Castle, the castle featured in DisneySea is King Triton’s Castle. I thought the castle wasn’t as grand as the other castles in Disneylands worldwide. Once inside the castle, we saw the four rides in the castle. Rides at the Mermaid Lagoon mainly cater to kids. We changed our minds when we saw the Whirlpool ride being a spinning tea cup ride. Seeing that Jumping Jellyfish was the next shortest queue ride (15 mins on the app), we queued for the Jumping Jellyfish ride instead. I would say this ride is equally boring as it merely hoists and controls release riders from a cable suspended from the ceiling. The height at which we were hoisted up was not too high. Even my nephew thought it was a boring ride. After the ride, my friend and I headed to the Lost River Delta for another roller coaster ride while my sister’s family remained in the Mermaid Lagoon as my nephew wanted to get onto the Whirlpool ride.

Lost River Delta – The only Loopy Loop Roller Coaster

The Lost River Delta was just across a bridge from Mermaid Lagoon. This area is modelled after the jungles of Central America, and I thought the rides here were the most exciting at Tokyo DisneySea. This area has two roller coaster rides, one indoor and one outdoor. We went onto the outdoor roller coaster – Raging Spirits, which had a shorter queue time than the indoor roller coaster ride. We spent 40 mins in the queueing for the ride. Raging Spirit is built with an Inca theme, featuring high drops, and is the only coaster with a 360° loop. Despite having a high drop at the beginning of the ride and a 360° loopy loop, I thought the ride was not that exciting. The roller coaster did not feel fast enough, and the drop wasn’t that scary tall. I think the short 1½-minute ride also contributes to the lack of an exhilarating feel on the roller coaster.

Back to Mysterious Island – Our Last Ride of the Day

We returned to Mysterious Island for the 20,000 Leagues Under the Sea ride that we booked under the complementary priority pass. As our booking was at 4.15 pm and we were there early, we spent the next 20 minutes walking around to wait for our QR code to show up on the app. The QR code appeared about 10 minutes before our time slot. The 20,000 Leagues Under the Sea ride is a submarine-themed ride, where we descend a spiral ramp to the bottom of the water-filled pit in the centre of the area. The ride started with us being whipped into an elevator down to the lower pit, and subsequently, water filled the submarine’s glass, giving us the illusion that the pod we were in was submerged in the water. Along the ride, we spotted some animatronics of deep sea creatures and some aliens. We felt the ride was surreal, like riding in a real submarine.

After the ride, we decided to call it a day at DisneySea and did not bother to stay for the fireworks show. I felt DisneySea was rather crowded; on average, the queue for more exciting rides takes more than one hour. We managed to take only four rides out of the 14 rides. We did not feel the Disney vibe when we were there, partly because we did not bother to watch the parades or the meet-and-greets with Disney Characters.

Dinner at Yurakucho

Leaving DisneySea, we headed for Yurakucho, mainly for the Bic Camera shop, as my phone camera lens protector was scratched. Yurakucho is an area dominated by a handful of shopping malls. As it was already late, we limited our stay at Yurakucho near the JR station. The Bic Camera sits next to the JR station and has lots to offer. Besides electronics, the 5-storey Bic Camera at Yurakucho also sells goods found in medical shops and toys. After getting what I wanted, we settled for dinner at Mos Burger, as my nephew wanted to eat nuggets. After dinner, my friend and I explored the area a little while my sister and her family returned to the hotel. The shops around here were already closed as it was already past 8 pm. The only shops we saw that were still operating were the restaurants dotted around this area. Seeing that there was nothing much to see around here, my friend and I headed back to the hotel after walking around for about 10 minutes.

Tokyo Day 4 (22 May 24): Nikko – An Oasis of Nature and History

Nikko is a quaint mountain town about a 2½ hour train ride from Tokyo. This town is famed for its nature and historical sites and onsens. The two main areas in Nikko lie West and North of Nikko train stations. As we will only spend a day here, our trip focuses mainly on the sites west of Nikko train station.

Map of Nikko (Source: JNTO)

Getting to Nikko

There are two ways to get to Nikko from Tokyo: using the Limited Express Trains or the Shinkansen. Two types of Limited Express trains depart for Nikko. The first one, the Spacia X Limited Express, departs from Asakusa Station. This newer train, with a variety of seating types and its caveated cockpit suite, whips travellers to Nikko in style. The other Spacia Limited Express (not to be confused with the newer Spacia X) uses an older train that seems to have been in use since the 80s and departs from platform 5 of Shinjuku Station. The JR Tokyo Wide pass that we have gotten is only valid on this older Spacia Limited Express. Nikko is also reachable by Shinkansen from Tokyo Station, but a transfer to a local train is required at Utsunomiya Station. The Shinkansen to Utsunomiya takes about 50 minutes, and the local train from Utsunomiya to Nikko Station takes around 30 minutes. The Shinkansen option, including the local train, is also covered by the JR Tokyo Wide Pass. We took the Spacia Limited Express for our trip to Nikko and the Shinkansen back from Nikko.

Getting Around Nikko

There are several bus lines that run to the popular tourist sights in Nikko. There are three main buses –
Y, YK, C and W that run to the sights to the west of Nikko Train Station. We mainly used YK and C for sights up to Lake Chuzenji, while the W bus line mainly runs to the three temples in Nikko and stops nearer them (compared to the Y, YK and C busses). Bus stops are marked with numbers and announced in Japanese, English, Mandarin and Korean at every stop, ensuring travellers do not miss our stops. The more significant stops for sights to the west of Nikko Station that we were alighted in were stop #24 – Akechidaira for Akechidaira Ropeway, stop #26 – Chuzenji Onsen for Lake Chuzenji and Kegan Falls, and stop #9 – Nishisando Iriguchi for Toshogu Shrine, Nikko Futarasan jinja Haiden and Nikkozan Rin’nōji Temple. There are two train stations in Nikko. Spacia Limited Express train stops at Tobu-Nikko Station, about a 3-minute walk from the Nikko Station. The first thing to do was to confirm whether the local buses accept Suica Card payments. We attempted to ask about the Tourist Information Centre in Tobu-Nikko Station but gave up due to the long queue.

Akechidaira Ropeway – Views of the Lake and the Waterfall

Nikko is a fairly large area with sights spread out in the town, as we have only one day at Nikko, we have to be very specific about the sights we want to visit. To avoid making the day too rushed, I picked out three sights to visit in Nikko. From my research before our trip to Japan, I matched the bus timetable to the sights we visited. I found the order to Akechidaira Ropeway, Kegan Falls, and Toshogu Shrine, which allowed us to maximise our time. We took the YK bus from the bus stop in front of Tobu-Nikko Station to Akechidaira Ropeway and alighted at stop #24. We took some time to admire the scenery before taking the ropeway. The gentle, cool mountain breeze with the cloud-covered views of the mountain ranges, coupled with the thin crowd, gave us a tranquil feel. The big rock with the mountain view behind gave us a great spot to take pictures.

The Akechidaira Ropeway that we took

We proceeded to buy tickets for the ropeway. Staff at the ticketing booth informed us that views of Kegan Fall might be disappointing as there is not much water flowing from the lake. He helped us purchase the ropeway tickets from the vending machine after we told him we did not mind the water volume at Kegan Falls. Akechidaira Ropeway departs from the base station every 10 minutes, so we did not have to wait too long for our ride to the observation platform. The ride up to the observation platform took around 3 mins. Along the ride, we were treated to views of the surrounding mountain; I could even spot a waterfall amongst the mountain ranges.

The observation deck is a small area offering 360° views of the surroundings. Other than Lake Chuzenji and Kegan Falls, we were also able to see the town that Nikko Station sits on and beyond. The main view we were after was the Lake and the waterfall. From the observation platform, we were able to see Lake Chuzenji sitting on a higher plain and feeding water to Kegan Falls. However, as we were told earlier, there is no water flowing at Kegan Falls; it appears as if someone placed a plug between the lake and the waterfall, causing little water flowing at Kegan Falls. I thought we were able to appreciate how tall Kegan Falls is without the water draining from Lake Chuzenji. As there were very few people here, we were able to enjoy the tranquillity the surroundings brought. The view opposite Lake Chuzenji was vast mountain ranges that seemed to stretch into the horizon. I liked the view of Lake Chuzenji’s side better. As the observation platform was small and there was nothing much to do besides looking at the views, we spent about 30 minutes here and left on the next cable car after taking some photos.

Chuzenji Onsen – Quiant Town next to Kegan Falls

Our next stop is to visit Kegan Falls. From the Akechidaira Ropeway bus stop, we took the next bus that came along for two stops and alighted at stop #26 Chuzenji Onsen. The bus stop at Chuzenji Onsen looked more like a bus terminal. There are bus bays dedicated to each bus service that passes through here. There is even a terminal building where we were able to top up our Suica Card (as mine was running low). Chuzenji Onsen is the small town next to Lake Chuzenji, the lake we just saw from the Akechidaira observation platform. This town is also home to the famous Kegan. Chuzenji Onsen was very quiet, with a handful of travellers walking on the main streets, making their way to Kegan Falls. As we were walking on the streets of Chuzenji Onsen, we could spot Mt Nantai towering over the town. We settled our lunch at one of the restaurants in the town, opposite Kegan Falls.

After lunch, we headed for Kegan Falls. There seem to be more people here at Kegan Falls. As we were already pre-empted that there wasn’t much water flowing down Kegan Falls, we forgo our original plan of taking the paid lift to the lower platform. The lower platform would be a perfect spot to view Kegan Falls when the waterfall flows. Since it wasn’t flowing today, we did not see a point in spending the money for the lift. The way to the upper viewpoint at Kegan Falls was very well-marked. We spotted a two-level concrete structure that seemed to jag into the waterfall. This upper platform is free of charge, and we were still able to catch a glimpse of the waterfall. We spotted water falling at the lower part of Kegan Falls, but it wasn’t anywhere near the majestic when the waterfall was in its full glory. As there was not much we could do here, we returned to the bus terminal and caught the next bus to the Shrines.

Toshogu Shrine – The Shrine in the Forest

As we were walking to the bus terminus at Chuzenji Onsen, we spotted a bus route Y pulling into the stop. The driver indicated that it was going back to Nikko. We took the bus and alighted to stop #9 Nishisando Iriguchi, the nearest stop to Toshogu Shrine. Despite being the nearest, we were still required to walk 10 mins upslope to the shrine. Toshogu Shrine is a UNESCO World Heritage site; its stone main entrance, together with the stone Torii gate, gave it an ancient look. The forested surroundings gave us a sense of adventure, akin to going into some forest shrine looking for treasure. This flight of stairs towards the Torii gate was just the entrance to the forecourt of the shrine. Its entrance is after the ticketing booth.

The Fore Court – The Three Monkeys and the Elephants

Pass the red wooden main entrance to Toshogu Shrine, and a pathway leads to the main shrine building. The forecourt of the shrine is a vast area with temple buildings built on both sides of the pathway. There are two buildings here that have interesting carvings. Walking towards the entrance, the building to the left had three monkeys carved onto the beam. This building looks unfinished with an unpainted basewood. However, the carving of these monkeys was vividly painted in a black and gold frame sitting above a window. The carvings of these monkeys can be easily missed if we are not deliberate in looking for them. Diagonally opposite the building with the three monkeys is another building with carvings of elephants. This building is decked in red and looks more vibrant than its neighbour opposite. Pass another Torii Gate, and after a short flight of stairs, we came to the iconic golden gate that is representative of Toshogu Shrine.

The Mausoleum Behind the Shrine

We did not pay much attention to this (Yomeimon) gate adorned with white walls and golden roofs. We walked past the Yomeimon Gate to the entrance to the main part of the Shrine. Instead of exploring the shrine, my friend and I followed a path that led to the right buildings of Toshogu Shrine. Here, we spotted a sign that guided our attention to the beam above it, where we spotted a carving of a sleeping cat. Here, we bumped into a staff that urged us to go through the gate as they closed. Not knowing what was behind this gate, we followed the instructions of the staff. After a small flight of stairs and a bend later, we saw a long flight of stairs. There are 207 steps up the back of the temple. As it was nearing closing time, just a handful of us were at the stairs. My friend and I scaled up the stone stairs and spotted a lone building perched at the top of the stairs in a large open area. A sign at the side of this short pagoda made from an alloy of gold, silver, and bronze informed us that this is the resting place of Lord Tokugawa, the founder of the Tokugawa dynasty of Shoguns.

The Golden Gate and the Main Shrine

We descended the stone stairs from which we came to explore the main shrine. As it was closing time, plus we were too lazy to remove our shoes, we only saw the main shrine in Toshogu from the outside. The main shrine is enclosed by a set of short-walled fences. The front gate to the shrine was adorned in white and gold with elaborate carvings on its beam. As the front gate to the shrine was closed, we couldn’t really make out what was inside. After exploring another building to the left of the main shrine, we hastily headed for the main entrance of Toshogu Shrine (as the shrine was closing). As we were walking past the Yomeimon Gate, this time around, we paused momentarily to admire the intricate carvings on this gate. The lower level under the roof was decorated in black and gold; taking a closer look, we could spot some characters carved onto the beam. The carvings of the white dragons on the beam above looked very lively, as though they were fiercely guarding Toshogu Shrine. The roof of the top level was full of carvings of dragon heads adorned in gold and black. I can see the amount of hard work that went into creating such a beautiful piece of work.

Back to Tokyo

As the shrine was closing and seemingly most of the shops and attractions in Nikko were calling it a day, we headed to the nearest bus stop for our bus ride back to Nikko Station. There is a bus stop about a 3-minute walk from the main entrance of Toshogu Shrine. This was where Bus Route W stopped, the bus route I originally wanted to take. As we were taking the Shinkansen (the last Limited Express had already left) back to Tokyo, we boarded the local train from Nikko Station, the other station in the Nikko area about 3 min walk from the Tobu-Nikko Station we arrived in this morning. The local train took about 30 mins to reach Utsunomiya station, and transferring to our 50-minute Shinkansen ride back to Tokyo was a breeze. We settled for dinner at Tokyo Station before calling it a night. After all, we had Tokyo DisneySea planned for tomorrow.

Tokyo Day 3 (21 May 24): Karuizawa – Views from Usui Pass Observation Platform; Outlet Mall Shopping at Prince Shopping Plaza

I added this trip to Karuizawa as an afterthought, partly looking for places to maximise the Tokyo Wide Pass we bought before our Tokyo trip. My sister wanted to visit an outlet mall, and it happens so that there is one at Karuizawa. Other than outlet mall shopping, Karuizawa has other attractions such as Kyu-Karuizawa Ginza, Shiraito Waterfall and Usui Pass Observation Platform. As I wanted to cater the afternoon for outlet mall shopping (the very reason we came here in the first place), we had only time for one other attraction. Getting to Karuizawa is easy and convenient, and we only have to spend 1 hour on the Shinkansen from Tokyo Station.

Usui Pass – View of the Mountains and an Ancient Shrine

Usui Pass Observation Platform is accessible by a 50-minute uphill hike from Kyu-Karuizawa Ginza or the red Karuizawa Aka Bus. We took the bus option, which costs ¥500 per person (round trip). The Aka Bus does not stop at Karuizawa. Instead, it starts from Tokyu Harvest Club, a 15-minute walk from the north exit of Karuizawa Station. Karuizawa came across as a sleepy, quiet town as we walked to the bus stop. This town seems to be a great place for someone seeking a relaxing environment away from the hustle and bustle of Tokyo. The bus ride took about 30 mins from Tokyu Harvest Club, with its final stop at the Kumano Kotai Shrine, the stop where we alight for the Usui Pass Observation Platform.

Usui Pass Observation Platform – The Centre Two Prefectures

From the bus stop at Kumano Kotai Shrine, we turned right and took a 5-minute walk to the observation platform. The Usui Pass Observation Platform was a small garden-like open area, not a wooden platform that protruded into the mountain ranges as I imagined. There is only a small opening at the Usui Pass Observation Platform that allowed us to look out into Mt Asama and the mountains of Gunma prefecture. From this small opening, we could see rows and rows of mountain ranges beaming with greeneries that seemed to stretch forever. The other significant sight at the Usui Pass Observation Platform was a sign and some stones that demarcated the centreline of Gunma and Nagano prefectures. We did not spend too much time here as there was nothing much we could do other than take pictures from the small opening of the mountain ranges; we headed back to the shrine while waiting for the next bus back to Karuizawa.

The Historic Kumano Kotai Shrine

Kumano Kotai Shrine is unique that it is one of the few shrines in Japan that sits on the border of two prefectures. The shrine is perched atop a small hill, and a staircase lined with red lanterns on both sides leads to the shrine. Kumano Kotai Shrine comprises three shrines housing three gods in the same compound. The wooden shrine Shinto-style wooden shrines seem to have seen the ages of time, yet they were very well preserved as though time had stopped. We did the prayer in Japanese style, paying respect to the deity installed in the centre shrine and spent the rest of our time here looking around the shops that sell charms. Behind the charm shop rests a 1,000-year-old tree that the locals would pray for marriage. As there was nothing else we could do here and the bus heading back to Karuizawa was about to arrive, we left the temple and joined the queue for the bus ride back.

Prelude to our Shopping Experience – Kyu-Karuizawa Ginza

Kyu-Karuizawa Ginza Street is one of the main attractions in Karuizawa. The Kyu-Karuizawa Ginza is a shopping street with neo-classical Japanese buildings. The bus stop was conveniently located at the northern end of the street, which made perfect sense for us to alight and continue our journey towards the JR station on foot. There did not seem to be a lot of visitors to this part of the street, but we noticed it gets busier towards the southern end. When it comes to dining options, the choices are very limited on this street. There are many cafes offering desserts and bread on Kyu-Karuizawa Ginza, but only a handful of Western-Japanese infusion restaurants. Most of the eateries are located at the southern end of the street. There are several small alleys from Main Street that are worth taking a look at. Most retail shops on Kyu-Karuizawa Ginza Street sell Japanese souvenirs and omiyage. Occasionally, we would find clothing and lifestyle shops and some shops selling artwork. It took us about 30 mins walking down Kyu-Karuizawa Ginza Street as we were mainly window shopping on the street.

Outlet Mall Shopping at Karuizawa Prince Shopping Plaza

Karuizawa Prince Shopping Plaza is a large outlet shopping complex at the doorstep of Karuizawa JR Station. The south exit (turn left as we exit the gantry) leads right to the shopping complex. Rather than calling it a mall, Karuizawa Prince Shopping Plaza sits on a huge plot of land with the stores spreading out over the vast area. The large pond in the centre of the shopping plaza makes the plaza look more like a garden than a shopping mall. The shops are very well laid out and grouped according to their category, like luxury brand shops surrounding the lake, eateries located on the northern part of the plaza, etc. We spent the rest of the afternoon shopping at Karuizawa Prince Shopping Plaza. I thought some of the things on sale here were very competitive. However, not all the items we found here are exactly outlet mall prices. Like most outlet malls, there is a limited range of goods in each store (maybe except Gucci and Burberry), and most stores sell off-season items. I found a huge selection of items for sale in almost all sporting goods shops. Despite being unable to find the things that appealed to us here, we spent the rest of the afternoon shopping around. Shops at Karuizawa Prince Shopping Plaza close at 7 pm; we left the shopping plaza at around 6.30 pm to catch our Shinkansen back to Tokyo.

Tokyo Day 2 (20 May 24): Kawaguchiko – Home of Mt Fuji, the Icon of Japan

Our Alternate Plan to Kawaguchiko

Kawaguchiko is the nearest town in Japan to visit the Mt Fuji region. Two main ways to get to Kawaguchiko from Tokyo are via the JR or the interstate bus. For the train option, we could take the Fuji Excursion Express train, which whips travellers from Shinjuku to Kawaguchiko in under 2 hours, or the non-express services, mainly for those who did not manage to snag a ticket for the Limited Express trains. For the bus option, there are numerous services from Tokyo to Kawaguchiko daily, departing from the Bus Terminal opposite Shinjuku Station. These buses can be boarded from the bus station opposite Shinjuku Station.

We originally planned and booked seats on the Fuji Excursion Limited Express to Kawaguchiko. Limited Express trains to Kawaguchiko sell out very fast (ours sold out within 2 days of release). As we woke up late and missed the train we had booked, I had to look for alternatives to get to Kawaguchiko. We initially wanted to take the bus option to Kawaguchiko. At the Bus Terminal, we were told the next available bus would leave at 11.45 am, which meant we would arrive at Kawaguchiko close to 2 pm. The ticketing staff advised us to take the next non-express train and transfer to Otsuki, where we would reach Kawaguchiko earlier. We heeded her advice and managed to catch the 10.30 am train to Otuski.

The non-express train took 1 hour to reach Otsuki Station. At Otsuki Station, the way to the platform for the local train to Kawaguchiko was very well marked. We followed the white sticker on the floor that said “Fujikyu Railway”, which brought us to another gantry where we just had to show the station staff our Tokyo Wide Pass for the ride on the local train. The local Fujikyu Railway took another 1 hour to reach ShimYoshida Station, our first to see Mt Fuji with the iconic Chureito Pagoda.

The Iconic View of Mt Fuji and Chureito Pagoda

The viewing platform in Arakurayama Sengen Park is perched on top of 398 steps hill. Exiting ShimYoshida Station, we followed the well-marked signs to the park, about 5 minutes on foot to the base of the hill. The base of the hill was a gentle slope decorated with red lamps on either side of the path. Further up, we spotted a red Torii Gate, which splits into two paths to the top of the hill. The one on the left leads to the Arakura Fuji Sengen Shrine and a sloping path leading to the top of the hill for those who prefer a leisurely and not too strenuous stroll up. The path on the right leads to the faster 398-step climb to the viewing platform. Initially, I was worried that the climb was too much for my 8-year-old nephew, but it wasn’t as bad as I had thought. My nephew and I completed the climb in around 15 minutes (his parent took a little longer but completed it within 20 minutes). The iconic 5-storey Chureito Pagoda, a peace memorial built to commemorate the people of Fujiyoshida who died in wars from the mid-1800s (from the First Sino-Japanese War in 1868) to World War II, sits at the top of the stairs waiting for visitors.

The platform where one could view Mt Fuji and the Chureito Pagoda is a short walk up the path on the right of the pagoda. We were sorely disappointed to learn that Mt Fuji was hiding from us. Due to the low clouds, we could not see the peak of the iconic volcano. We spotted some visitors sitting at the platform as though waiting for the clouds to dissipate to get the iconic pagoda and Mt Fuji shot. As it wasn’t overwhelmed with visitors at the time of our visit, we managed to get some shots with the pagoda with no people in it. Despite being unable to see the peak of Mt Fuji, we were still rewarded with a commanding view of the town below.

We decided to visit the Arakura Fuji Sengen Shrine, established in the 9th century as a place of worship dedicated to the Shinto goddess Konohanasakuya-hime. This deity, often associated with Mount Fuji and the blooming of cherry blossoms, symbolizes renewal, beauty, and the transient nature of life. The Arakura Fuji Sengen Shrine, built mainly with wood, wasn’t that massive of a shrine. The single-building shrine occupies a relatively small corner at the base of the hill. There was a small crowd here, and people mostly came to pray after visiting the viewing platform. I taught my nephew the rituals of hand cleansing and how the Japanese did their prayers at a shrine. After praying, we continued our journey towards Kawaguchiko.

The Lake and the Volcano – Kachi Kachi Ropeway

Returning to ShimYoshida Station, we took the next train (using our JR Tokyo Wide Pass) to Kawaguchiko. Originally, I planned to get tickets to the Fuji Shibazakura Festival, then head to Kachi Kachi Ropeway and return after the ropeway ride for the flower show. We arrived at Kawaguchiko Station at around 2 pm and tried to purchase the tickets to the festival from the ticketing booth next to the gantry at Kawaguchiko Station. However, we were saddened to learn that the tickets for the day had been sold out. We had to change our plan again to head to the Kachi-Kachi ropeway first and do a cruise on Lake Kawaguchiko afterwards. Kachi-Kachi Ropeway takes about 20 minutes on foot from the Kawaguchiko Station, and we used a combination of Google Maps and the signs posted around the area to find our way. Along the way, we stopped by a restaurant for lunch.

After our meal, we continued our walk towards Kachi-Kachi Ropeway. By the time we arrived at the base station, we learned that it was 30 minutes before closing time (the ropeway closes at 5.30 pm). I read online that the queue for the Kachi-Kachi Ropeway would take up to 1 hour during peak hours; we were lucky that there was no queue at the ropeway station. I guess it was a blessing in disguise that we missed our earlier train to Kawaguchiko. I thought the ride up Mt Kachikachi on the ropeway was superb. From ground zero, Lake Kawaguchiko looked like a body of water that seemed to stretch forever, and we had no idea what the entire lake looked like or how big it was. As the cable car slowly made its way up to the mountain, we were able to appreciate Lake Kawaguchiko. The mountain ranges surrounding Lake Kawaguchiko looked like they were protecting the lake. The view was peaceful and calming.

The ride up to the top station took about 3 minutes. As we walked out of the station towards the viewing platform, we were pleasantly surprised to see Mt Fuji’s snow-capped peak peeping out of the clouds, rewarding us with her full glory. Instead of taking the long walkway towards the viewing platform, we could not hold back our excitement for Mt Fuji and used the faster staircase route. Seeing Mt Fuji in her full glory felt like our trip here was well worth it. There are two viewing platforms at the top station of Kachi-Kachi Ropeway, and both platforms were constructed to face Mt Fuji. The lower platform is the larger one, where we saw many people gathering, busy taking pictures with the icon of Japan. However, the upper platform has a better view of Mt Fuji. Here, not only were we treated to an unobstructed view of the icon of Japan, but we were also able to get a 360° view of the surroundings, from Mt Fuji to the town below and Lake Kawaguchiko.

Mt Fuji finally showed her face.

We rode down to the base station as it was approaching closing time. Shops around Kawaguchiko seem to close at around 5.30 pm. When we reached the base station, most shops were already closed. As we were too lazy to make that 20-minute walk back to Kawaguchiko Station, we took a bus (there is a bus stop right in front of Kachi Kachi Ropeway base station) instead. As we boarded our ride back to Tokyo on the Fujikyu Railway, we were still treated to the view of Mt Fuji. The last Limited Fuji Excursion trains left at around 4 pm, and we followed our original plan to take the longer train ride via Otsuki back to Tokyo.

Tokyo Day 1 (19 May 24): Ueno – Starting our Tokyo Trip with Shopping on the Historic Ameyoko Street

My maiden trip to Tokyo was planned around visiting the major sights outside Tokyo for the first three days to maximise the JR Tokyo Wide Pass we had gotten before the trip and spending the last three days around Tokyo city. As we had a redeye flight, I did not pack too many itineraries on our first day.

Arrival at Narita Airport

There have been several changes to the immigration to Japan in recent months. Due to the recent depreciation of the Japanese Yen, Japan has seen a large inflow of tourists, resulting in ridiculously long wait times at immigration. To manage the situation at immigration, the Japanese Government encourage visitors to register on the Visit Japan Web. The latest change to the web service now only generates one QR code for faster immigration clearance. I thought there would be two queues for the immigration process, one for those who had registered on the Visit Japan Web and another for those who hadn’t. However, we found out that wasn’t the case at Narita Airport. There was only one queue at the immigration, regardless of registration status on the Visit Japan Web. Although only one flight landed before ours, we spent the next 1½ hours waiting in the queue to clear immigration. Only four counters were open to handle the large influx of visitors waiting to clear the immigration, contributing to the lengthy wait times. The immigration situation felt more chaotic when we spotted airport staff randomly picking people in the queue to register our fingerprints. I felt registering on Visit Japan Web did not improve the immigration process since everyone was made to fall into a single queue.

Sorting out our Transportation at Narita Airport

Just when we thought clearing the immigration was the end of the chaos at the immigration. We were in for another shock when we arrived at B1 to settle our transportation tickets. We wanted to collect our JR Tokyo Wide Pass and get our Suica cards simultaneously before collecting and making seat reservations for the Skyliner tickets I bought online. The way from the airport arrival hall to the subway counters was well-marked. When we arrived, there wasn’t much of a queue in all the counters. The JR East Travel Centre was easy to locate, marked with oversized fonts on its door. We were third in the queue but had to wait around 10 minutes as only one counter served passengers who had pre-booked passes online. We would spend the next 15 minutes at the counter collecting our tickets and purchasing a Suica Card. But when we enquired about the child Suica Card, we were told to join another queue across from the JR East Travel Centre.

When we settled our JR tickets, a long queue had formed at Counter C. We spent another 30 mins queuing at the counter and finally got the child Suica Card for my nephew. The Skyliner train service is the fastest way from Narita Airport to downtown Tokyo. I had previously bought our Skyliner tickets on their official website, as we would have saved around ¥200 for each adult. There are two counters and three queues for the Skyliner ticketing. Not knowing which queue was for what, we initially queued at the blue-coloured counter next to the gates with a huge “Keisei Ticketing Counter” written on it. There are two queues formed at this counter, one for the automated ticket purchasing machine and another for the manned counter for assistance. We queued up at the manned counter as we had already bought our tickets. After queueing for about 15 mins, we were told by the staff at the counter we were in the wrong queue, and we could only redeem our tickets at the shop opposite (next to JR East Travel Centre) that says “Skyliner & Keisei Information”. We spent another 1 hour queuing up to get our reserved seats. By the time it was our turn, we could only catch the 12.15 pm train to Ueno.

I thought the ¥200 saved by buying the tickets online was not worth it, and we spent more time queuing to get the tickets than buying tickets on the spot (the queues seem to move faster). One good tip we got from the staff at the information centre was to alight at Nippori Station instead of Ueno Station when switching to the Yamanote Line. We were told that at Nippori Station, we were only required to move from one platform to another, whereas at Ueno Station, we would be required to switch stations.

Change in Plan – Scrapping Tokyo Tower Visit for Ueno

I had originally planned to visit Tokyo Tower and Asahi TV station in the afternoon before heading to Ueno in the evening. However, the long queue times at the immigration and the ticketing counters took up 4 hours of our time. It was around 1.45 pm by the time we reached our hotel. It was already 2.20 pm by the time we settled into our room and got ready to explore Tokyo. Our Tokyo Tower visit was the 2.30 pm timeslot; factoring in the time required to make our way (it would take us around 30 mins), we would have missed our timeslot for entrance. We ended up cancelling our original plan of visiting the sights around Roppongi and opted to go shopping at Ueno instead.

The Historic and Vibrant Ameyoko Shopping Street

Yamanote Line is our go-to JR line for the next few days, as it covers most of the popular areas in Tokyo. It took 30 minutes from our hotel to Ueno by Yamanote Line. Ueno has several attractions, such as the zoo and the Ueno garden. As we had a long day, I kept the to-visit list only to the Ameyoko Shopping Street this evening. Ameyoko Shopping Street dates back to the post-World War II period and started as a black-market selling things from the soldiers. This place subsequently transformed into a marketplace selling candies and sugar (its original name, Ameya Yokocho, translates to Candy Store Alley). To Ameyoko Shopping Street, we should have taken the south exit – Hirokoji Exit, directly across from the street. As we were rather overwhelmed with the number of exits (nine total), we barged towards whatever exit popped up and took the east exit – the Iriya Gate exit instead. This exit took us another 15-minute walk to Ameyoko Shopping Street.

After some navigation, we found ourselves in one of the back alleys of Ameyoko. This small street is populated with restaurants. After another 5 minutes of walking, we came to the main street of Ameyoko. On top of the restaurants, we spotted many more shops selling various goods, from clothing to shoes to medical stores. There are several smaller alleyways that branched out from the main Ameyoko Shopping Street, and it seemed nothing much was going on in these streets. The main actions and more “shoppable” stores are on the main street, where there are two large drug stores on the main street alone. Nearer to the end of the street opposite Ueno Station, the main street merges with its neighbouring street, where we found eateries dominating this part of the street. Numerous seafood eateries lined up on either side of the street with outdoor seating, where patrons can choose their live seafood from the tanks, and the chef would whip up a dish. On top of these cooked food stores, stores sell from omiyage to dried food. The neighbouring street was dotted with stores selling desserts.

[Airline Review] – Singapore Airlines A350-900 (Long Haul Variant) (SQ125) – Business Class (Bulkhead Seat), KUL -SIN (18 May 24)

At the Airport

Singapore Airlines operates eight check-in counters in Row L at the rightmost end of the Kuala Lumpur International Airport Terminal building. Three of these eight counters were dedicated to Business Class passengers, and one to KrisFlyer Elite Gold or Star Alliance Elite Gold members. The rest of the four counters were designated to service Economy Class passengers. Unlike most airports, I am surprised to see a separate queue for elite members, which lumps Elite members into the queue with Business Class passengers.

The Aircraft

Singapore Airlines mainly deploys the older B737-800 NG, inherited from SilkAir, B737-8 Max, and the A350-900 Long Haul variant between Singapore and Kuala Lumpur. We took the same A350-900 Long Haul variant for this flight back to Singapore.

The Cabin

Singapore Airlines A350-900 Long Haul variant Business Class cabin has a total of 42 seats, with a bulk of 26 seats in the forward Business Class cabin and 16 in the more intimate aft cabin. The Business Class cabin employs an earthy tone, which is apparent in the cabin’s brown leather seats, armrests, and carpeting. Coupled with the lilac-coloured lighting during boarding, the Business Class cabin emits a sense of elegance and calmness.

Three lavatories serve all 42 Business Class passengers: one in the front part of the cabin just behind the cockpit and another two between the Business Class cabins. The Business Class lavatories were designed with the same colour tones as the cabin. The dark wood-coloured panelling at the sink cabinets and the light brown backsplash at the sink ensured the design language flowed into the lavatories. Singapore Airlines even carpeted their Business Class lavatories and decorated them with orchid flowers to make them feel more premium. Regarding amenities, the Business Class lavatories are packed with even more amenities than the Economy Class lavatories. On top of the more premium dental kits, hairbrushes and shavers, Penhaligon’s toiletries, such as hand cream, facial mist, and eau de toilette, were also supplied in these lavatories.

The Seat

Singapore Airlines Business Class seats in the A350-900 long haul variant aircraft are arranged in a 1-2-1 configuration, with each of the 42 seats having a generous pitch of 60″ and a width of 28″, making it one of the widest seats in the skies. The seats onboard are designed with three modes: upright for takeoff/landing, angled for relaxing and lounging, and flatbed for sleeping. Two of these three modes can be accessed using the seat control buttons, which also control the lighting located on the aisle side of the seat. Converting the seat to bed mode would require the assistance of the cabin crew to flip the seat back over. Singapore Airlines also programmed an adjustment button for passengers to customise the angle of tilt and how much forward they want the seat to be to increase the comfort of the passengers. Personally, I find the lounging mode to be the most comfortable. As this was a short flight and the cabin crew was busy with service (they have a very short window to service and collect the china), I did not bother them to convert my seat into the flatbed mode. We managed to secure the highly in-demand bulkhead seats, usually blocked off for higher-tiered Singapore Airlines members during booking. The main difference between the bulkhead seat (and the main reason for their popularity) and the rest of the seats is the size of the foot well. The regular A350-900 Business Class seats were designed with a small footwell, angled towards the middle (for middle seats) and the sides (for window seats). Due to this angle, sleeping on longer flights can be a challenge. Instead of a small footwell, the bulkhead seats are designed with a footrest that spans the entire width of the seat, allowing passengers to sleep in a variety of positions. This also gave passengers more space underneath the footrest to stow away carry-ons.

Singapore Airlines A350-900 Long Haul Business Class seats are fitted with a large solid table, stowed at the armrest away from the aisle. Despite the sturdiness of the table, deploying it is pretty effortless. While the positioning of the table was convenient, I kept bumping my elbow onto the ledge when the table was stowed away, causing it to spring out of its stowage position. The table can be swivelled for passengers to get in and out of their seats, and its height can be adjusted depending on how high passengers like the table to be (particularly useful when the seat is in bed mode).

There are several storage spaces available in Singapore Airlines A350-900 Long Haul Business Class seats. The inflight seat pocket is located before the table, where the airlines provide reading literature such as the inflight magazine, duty-free shopping catalogue, and aircraft safety card. Right next to the seat is an open cabinet that allows us to place our tablets or laptops. However, due to the open design, items stored here must be removed during takeoff and landing. Besides the open cabinet, a deep storage compartment is designed into the armrest. I found this space perfect for storing my passport and mobile phone (when not being charged). Here comes the difference between the bulkhead and the regular Busines Class seat. The regular Business Class seats come with an additional cabinet next to the personal TV, which I usually use to store items such as my toiletries pouch or the provided amenity kit. In the regular seat, there is also a small cocktail table beneath this cabinet, which I found very useful for placing drinks. These features are not present in the bulkhead seat. I am torn between sacrificing additional storage space in the seat over the large legrest and more storage space under the legrest.

Singapore Airlines A350-900 Long Haul Business Class seats come fitted with several lighting to illuminate, especially for night flights. Besides the overhead reading light, the seat is fitted with two more lights on either side. On the aisle side, I found three lights for passengers to use while the seat is converted to bed mode. On the middle or window side, fitted next to the open cabinet, is another adjustable reading light meant to be used when the seat is in upright or lounging mode. There are some charging outlets fitted under the seat side reading light. I found two USB-A outlets and a universal power outlet to satisfy passengers’ power needs for charging our mobile devices and laptops. Besides these power outlets, Singapore Airlines also fitted an iPod and HDMI ports for greater connectivity to the TV.

Inflight Entertainment

Singapore Airlines fitted its A350-900 Business Class seats with a large 18″ personal TV. The high-resolution TV produces crisp and sharp images, converting the seat into a mini theatre in the sky. I have flown in this Business Class product several times (the most recent time was in Jan this year when I flew from Paris to Singapore), and this is the first time I discovered the TV can be tilted to angle downwards, perfect for passengers to watch while lying down. The TV installed in the Singapore Airlines A350-900 Long Haul Business Class product does not have a touchscreen function. Controls for movie selection must be done via the IFE controller, stored on the armrest away from the aisle. The IFE controller is very intuitive to use, and passengers can use the physical buttons or the touchscreen function on the IFE controller to select their entertainment option. Singapore Airlines did not provide headphones for the passengers as this was a short flight. I am unsure if they will be made available upon request from the cabin crew. When it comes to Singapore Airlines’ entertainment system – KrisWorld, passengers are spoilt for a choice of entertainment options ranging from the latest Hollywood blockbusters to hundreds of movies to TV series and documentaries. There is even an entertainment menu for children to access kids-friendly cartoons and movies. I’d say KrisWorld is jam-packed with numerous entertainment options catering to various passengers and entertaining us for hours.

Singapore Airlines fits an 18″ high-resolution personal TV in its Business Class seat.

Meal

Despite the short 1 hour flight to Singapore, Singapore Airlines manages to serve its Business Class passengers with meals. However, menus were not made available during this flight, but we could view the food options on the Singapore Airlines website. Due to the short flight time, both food options made available to us were cold food. During boarding, the cabin crew approached us and asked if we wanted the Poke Bowl or the Beetroot Toast Sandwich option. I opted for the Poke Bowl and had very low expectations of the meal since neither option was the food that I usually ate. To my surprise, the Poke Bowl served was very tasty and tasted akin to sushi. The Japanese rice complemented very well with the seared tuna, creating an interesting flavour in my mouth. Drinks were served shortly after the food was served.

Service

The service onboard this short flight from Kuala Lumpur to Singapore was nothing short of impeccable. We were warmly welcomed and ushered to our seats the moment we boarded the aircraft. Like clockwork, another cabin crew came around, offering us orange juice and champagne as welcome drinks when we were seen settling into our seats. Throughout our interactions with the crew, we were always addressed by our first name. We even managed to engage in short conversations with the cabin crew during boarding. The caring cabin crew took note of my 7-year-old nephew, and I saw them checking on him several times during the flight to ensure he was comfortable. As my nephew is a picky eater, the food served during this flight was nothing to his liking. The caring cabin crew gave him some biscuits in case he was hungry. I can understand the immense pressure the cabin crew faces for this short flight. Other than the fatigue of operating a turnaround flight (they are the same set of crew we flew with for our flight from Singapore to Kuala Lumpur), the crew working in Business Class were also under immense time pressure, having to serve food and drinks for a flight that is barely 1 hour long. Despite these pressures, the cabin crew still serviced their Business Class passengers with a smile, and service did not come across as rushed.

Afterthought

Singapore Airlines A350-900 Long Haul Business Class seats are very comfortable, being the largest seats in the sky. The cushioning on these seats made one feel like sinking into them and not getting up. I particularly like the seat in lounge mode, where I was able to adjust the seat to the angle I find most comfortable. It is a shame that headphones were not provided for this short hop between Kuala Lumpur and Singapore, which hampers passengers from enjoying the numerous entertainment options on KrisWorld (I brought my headphones). Despite being under immense time pressure, the well-oiled procedure and teamwork allow the cabin crew to service passengers with much grace and with a smile. This short flight with Singapore Airlines in their Business Class exceeded my expectations, and I thought the crew did a great job ensuring that passengers were well taken care of.

Paris Day 7 (8 Jan 24): From the 1st to the 8th Arrondissement – The Mona Lisa in the Louvre; Walking in Tuileries Gardens and Champs Elysees; Au Revoir Paris

Since our flight back home departs at 10 p.m., we had the whole day to cover the last few sites we had not managed to see for the past six days in Paris. We visited the Louvre in the morning and strolled past the Tuileries Garden while on our way to Champs Elysees. We departed for the airport at 5.30 p.m. for our flight back home.

The Louvre – The Glass Pyramid where Mona Lisa Calls Home

We initially did not plan to visit the Louvre as we were not museum people, nor did we appreciate paintings, and visiting the Louvre for the sake of looking at the Mona Lisa would only sound silly. However, during our trip to Egypt, we learned that most original Egyptian antiquities were displayed in the Louvre. Visiting the Louvre (we only booked the tickets one week before our trip to Paris while in Egypt) made sense as there was more to see than the Mona Lisa and some paintings. There are several entrances to the Louvre. When I did some research before my trip, I learned that the main entrance at the glass pyramid was always crowded. Someone recommended the side entrance – The Carrousel entrance for a thinner crowd. To get to the Carrousel side entrance, we took the metro to Palais Royal-Musée du Louvre station and followed the signs to the Carrousel du Louvre exit (exit 6). There weren’t many people at this entrance, so I’m not sure if it was due to the day of the time (we arrived at the entrance around 9.30 a.m.), and we got into the museum grounds almost immediately. Coming from the underground entrance, we saw the bottom part of the glass pyramid. We could take pictures with the inverted pyramid without too many people crowding around. One tip on visiting the Louvre is to have the ticket printed out. As there are three wings to the museum, Sully, Richelieu, and Denon Wings, we were required to scan our tickets to enter each wing.

Denon Wing – the Home of Mona Lisa

Our strategy in visiting the Louvre was to head straight to the Mona Lisa painting as we expected a crowd in front of the masterpiece by Leonardo da Vinci later in the day. Mona Lisa is located on level 1 in the Denon Wing, which is to the right when coming in from the Carrousel entrance. There are signs that lead visitors to the Mona Lisa. We were lucky as the crowd had not been built up. We were able to get a front-row view of the Mona Lisa. The painting was a little small, and we could only view it from a distance. As I do not know how to appreciate art, we were only here to take those “I was here” pictures with the painting. As we were leaving the room where the Mona Lisa was housed, we saw more people flowing into the room, wanting to take a picture with the famous Da Vinci painting. We left the Mona Lisa and roamed around the level in Denon Wing, where the Mona Lisa was housed. This part of the Denon Wing housed mainly paintings, with battle scenes and holy figures.

Sully Wing – Recollecting our Egyptian Trip

We headed for the Sully Wing next, retracing our steps back to the entrance of Denon Wing. The Sully Wing is situated straight ahead from the Carrousel entrance. This wing houses the Egyptian Antiquities collections that drove us to the Louvre. We headed to the Greek Antiquities sections to see the Venus de Milo sculpture. Not understanding the statue’s significance, we left after taking some pictures. As we headed for the Egyptian Antiquities Gallery, we came to an open space with some stone structures. Unknowingly, we have entered the exhibits’ “History of the Louvre” section. This is where we can see the original stone walls of the Louvre from when it was a palace. There is nothing much here other than some signs providing a brief history of the Louvre and some remaining columns of the Louvre.

Entering the Egyptian Antiquities section, we were welcomed by a well-preserved sphinx sitting in an annexe by the entrance. Most of the signs explaining the exhibits in the Sully Wing were in French, which made it very difficult for us to understand the significance (and we were too lazy to use Google Translate). The Egyptian Antiquities Gallery has an extensive collection of well-preserved relics from ancient Egypt. Having come from Egypt just before our trip to Paris, we were able to resonate with most of the exhibits here. As we were walking around the Egyptian Antiquities, I spotted an interesting wall encased in glass cabinets displaying the more well-known Egyptian Gods. Here, we could see how these Gods, whom we heard our tour director mention throughout the trip, look in human and animal forms. The other exhibit I was looking for was the original Zodiac calendar taken from Hathor Temple in Dendera. For such a significant item, I was quite surprised that it was installed in an inconspicuous corner of the Egyptian Antiquities gallery. The calendar was in great condition, and we could see the carvings clearly on the artefact despite its having survived for 5,000 years.

There were simply too many things to see in the Egyptian Antiquities gallery alone, and we were exhausted after seeing only half of it. We saw what we came to see and left the Louvre at 11:30 a.m. When we came out of the museum, we were pleasantly surprised to find it snowing in Paris. According to the staff at our hotel, it hasn’t been snowing in Paris for the past three years.

From the Louvre to Champs Elysees – Walking in Snowy Paris

Tuileries Garden – The Park in Front of the Louvre

We did not plan to visit the Tuileries Garden, which is wedged between the Louvre and Place de la Concorde near our hotel. Since we still had a few hours before leaving our hotel for the airport to catch our flight back home, my friend wanted to return to the Louis Vuitton flagship store in Champs Elysees to get a bag. We could take a metro to Champs Elysees but wanted to walk in the snow. To get to Champs Elysees from the Louvre, we walked through Tuileries Garden. Like the gardens we visited, the main thoroughfare of Tuileries Garden was laid with brown gravel. The middle part of the garden was bare with no plantations, giving us a good view of the Arc de Triomphe and the obelisk in Place de la Concorde. A huge fountain occupies the centre of the Tuileries Garden. Like many fountains we have seen, the fountain feature was not turned on. There were chairs randomly placed around the large fountain for people to sit and enjoy the scenery.

Strolling in the Champs Elysees Neighbourhood

At the end of the Tuileries Garden, we arrived at the ever-familiar Place de la Concorde, where the obelisk from Luxor called home permanently. Along the way to Champs Elysees, we also walked past the Champs Elysees Gardens near our hotel. From these gardens, trees were planted on both sides of the road leading to the Arc de Triomphe. It did not take us long to walk to Champs Elysees from Tuileries Garden. After lunch, we went to the LV store and then returned to the hotel to prepare to leave for the airport. As we had some time left, we strolled on the shopping streets near our hotel. We saw this green bronze column yesterday at the Place Vendôme near our hotel and went to check it out. The square where the Vendôme Column sits in the centre, with the statue of Napoleon standing at the top, was filled with luxury boutiques and the opulent Ritz Paris hotel. With the buildings surrounding the column, leaving the centre part open, the Place Vendôme feels spacious. We returned to our hotel after visiting Place Vendôme to do some final packing before heading to the airport.

Au revoir, Paris

We checked out of our hotel at around 5.30 p.m. when our ride to the airport arrived. The journey to Paris Charles de Gaulle Airport from our hotel in the 8th arrondissement took about 1 hour. There were hardly any traffic jams along the way despite being the evening peak period. This would be our final hours in the City of Lights. Paris is a large city with lots of things to see and do. Despite spending one week in the city, we did not cover all the attractions. We found the Parisians were friendly and not as rude as what we read online. The city felt safe, and my initial worries about pickpockets and scammers were unfounded. We enjoyed the city and will return, maybe minus some of the attractions we visited during this trip. I thought having the Navigo weekly pass was very useful and a cost-effective way to travel around the city and the suburbs. Despite starting our trip on Tuesday, we already recovered the cost of the weekly pass during our week-long stay in Paris. Having the Navigo card saves us the hassle of getting tickets for public transportation, and we just had to hop on and off metros, funiculars and buses. We used the RATP official app to navigate around the city. The app showed us the options of getting from point A to B and even showed which exit we should take for the attractions we were going to. I thought the RATP app was better than Google Maps for navigating the city. We enjoyed our trip to Paris and may, in a few years, plan another trip to France, except this time, we will be travelling around France, not just Paris.

Paris Day 6 (7 Jan 24): The 8th Arrondissement: Relaxing Day Walking Around our Hotel

It is an uneventful day today. We originally booked a day trip to the Loire Valley, visiting the Chateaus in the nearby provinces to Paris. We cancelled the trip as the meeting time for the tour is at 7 a.m. We had to wake up as early as 5 a.m. to make it in time. We cancelled the trip two days ago because we wanted our last few days to relax. We took a break today, sleeping in and hitting for breakfast at the hotel.

Shopping around our Hotel and a Surpised Find

We spent the rest of the day strolling in the shopping strip near our hotel and picking up things we had missed out on or considered buying. Shopping in luxury boutiques can be quite time-consuming, as we must wait for someone to assist us. Fortunately, we met a nice, friendly staff member at Chanel today. Not only could we “jump the queue”, she was very patient and took the effort to show us the pieces my friend wanted to buy. We returned to our room several times to leave our shopping bags and head out. Walking along the streets near our hotel in the 8th arrondissement, we came across a street that police officers guarded. Curious, I approached one of the police officers and asked what building they were guarding. Instead of chasing us away, the friendly policeman told us that it was the residence of the French President. Wow, we were staying in the same neighbourhood as the President of France!

Back to Ave des Champ Elysees

We headed back to Ave des Champ Elysees in the evening for dinner. The concierge at our hotel recommended a restaurant at Ave des Champ Elysees, which had received good reviews from guests and even helped us make reservations. Instead of taking the metro, we figured we would stroll along the avenue to the restaurant since it was our last night in Paris today. The stroll took us through Jardin du Champ Elysees and past Petit Palais. Both sides of the Ave des Champs Elysees were planted with trees, fitted with LED lighting, beautifying the entire stretch of the avenue. Occasionally, we would see the Eiffel Tower peeking behind the buildings. We made it to the restaurant ahead of our reservation time. Nonetheless, the staff at the restaurant welcomed us. The service was excellent, and the food was tasty and flavourful. We enjoyed our last dinner in Paris. After dinner, we did window shopping in the still-open shops at this hour and returned to the hotel on foot. We returned to the hotel early as we had to pack our luggage for our flight home tomorrow.

Paris Day 5 (6 Jan 24): Trip to Western Paris, The 5th & 4th Arrondissement – Excursion to Versailles; Strolling along the Streets in Latin Quarter; Glimpse of the Notre Dame de Paris

Versailles is highly recommended to anyone visiting Paris for the first time. As the Chateau was relatively large, we opted for a guided tour of Versailles so we would not be lost in the numerous artworks within the Chateau. We planned to visit Versailles in the morning and spent the afternoon checking out the Latin Quarters in the 5th arrondissement. While waiting for our dinner cruise along the Seine River, we wandered into the edge of La Marais in the 4th arrondissement. We ended our day with a bad experience on the dinner cruise.

Versailles – The Chateau Behind the Golden Gate

We had an early start as our meeting time with the tour group was 10.45 am in front of Versailles. The metro station where we would catch the RER to Versailles was about a 15-minute walk from our hotel. On the way, we walked past the Grand Palais and onto Pont Alexandre III. Pont Alexandre III is one of the many bridges across the Seine River. The bridge is adorned with golden statues, and we got a great view of the Eiffel Tower from it. As we were rushing to catch the 9.45 am train, we did not have the time to stay and admire the artwork installed on the bridge or the scenic view that the bridge offers. We arrived at the RER station and found that we just missed the train. The RER does not run as frequently as the metro, and we had to wait about 20 minutes for the next train. We managed to catch the 10.05 am train, which meant we had to rush when we reached Gare de Versailles Chateau station.

We made it just in time for the meeting. Versailles looked like a huge estate with many, many rooms sitting majestically behind a golden gate. The golden cap on the roof captivated my attention. A large empty square (now filled with tourists) sits at the front of the central building of the Chateau, where the rest of the rooms seem to branch out.

Map of Versailles

The Interior of Versailles – Touring the Apartments

Our guide led us to the (empty) queue line, where we were given immediate access to the Chateau. On the grounds of Versailles, our guide brought our attention to the golden roof caps and explained these caps were made of gold plating, not solid gold. He then directed our attention to the large square in front of Versailles. According to our guide, this square is made of marble and is the original courtyard of the palace. Our guide then gave us time to take pictures of the Marble Courtyard. Our tour officially started with our guide taking us to the second level of the Chateau.

This part of the tour consists of us going through rooms and rooms in the central part of the main building of Versailles. We walked past the first room, the Hercules Salon, and were led to a room with an opening. This is the Royal Chapel. We were only allowed to view the chapel from the outside. Peeking from outside, we could see the intricate artwork on the chapel’s ceiling, which reminds me of the Sistine Chapel we visited in Vatican City. The gold colour in the painting contrasted with the white background, and the large amount of natural light let in through the windows near the ceiling gave it a clean and pure look. The gold on the painting, the organ, and the sculpture on the far end gave it a royal look. It is a shame that we were not able to enter the chapel.

After the Royal Chapel, we would walk past several rooms, each with different colours painted on their walls and differentiated by the frescos on the ceiling. These apartments before the Hall of Mirrors were named after Greek gods, where the room that was named after a particular god had their image painted on the ceiling. Such as, in the Hercules Salon, we saw a scene of Hercules visiting his father, Zeus, painted on the ceiling of the salon. Most of these rooms were large empty spaces used either as a ballroom or a social space where Louis XIV used to entertain guests. These rooms had a common feature: their ceilings were adorned with gold-plated trimmings and crystal chandeliers, giving them a luxurious and opulent look. Some rooms had statues of Louis XIV, such as the Venus Salon, where we saw a life-size statue of Louis XIV dressed in his war tunic and his bust in the Diana Salon. Of these rooms we visited, we saw a bed in the velvet red Mercury Salon. The red velvet colour and the golden trimming on the ceiling gave this room a very cosy vibe. Our guide told us this was not the actual bedroom where Louis XIV slept. This room was a temporary bedroom used by his grandson before he travelled back to Spain. We passed two more rooms before reaching the Hall of Mirrors.

Many people who came to Versailles agreed that the Hall of Mirrors was the highlight of the Chateau. The Hall of Mirrors has mirrors decked out on the walls on the inner side of the hall. The other side of the hall is built with floor-to-ceiling window panels that look out into the gardens, giving it an indoor-outdoor look and allowing plentiful natural light in. Together with the mirrors, this made the Hall of Mirrors look very bright and airy. The Hall of Mirrors is also painted with bright-coloured frescos on the ceiling with numerous crystal chandeliers hanging from it, illuminating the hall at night. The gold trimming on the ceilings enhances the elegance of the hall and, at the same time, gives it a royalty vibe. Our guide brought our attention to an open doorway, sealed off to visitors in the middle of the Hall of Mirrors, where we could see another empty hallway. He explained beyond this hallway lies the King’s chambers. We couldn’t see any traces of the chamber from the hall. Our guide also told us the best photo spot would be the other end of the hall, where most visitors would rush off to see the other parts of the Chateau.

Passing the hall of mirrors, we visited four other rooms. Like most of the rooms we went through, these rooms were empty, mainly used by Louis XIV as a social space and decked with artworks and beautifully painted frescos on the ceiling, except for the second room after the Hall of Mirrors, where we saw a bed sitting by the wall in the centre of the room. This room was the Queen’s Chamber, with white walls filled with red and pink floral prints. The gold-plated ceilings and two chandeliers gave the chamber a royalty feel. After the four rooms, we were led down to the Chateau’s ground floor, where our guided tour of the Versailles ended. Our guide reminded us that our ticket includes access to the gardens. Having toured the apartments in the Versailles, I thought the palace was a little disappointing. The parts that are opened to the public are the rooms we have walked past, representing a small part of the palace. Most of the palace, including the King’s chambers or offices, were not open to the public. The paintings and frescos in the Versailles, though they were beautifully painted, were not as impressive as the ones we saw in the Vatican Museum and the Sistine Chapel in Vatican City.

Green Behind the Versailles

Besides the main building with the apartments in Versailles, the palace grounds also have a huge green landscape behind the main building. The greenery space, covering 800 hectares, comprises the Gardens, the Estate of Trianon, and the Park. Exiting the main building in Versailles, we came to the palace gardens. We were expecting someone to check out tickets for the Gardens of Versailles entrance, but we saw a large passageway under the main building leading to the open garden. This garden is the starting point for the greenery space behind Versailles. Covered with brown gravel paths, the Gardens of Versailles is split into two levels. The upper terrace has two large ponds, each adorned with numerous bronze statues, which can be seen from the Hall of Mirrors. We spotted some water features at the edge of the upper level, decorated with bronze statues of dogs, wolves, and deer. The water feature was not turned on during our visit. The lower part of the Gardens of Versailles stretches to the Grand Canal in the Park. Despite being the smallest area in the entire estate, this part of the gardens is still fairly large. It took us about 15 minutes to walk the entire garden length at the lower terrace. A large four-tiered fountain adorned with gold-plated statues welcomes visitors to the lower terrace of the Gardens. The fountain was also not turned on at the time of our visit. We took a stroll down towards the Grand Canal, and on the way, we saw “forests” of some sort on either side of the gardens. There seem to be some mazes and cafes situated in this green space, which was planted with trees in an orderly manner. At the end of the Gardens, we spotted another pond. I like how there are benches facing the pond and the Grand Canal at this spot for visitors to rest or relax and take in the grand view of this greenery space.

We did not visit the other two parts, the Park and the Estate of Trianon, in the greenery space behind Versailles. We figured it would probably take another half a day to visit them. The Park stretches as far as our eyes could see. The Grand Canal signifies the Park of Versailles as the Park’s centrepiece. The Grand Canal is this large pond with a cross design in the park’s centre. There seemed to be more greenery on either side of the Grand Canal, which would take us a long time to visit them. From where we were, there seemed to be fewer visitors to this part of the Versailles. We couldn’t see the Estate of Trianon from the border between the Gardens and the Park. According to the official Versailles website, the estate lies to the right of the Grand Canal. We were worried we might not make it in time for our dinner cruise and visit the Latin Quarters, so we left the Versailles after walking to the edge of the Gardens of Versailles.

The 5th Arrondissement – The Charming Latin Quarter

Getting to the Latin Quarter from Versailles was very easy. The RER C service runs straight from Versailles station to the nearest station in the Latin Quarter. As it was around lunchtime, the first thing in order was to hunt for lunch in the Latin quarter. We chanced upon a restaurant, which seemed to be run by three personable elderly French gentlemen. The decor of the restaurant has a nautical theme. The food was delicious, and the pricing was inexpensive. We had a great time having lunch at this restaurant. There do not seem to be a lot of tourist sites in the Latin Quarter. We mainly saw restaurants populating the small alleys in the 5th arrondissement, and the shopping options were thin. All we could do was walk around admiring the beautiful French architectural style buildings with their iconic six-storey characteristics, the bold roof structure and French balconies adorning almost all the window panels on these buildings. We saw the Fontaine Saint Michel, which has a statue of the archangel Micheal raising his sword. As there was still some daylight, we crossed the Seine River to visit the Notre Dame de Paris.

Into the 4th Arrondissement for Notre Dame

At the time of our planning for this trip, we already knew that the Cathedral of Notre-Dame de Paris would not be opened for visitors yet. The unfortunate event at the cathedral rendered it closed for years for restoration. Walking along the Seine River on the Islands in the 4th arrondissement towards the cathedral, we could see the scaffolding on the top level of the cathedral from afar, where repair work is still taking place. The Notre Dame was as impressive from afar as it is up close. At the front of the cathedral, we could see panels barricading the cathedral off to the public for work to be done on the cathedral. A makeshift flight of stairs is installed in front of the cathedral so visitors can sit around and admire the Gothic-style cathedral. The iconic twin-towered facade of the church was still stunting despite being “hurt”. The cathedral still stands majestically awaiting repairs to be completed to welcome visitors once again. There was nothing much more we could do here. After taking pictures of the cathedral, we returned to the 5th arrondissement via the Petit Pont – Cardinal Lustiger in front of the Notre Dame.

Transversing Between 4th & 5th Arrondissement

We had about 3 hours to kill before our dinner cruise, we explored the 5th arrondissement further. We walked one block over to Pont Saint-Michel on the 5th arrondissement side of the river through a street filled with restaurants. My friend and I were just strolling in the 5th arrondissement without any agenda of what to see here. We spotted an old structure, Thermes de Cluny – an ancient bath complex and archaeological site guarded by iron gates not far from the Pon Saint-Michel. The buildings along this main road are mainly filled with theatres, supermarkets and second-hand bookstores. This part of the Latine Quarter felt more like a neighbourhood area where the locals went around in their daily activities. We did not venture far into the rest of the Latin Quarter. Near the river, we went up close to the Fontaine Saint Michel. The fountain was not turned on at the time of our visit, and it seemed to be added to the end of a building that a restaurant and some residential premises mainly occupy. The two bronze gryphons flanked on both sides of the sculpture brought might to the archangel St Micheal.

At this point, we still had 2 hours to spare. We headed to Pont Neuf and crossed the Seine into the edge of the 4th arrondissement. This part of the city is filled with budget-friendly boutiques and departmental stores, making it feel like a shopping district. Along the road, we spotted a single tower at the edge of the road. The Saint-Jacques was the only remaining part of a 16th-century church destroyed during the French Revolution. With only 30 minutes, we started returning to the dinner cruise pier along the Seine River. We opted to walk along the street outside Hôtel de Ville towards the Seine, which led us back to Notre-Dame de Paris. Compared to a few hours ago, the crowd at the cathedral was thinner. We took the opportunity to take more pictures with Notre Dame de Paris before crossing the Petit Pont-Cardinal Lustiger back to the 5th arrondissement. Making our way to the pier for our dinner cruise, we walked along the banks of the river. This part of the 5th arrondissement felt so peaceful due to the absence of people, making strolling along the river banks pleasant.

The Unpleasant Dinner Cruise

When planning this trip, I came across numerous recommendations that a dinner cruise along the Seine was a must when visiting Paris. There are several operators providing dinner cruises on the Seine River. During my research, La Calife, the river dining cruise, came highly recommended for its food and service onboard. Despite being a little more expensive than other operators, we opted for La Calife as we wanted a good time during our trip. We boarded the riverboat and were seated in a very bad location. This was a bad start for our cruise, and things went downhill. We were served by an Asian waiter who was rude and obnoxious. We witnessed him addressing our caucasian counterparts as Sir/Mdm, but he never used the same term to address us and simply addressed us as “you”. The same staff did not bother placing our food on our table but passed the plate to us. This was a different treatment from our Caucasian counterparts, where he would squeeze through the tight spots and make an effort to lay the food on their tables. Our experience was destroyed by the waiter even before the boat slipped off. The food was good on board, but the service was terrible. Every single minute of interaction with the server was torture.

Due to the spot we were sitting in, we did not get to enjoy the view along the Seine River. The cruise sailed down the Seine River from near Pont du Arts in the 5th arrondissement to the 15th arrondissement, passing the Eiffel Tower in the 8th arrondissement. We merely saw some buildings along the river and passed under some bridges. The highlight would have been the light show at the Eiffel Tower, which we could only see when standing on the outdoor part of the boat. The boat made a U-turn at the 15th arrondissement, near an island with the Statue of Liberty. We passed by the Eiffel Tower in time to see it glitter. We really did not enjoy the cruise and can’t wait for it to end soon. The moment we hit the docks, we disembarked without looking back or thanking anyone. After all, why bother to thank them for the mistreatment? For the price we paid for a dinner cruise on La Calife, it was definitely not worth the buck!

Our night was spoilt by the cruise. Having no mood for any more sightseeing, we crossed the Pont du Arts towards the Louvre for the metro station. The Pont Du Arts is a pedestrian bridge that is laid with wooden flooring. I would have to say that at this hour, the Pont du Arts feels very tranquil, with scenic views of the Louvre by the Seine River. We only stayed here momentarily to take some pictures and continued our way to catch the metro back to our hotel.

Paris Day 4 (5 Jan 24): The 18th, 9th, & 8th Arrondissement: Montmartre – From the Magnificent Sacre Coeur to Moulin Rouge; Viewing Paris from the Roof of Arc de Triomphe

The original plan for today was to visit the sights in the 9th arrondissement, specifically the Palais Garnier, and catch the sunset at the neighbouring 18th arrondissement. Considering that Montmartre in the 18th arrondissement was a huge district, we made some last-minute changes in our plan to visit the Montmartre first and end of the day with a visit to the Arc de Triomphe that we missed out on Day 1.

Montmartre – The Charming 18th Arrondissement

I chanced upon a series of videos done up by Paris Top Tips that not only gave a very plan for visiting the various arrondissements in Paris, but Alan, the content creator, also took the effort to map the attractions out in his videos on Google map making it very easy for us to follow. Montmartre is a big district, and we followed Alan’s recommendations when visiting the area (click here for a link to his video on Montmartre). We were religious in following the recommended route that Alan had posted in his video. Still, somehow, we got lost after Sacre Coeur and ended up walking where our feet took us. We started our Montmartre discovery at the Lamarck – Caulaincourt metro station. Coming out from the station, our first stop was finding a breakfast place. We chanced upon a bakery and popped in for a simple breakfast. Though the owner could only speak French, somehow, we could communicate (by pointing out which bread we wanted). The shopkeepers were very friendly, and the croissants were fluffy and crispy. We had a satisfying breakfast.

The recommended route we found on the Paris Top Tip YouTube channel

The Houses and Statues of Montmartre

Our first stop of the day is Villa Léandre. Walking in Montmartre is very relaxing, and we could see the hilly terrain of this arrondissement. It did not take us long to walk to Villa Léandre. Villa Léandre sits on a dead-end street, comprising rows of houses with a distinct architectural style from the houses opposite it. Instead of the standard five storeys, Villa Léandre only has two to three storeys. I thought Villa Léandre was quite boring. Other than a few houses, there is nothing much to see here. Looking at the Google map, our next stop, the Passe-Muraille, is merely 5 minutes away. The Passe-Muraille is a bronze statue of a man walking through the wall. We could see his head, upper body, both hands and a leg poking out of the wall, and the rest of his body seemed to be stuck inside the wall. This statue pays homage to a French novel where a man could pass through walls but found himself stuck mid-stride when he lost his power.

The next site we visited was the Beheaded Statue of St Denis. The statue is rather inconspicuous from the outside and sits in a small garden with a wooden entrance. We wouldn’t have found it if not for Google Maps. There is a pit in front of the statue, which was supposed to be a fountain. There wasn’t any water in this pit during our visit. The statue depicts a man holding his head in front of his body. Legend has it that St Denis was the first Bishop of Paris and was beheaded by a Roman Governor. St Denis walked 6km with his head in his arms and came to the fountain in this spot to clean his head. The garden here is very peaceful and a great spot for anyone to rest their feet while exploring Montmartre. Next up was Buste de Dalida, about a 2-minute walk from the Beheaded Statue of St Denis. Dalida was a French artist who had a house in Montmartre. To commemorate her, the city of Paris erected a bust of Dalida here. My first impression is that her bust seems to be “molested” by visitors in that her boobs are shiny. Perhaps visitors regard rubbing her boobs with a good-luck connotation.

From the Buste de Dalida, our next stop – La Maison Rose, was just a straight ahead following the path. This pink facade restaurant is famous for its unique petit corner-house look and food. Many visitors to Montmartre would drop by for an Instagram photo of this cute little building. Right around the corner, about a 2-minute walk, we arrived at Au Lapin Agile. The distinctive bright orange two-storey petit building in Montmartre is Paris’s oldest cabaret bar. The cabaret bar only operates at night on certain days of the week. After taking pictures of the building, we headed to our next stop, the Sacre Coeur. Walking towards the basilica, we saw this medical tower-looking structure. Initially, I thought this tower was a watch tower, but this tower is a functional water tower. As there wasn’t much to see here as the tower was locked, we continued our walk towards the Basilica of Sacre Coeur. There are some souvenir shops selling inexpensive souvenirs on either side of the street that lead us towards the basilica. We spent some time picking out souvenirs before continuing to the basilica.

The Grand Sacre Coeur

The Basilica of Sacre Coeur is a Roman Catholic church dedicated to the sacred heart of Jesus. The building style of the church reminded me of the Vatican City, but on a smaller scale. Nonetheless, the church still looks very grand. Sitting on a hill overlooking Paris made me feel that the basilica was protecting the city. It was free to enter the church, all we had to do was join the queue for bag inspection. The queue was not long when we arrived at Sacre Coeur, and we were in the church in about 3 minutes.

Inside the Basilica of Sacre Coeur

The church was large and could accommodate the huge number of people visiting. The centre part of the church was cordoned off for visitors coming here for prayers. Grand but dark was my first impression of the interior of the basilica. The darkness did not give off a grim sensation but emitted a comfortable and peaceful feel. The first thing that caught my eye was the large mosaic fresco of Jesus dressed in white with his arms opened and a golden heart in front of him, welcoming visitors to the basilica. There are several small chapels at the sides of the interior of the basilica. As we were walking around the basilica, we saw numerous stained glass windows beautifully depicting various characters in the bible. They are especially beautiful when the rays of sunlight shine through them, casting a colourful shadow on the basilica’s interior. Several colourful mosaic frescos adorned the walls and dome ceilings of Sacre Couer, some in gold-coloured tiles depicting scenes from the bible. These frescos not only brighten the basilica’s interior but are also artistically and tastefully done. We also spotted several sculptures around the interior of Sacre Couer. The one that caught my attention is the solid silver sculpture of Jesus. The sculpture captured his kindness and acceptance of everyone with his hand gesture of invitation.

Climbing to the Dome of Sacre Coeur

We saw a sign that said “Panasonic view of Paris” as we walked into the church, pointing to the way up the basilica dome. Entrance to the dome climb can only be bought at the venue, costing €8 per adult to scale up the 292 steps to the top of the basilica. The climb to the top consisted of a series of narrow stone spiral staircases that seemingly went on with no end. Occasionally, a small window would pop out to give us a good idea of how high we were and a guesstimation of how long more to go. At the end of the climb, we were rewarded with a magnificent view of Paris at the top of the dome. It was worth each one of the 292 steps we climbed. We were on a higher elevation than the terrace at the bottom of the the basilica, which gave us a better unobstructed view of the City of Lights. Not only were we able to see Paris in front of the basilica, but we were also able to see the city behind Sacre Couer. What I feel the top of the dome brings is the lesser crowd. We did not have to wait for our turn for a picture with Paris as the backdrop, nor would we need to worry about other visitors photobombing our shot.

The Shopping Arcades in the 9th Arrondissement – Getting Lost in Montmartre

After visiting the Sacre Coeur, we followed Alan’s instructions in his video and took the Funicular down to the base of the hill on which the basilica was built. The funicular is chargeable, and we could use our Navigo weekly pass to ride it for free. The streets at the base station were filled with shops, restaurants and cafes. As we were hungry, we found a Thai restaurant near the funicular base station and settled for our lunch there. The level of spiciness was the kind that we were used to. The food was tasty and, more importantly, spicy. After lunch, we wanted to continue our hunt for the sites in Montmartre. This is when things went wrong, and we got terribly lost. We wanted to visit the Wall of Love in Montmartre and followed the Google Maps instructions. I must have keyed in the wrong landmark, and little did we know, we unknowingly drifted into the 9th Arrondissement.

Google Maps lead us through a covered shopping arcade. These covered shopping arcades were built for the locals to take shortcuts and shelter from the rain and mud while shopping. The two Passages we went through in the 9th arrondissement were built in 1847. We walked through Passage Verdeau first, which felt like time stopped here. The decor screams of the 1960s with its white marble flooring and wooden doors. The high glass ceiling lets in natural light, illuminating the Passage and giving it a very artistic flare. Shop in Passage Verdeau mainly sells antiques and paintings, with a shop selling comics from the ’50s. Passage Verdeau is rather short, we were through it in 2 mins (partly because we were glancing into the the shops). Across the street from Passage Verdeau was Passage Jouffroy, which has an even more retro vibe. Passage Jouffroy is decked with mosaic black and white tiles on the floor and similar wooden doors in the shops. This Passage mostly houses cafes, bookstores and art galleries. There is even a hotel in Passage Jouffroy.

I consulted Google Maps again after we walked through Passage Verdeau and Passage Jouffroy into the main street. This is when I realised we were very far off course. We then decided to take a bus back to Abbesses Metro station and make it to the Wall of Love near the Sacre Coeur funicular. Alighting from the bus, we got lost again and gave up the idea of going to the wall. We immediately got the directions for Moulin Rouge, the famed red building with a windmill on top. Moulin Rouge today is a theatre with live dance shows. I reckoned the best photo spot for Moulin Rouge is right outside the Starbucks opposite the theatre.

The Landmark in the 8th Arrondissement – Arc De Triomphe

Leaving the 18th arrondissement, we returned to the 8th arrondissement to the Arc de Triomphe. One of the things I wanted to do here was climb to the top of the Arc de Triomphe, as I didn’t want just to take pictures of the arc. As I researched for this Paris trip, I learnt that the top of the arc offers a spectacular view of the city of Paris. Unlike the Eiffel Tower, where tickets to the summit were limited, I did not think tickets to the top of the Arc de Triomphe would be sold out. We waited about 20 mins in a queue to purchase our tickets. To get to the ticketing booth, we followed the signs in the tunnels that said “Arc de Triomphe”. After getting our tickets, we emerged from the tunnel and were right under the arch. From here, we could see the sculptures on the walls of the arc.

The Arc de Triomphe in the 8th arrondissement

We joined another queue for security checks to enter the arch for our climb to the top. The initial 284 steps were done on a spiral staircase that snakes up the Arc de Triomphe. The end of the spiral staircase led us to its attic, with exhibits about the arch and a gift shop. A TV panel in the centre of the attic streams activities directly under the arc, making it look like a glass being fitted here. From the attic, we took another 46 steps to the roof of the Arc de Triomphe.

We were soon rewarded with views of the roads that seemed to converge into the Arc de Triomphe and the night view of Paris. The view was stunning, seeing how the roads came through the arc, making it feel as if the arc was the centre of Paris. We could see the Eiffel Tower in her yellow nightgown, standing proudly amongst the buildings in Paris.

After taking our fair share of pictures, we headed back down to the bottom of the arch to take more pictures of the Arc de Triomphe up close. Looking at the time, we figured we still had 1 hour before the rooftop of Galeries LaFayette closed. When we arrived at the department store, we were told that the rooftop closes 30 minutes before the store’s closing time. Seeing that there is not much we can do here, we left Galeries LaFayette and hunted for dinner. The restaurants we walked past seemed either expensive or crowded. We ended up buying McDonald’s back to the hotel. We rested early tonight as we would need to wake up early the next day for our guided tour of the Versailles.

The only thing we could see at Galeries Lafayette was this Christmas tree since the rooftop was closed.