Tokyo Day 7 (25 May 24): Asakusa – The Oldest Temple in Tokyo; and Ginza – Home of Upscale Shopping

As our flight leaves at 10 pm tonight, we have the whole day to cover the sights we have yet to see in Tokyo. I planned to visit the iconic Sensoji Temple in the morning and Ginza in the afternoon, leaving us some time to get back to our hotel before making our way to the airport.

Koami Shrine – Washing Our Money for Luck

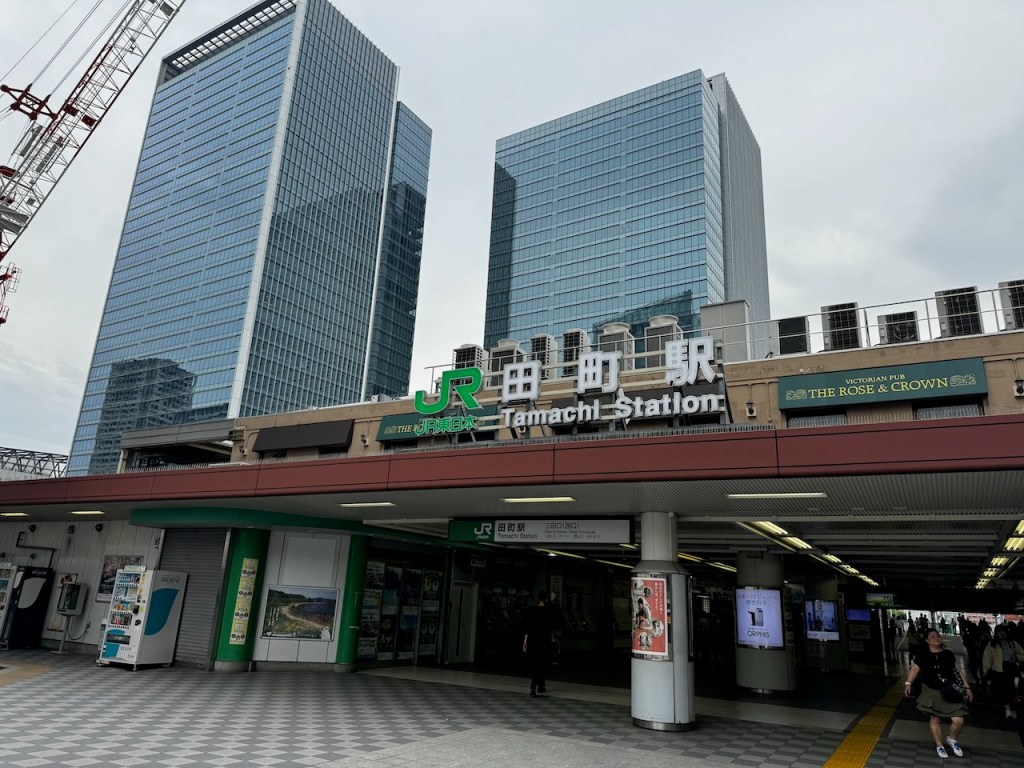
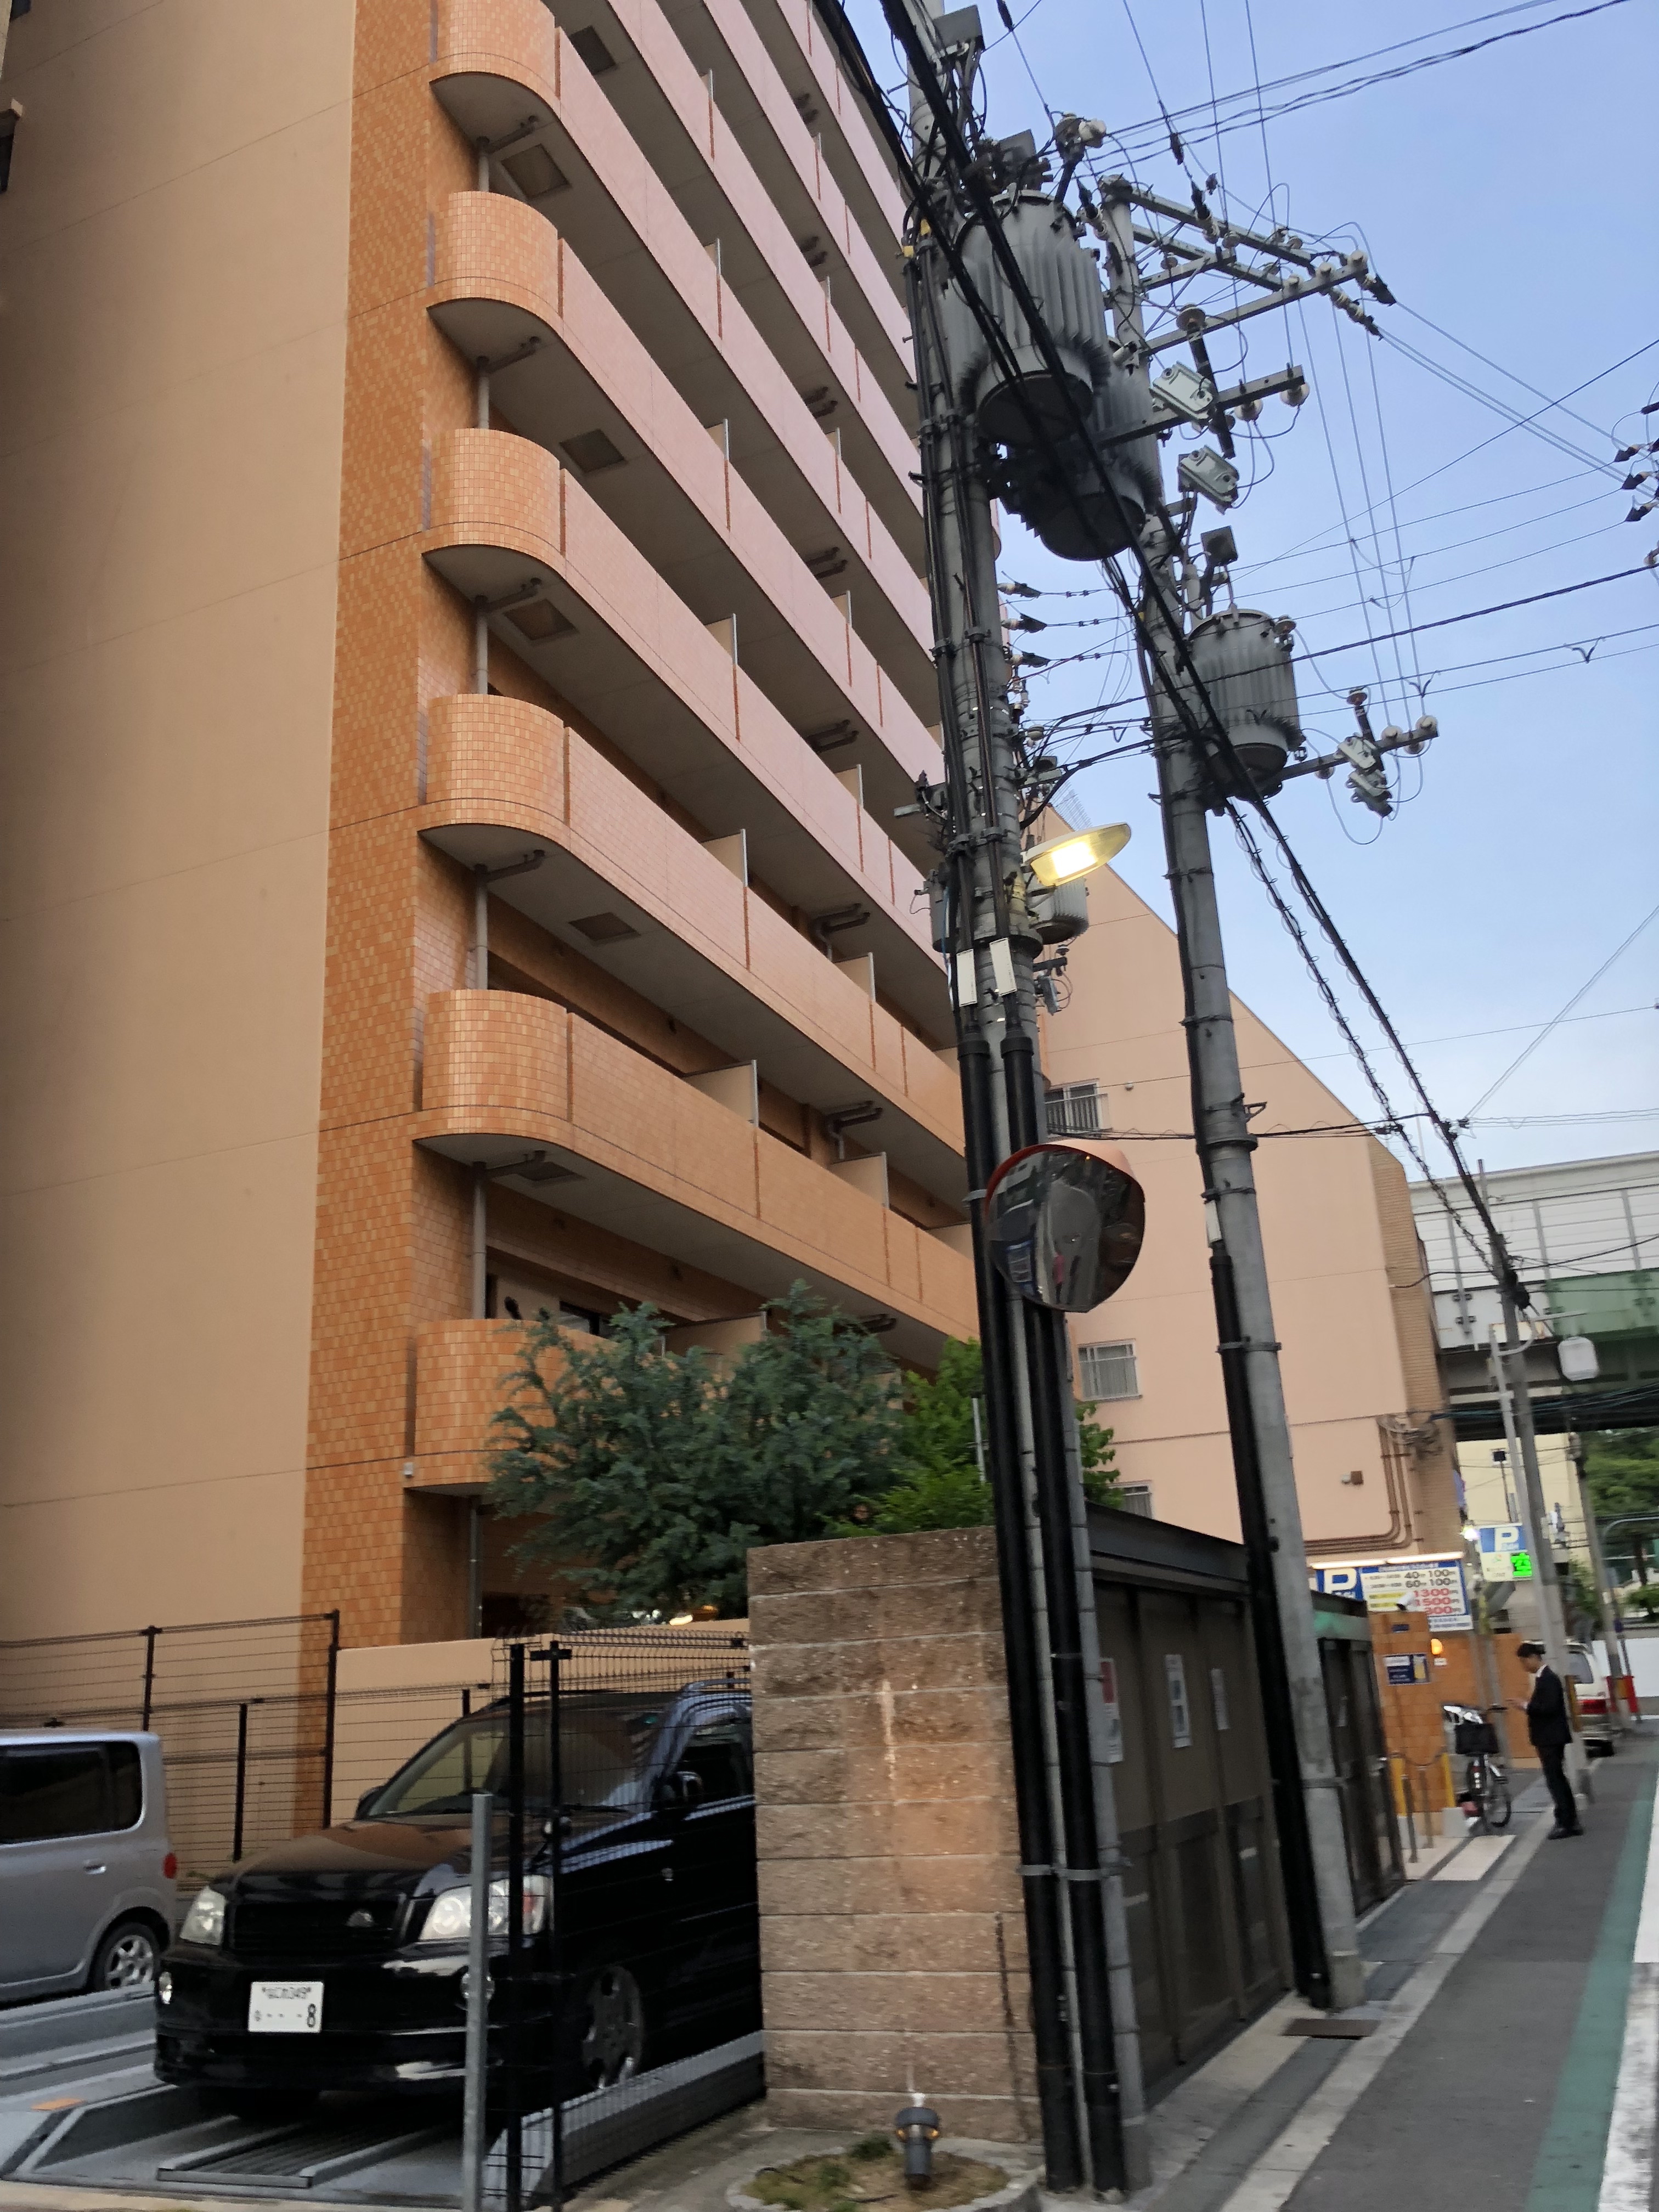
Before our trip to Japan, I saw a clip on social media about this unassuming temple in Tokyo that was believed to bring luck and ward off evil. Koami Shrine is located in the Ningyocho district, near the Asakusa area. We took the Tokyo Subway from Mita Station and alighted at Ningyocho Station. The shrine is a 3-minute walk from Ningyocho Station Exit A6. Koami Shrine is a small shrine tucked in a residential neighbourhood, sandwiched between two buildings. The wooden structured shrine follows a typical Japanese shrine architecture, coated mainly in the natural colour of the wood used to construct the shrine. We spotted some gold platings on the under roof of the shrine; despite the small number of golden platings, the plainness of the shrine made the golden parts stand out. There are very few carvings on the shrine structure, with only a phoenix at the topmost beam and some dragons. The main deity enshrined in Koami Shrine is the god of wealth and asset protection. Hence, the locals flocked to this shrine for good luck. One of the interesting rituals here is the washing of money, which is believed to bring wealth and fortune. After offering our prayers, we participated in the money-washing ritual in the well beside the shrine. It was an interesting experience, and hopefully, it would bring us luck.

Asakusa – The Iconic Temple in Tokyo

Our next destination is the iconic Sensoji Temple, the oldest temple in Tokyo. To get there, we took the Asakusa Line to Asakusa Station. Well-marked signs guide us to Exit A4, the nearest exit to Sensoji Temple.

Kaminarimon Gate – The Iconic Red Gate

The metro exit to Sensoji Temple is situated across the road. After a short walk from the exit of the metro station, we spotted the iconic red Kaminarimon Gate to Sensoji Temple. The predominantly red wooden building against the white walls is the entrance to Sensoji Temple. Statues of Thunder and Wind Gods stand were seen guarding both sides of the gate. Hanging in the centre is the iconic huge lantern, believed to weigh about 700kg, with the words “Thunder Gate” on the side facing the main road, while “Wind and Thunder Gods Gate” was inscribed at its back. Underneath the lantern, we could spot a dragon engraved into a circular wooden panel.

Nakamisedori Street – The Shopping Street in Front of the Temple

Our nightmare began after we walked past Kaminarimon Gate. We were greeted by a large horde of tourists visiting this iconic temple. To get to Sensoji Temple, we had to walk through Nakamisedori Street, the main shopping street in front of the temple. On both sides of Nakamisedori Street, we spotted numerous shops selling souvenirs, charms, clothing and some stores selling food and snacks. However, at the time of our visit, Nakamisedori Street was packed with travellers and was too crowded for us to do any meaningful shopping. Half the time, we were tussling with fellow visitors for a spot to advance closer to Sensoji Temple. The warm weather added to the discomfort we felt while walking through this gauntlet filled with stores on either side. We were not looking forward to bashing through this crowd again on our way out later in the day.

Sensoji Temple – The Oldest Temple in Tokyo

It took us 10 minutes to navigate through the sea of visitors on the 250m Nakamisedori Street. Once past the crowded street, we arrived at an open area which marks the grounds of Sensoji Temple. We could see the five-storey pagoda sitting at the left of the temple. In front of us was the inner gate to Sensoji Temple. The Hozomon Gate has a similar structure and colouring palette to that of the outer gate of Kaminarimon. Unlike the Kaminarimon Gate, the Hozomon Gate is wider and features three lanterns. The red lantern in the centre, weighing about 400kg, displays the name of the town Kobunacho. Two smaller copper lanterns, each weighing about 1,000kg, hang on either side of the centre red lantern.

A short walk from Hozomon Gate, we arrived at the main hall of Sensoji Temple. The main hall has an unusually high roof and uses the same architectural style as most Japanese temples. The main hall is decked mainly in white with red-coloured pillars. Despite being packed with visitors, the large outer sanctum of the main hall in Sensoji Temple did not feel crowded. We were able to peek into the temple’s inner sanctum from the large mash in front of the inner sanctum. A large golden altar dominated the views of visitors. As the Bodhisattva is a national treasure, it is housed deep within the inner sanctum, away from the view of visitors. All I could only see was a large painting of a peacock from the outer sanctum. I found the outer sanctum a great spot for photos with the temple grounds and the five-storey pagoda. There are several stations placed around the outer sanctum for visitors to draw paper fortune (simply drop ¥100 into the box in each station). We spent time drawing fortune and buying charms at the outer sanctum before meeting with my sister and her family. As we were leaving the temple, I did not want to go through the sea of crowds in the gauntlet of Nakamisedori Street. Looking around, I noticed a road that seemed to lead to the adjacent main road. This way into the temple is less crowded, though one would miss out on walking under the Kaminarimon and Hozomon Gates.

Ginza – Home to Upscale Shopping

Our next destination was the Ginza area, home to luxury boutiques and upscale shopping. To get to Ginza from Sensoji Temple (or Asakusa area), we took the metro from Asakusa Station to Ginza Station. The main street in Ginza was closed to traffic on Saturdays to provide more space for shoppers to roam around. There are random chairs and tables on the main road for visitors to rest, although we saw more people using them for photos. All the luxury brands seem to find a spot in the Ginza area, and numerous shopping malls are on either side of the street. Ginza is also home to the flagship store of the Japanese brand Uniqlo, occupying a 12-storey building by itself. Perhaps we were not in the mood to shop in malls or had already bought the stuff we had set out to buy, we found Ginza a little boring. We did not spend too much time here. We returned to the hotel around 5 pm to repack our stuff and prepare to leave for the airport for our 10 pm flight tonight. We spent some time at the hotel lounge for evening cocktails and relaxation before heading for the airport.

Bye Bye Tokyo

We were in good time to check in for our flight home and had some time to spare in the airport lounge before our flight. After spending 7 days in Tokyo, I thought a few things could be better.

Not Spending More Time in Kawaguchiko and Nikko

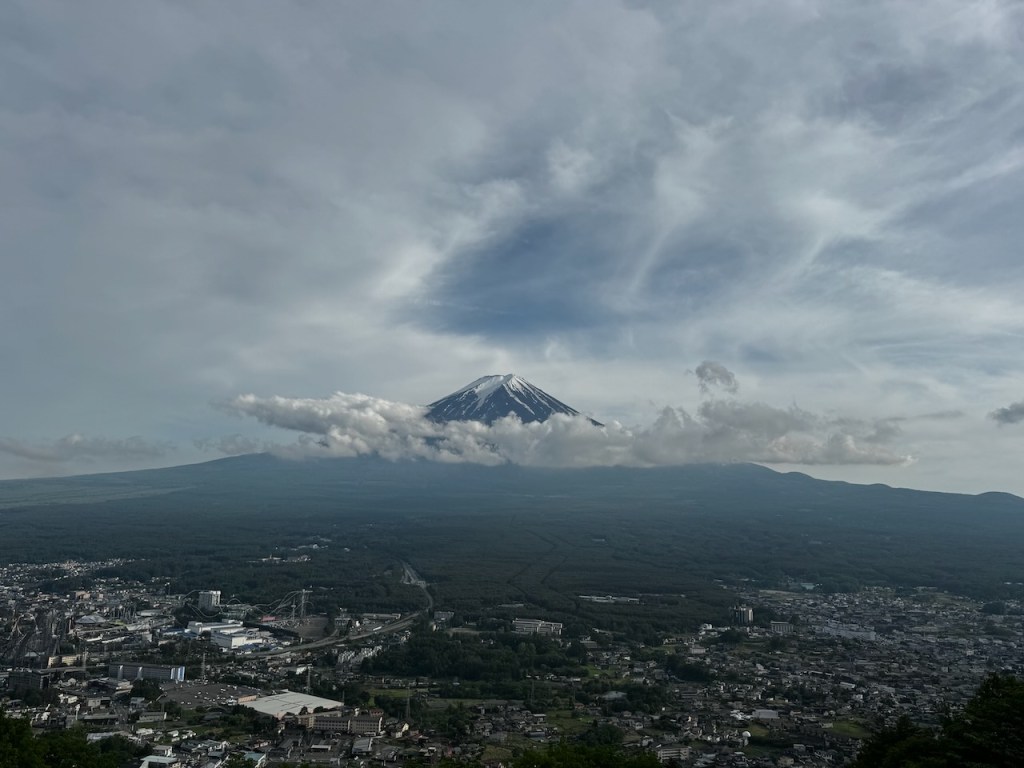
While both Kawaguchiko and Nikko can be done as a day trip from Tokyo, I thought we were a little too rushed during our time in these outskirt towns. The journey already takes 2 to 3 hours, leaving us little time to explore the places we want. We also did not expect attractions and shops to close at around 5 pm, which further limited our time to enjoy these cities. To cover more attractions and at a more leisurely pace, I thought spending a night in each of these cities would be ideal. For Nikko, we only have time to explore part of the attractions in the western part of the town (and even that we did not have sufficient time to cover these attractions fully), there is the northeastern part of Nikko that we did not manage to cover. Hence, spending a night at Nikko would allow us to cover more of the city.

Shopping Timings are Limited

Shopping malls in Tokyo open from 10 am – 10.30 am and close at around 7.30 pm – 8 pm, which means we do not have time to enjoy shopping in the malls and department stores. We did not see any night markets (like those in Taiwan or Bangkok) that open till late for us to shop, other than the medical shops and Don Quijote, which are open 24 hours. We also realised that only restaurants are open till late, while the shops close early. Perhaps the next time we return to Tokyo, we might leave shopping at Don Quijote late at night while exploring the shopping malls in the day.

Not Spending More Time in Tokyo City

As we were trying to maximise our JR Tokyo Wide Pass and catering a day for Tokyo DisneySea, we were only 2½ days in Tokyo. This meant we were limited in the areas in Tokyo we could visit. We only managed to visit part of Asakusa and Shinjuku while missing out on places like Shibuya and some attractions such as Tokyo Tower, Tokyo Skytree and Team Labs. Perhaps the next time we visit, we will have more time to explore Tokyo City leisurely.

Tokyo Day 6 (24 May 24): Shinjuku – The Shopping Mecca of Tokyo

We spent the next two days exploring the different districts of downtown Tokyo, and today, we explored the Shinjuku area.

Tokyo Metropolitan Government Building – Tokyo from Above

We started our day with a visit to the Tokyo Metropolitan Government Building. To get to the Tokyo Metropolitan Government Building, we took the subway to Tochomae Station on the Asakusa subway line. The Tokyo Metropolitan Government Building is right at the doorstep of Tochomae Station. There is an underground link from the subway station directly to the basement of the building. Tourism officials on the ground floor were ready to assist travellers with our visit to the observation deck. The 243m tall Tokyo Metropolitan Government Building has two towers, each with an observatory deck. Visit to the observation decks of the building are complementary, and we were advised that the views from the South Tower were better. There wasn’t a queue at the South Tower lift queue when we were there; few people seemed to visit this complementary sight. The lift whizzed us up to the observation deck on the 45th floor of the building swiftly. There wasn’t too much of a crowd at the observation deck when we were there, where we were treated to a view of the entire Tokyo city. Seeing the numerous buildings in Tokyo that looked like giants when we were standing on the ground level, suddenly looked like dwarves from the observation deck. The observation deck faces the four cardinal directions of the compass, each with well-marked signs to tell us what we can see from each side. We saw how compact the city is from all sides, with countless buildings packed closely to each other, except for the view from the east window where our attention was captured by the large greenery space of Shinjuku Gyoen National Gardens as if this space was carved out as the lung of Tokyo. Despite being a sunny day, the low clouds obstructed our view of My Fuji from the north windows, and we also hardly saw Tokyo Skytree from the East Windows. There is a cafe and souvenir shop on the observation deck where we bought inexpensive souvenirs.

East of Shinjuku Station – The Lively Side of Tokyo

We dedicated this day to shopping around the Shinjuku area. Shinjuku is a large area, and we mainly shopped around the streets and in the shops east of Shinjuku Station. We had two options for getting to the Shinjuku area from the Tokyo Metropolitan Government Building: riding the subway for one stop or walking over. We opted for the walking option. Surprisingly, the walk from the Tokyo Metropolitan Government Building to the Shinjuku area was rather effortless. The underground walkway had travelators along the tunnel, making walking over a breeze.

Hotel Gracery Shinjuku – Getting up close with Godzilla

The Godzilla building, also known as Hotel Gracery Shinjuku, lies to the East of Shinjuku Station. We exited Shinjuku Station from the East exit and came to a cross junction. Little did we know this junction is also where the 3D cat advertising billboard was (also known as Cross Shinjuku Vision on Google Maps). This was one of the sights I wanted to see but I kept it as an option. We stayed at the junction watching the 3D cat come alive on the billboard, but we were disappointed that the cat did not seem very 3D when we saw it live. The cat only came on for about 10 sec, and the billboard would switch to some advertisement. I thought it wasn’t as special as I had seen on social media.

Crossing the road, we approached the Godzilla building via a small street. This small street, accessible to both pedestrians and cars, is filled with shops and a handful of restaurants. I have a feeling that people use this street as a thoroughfare to the Godzilla building and Kabukicho. We could see the Godzilla head popping up from the top of a building within minutes, which excited my nephew. We stopped at the Don Quijote at the road’s junction on our way to the Godzilla Building. There are several storeys in this 24-hour Don Quijote selling all sorts of goods, from souvenirs to medical items and even branded luxury goods. There is a tax refund counter inside the building, located on the 4th floor.

My nephew was even more excited as we got close to his favourite character. We initially entered the building via the cinema side, hoping to see the Godzilla head terrace. After asking the cinema staff, we were told the Godzilla head terrace is accessible from the Hotel Gracery Shinjuku entrance around the back of the building. The Godzilla head terrace is in the hotel’s lobby, on level 8. We saw a model scene of Godzilla fighting off some alien the moment we stepped out of the elevator, which made my nephew very happy. The Godzilla terrace was closed to the public, perhaps due to over-tourism in the hotel. Nonetheless, my nephew was still very happy to come so close to his “idol”. We spent some time in the cafe next to the terrace and ordered a Godzilla-themed pancake with Godzilla chocolate (it was rather expensive). The pancake and Godzilla chocolate tasted normal, which I thought was not worth the price. There is a Godzilla figurine and movie posters displayed in the hotel lobby. There is even a small shop selling a small selection of Godzilla memorabilia.

Shopping on the East of Shinjuku Station

Our next stop was the Godzilla shop at Shinjuku Marui Annex, about a 15-minute from Hotel Gracery Shinjuku. There was a small market outside the Godzilla building with locals dressed in cosplay characters, which made this already lively part of the Shinjuku area even livelier. As we walked towards the Shinjuku Marui Annex, we stumbled into the Kabukicho, Tokyo’s entertainment and red-light district due to its high concentration of nightclubs. Instead of looking like a red-light district, Kabukicho looked like any other shopping street in Tokyo. Perhaps we came here during the day, which might be different at night.

The way to Shinjuku Marui Annex was very busy with tourists and locals. We stopped by several shops to do some shopping and even spotted a Disney Store along the way. When we reached the Shinjuku Marui Annex, my nephew was ecstatic with the number of Godzilla figurines and merchandise he could choose. My nephew was happy to see a gigantic Godzilla figurine at the shop entrance. There are some gachapon machines at this department store, and we had a great time playing on them. We stopped by some shops after getting Godzilla merchandise while walking towards Takashimaya near Shinjuku Station.

Unknowingly, we came to Musashino Street, just across from Shinjuku Station. This area has a concentration of shops selling figurines and toys and is home to some bigger brands, such as Uniqlo, other than numerous restaurants and pubs. The neon street signs made this area very colourful at night. After getting what we wanted from Takashimaya, we headed back to Musashino Street for dinner, where we saw a good variety of restaurants. One thing I noticed in the restaurants in Tokyo is that most restaurants here do not seem to cater to families or large groups. These restaurants only have seats for two pax, perhaps due to the limited space in Tokyo and partly due to the expensive rental, making it challenging for us to find out who can seat our party of five. We finally found a ramen restaurant that could accommodate us. The food here is delicious, and we had a great meal to end our shopping day in Shinjuku.

Tokyo Day 5 (23 May 24): DisneySea – The Land (or shall I say the Sea) of Happiness

I originally did not plan to visit any of the Disneys, partly because we would waste time queuing for the rides. However, my sister thought not going to Tokyo Disney was like not coming to Japan. Thus, I set aside today for our Disney trip. There are two Disneys in Tokyo: Disneyland and DisneySea. We opted for the Japan-exclusive Tokyo DisneySea, the world’s only sea-themed Disney theme park.

Getting to Tokyo DisneySea

Both Disneyland and DisneySea are located next to each other. To get to Tokyo Disney, we took the Yamanote Line to Tokyo Station, transferred to the Keiyo Line, and alighted at Maihama Station. We exited Maihama Station and took a 2-minute walk to the Disney Resort Line. The Toko Disney Line has only four stops. Of interest were Stop #1 for Tokyo Disneyland and Stop #3 for Tokyo DisneySea.

Into the “Sea” of Happiness

We arrived at DisneySea around 11 am, which wasn’t crowded at the entrance. We opted to arrive at this time to avoid the insane crowds at the entrance before opening, like what we saw on social media. Coming at this time meant we would forgo some of the rides people came here early to snatch the priority pass (paid and complimentary) for. As there were some issues with my Disney app (which was essential for us to book rides), we spent the next 20 minutes at the Guest Relations to sort out and get the paid Disney Premier Access pass for the Journey to the Centre of the Earth ride at the same time.

Mediterranean Harbour and Amercian HarbourFront – Getting our Bearings Around Tokyo DisneySea

Passing under the European-styled buildings after the arrival plaza, the first area visitors will visit is the Meddiratiran Harbour with its signature large lake. We used this lake to get our bearings and figured out which rides were in which area. The Mediterranean Harbour is modelled after Venice. It does not seem to have much going on as it is dominated by restaurants, a bridge that links the front entrance to the rest of the park, and the only attraction – a Gondola ride. Despite not being overly crowded, the gondola ride still requires a quime of 30 minutes.

We passed the Mediterranean Harbour and came to the American Harbourfront. This area is dominated by a high-rise train ride and a replica of a ship – the S.S Columbia that resembles Titanic (my nephew insisted that the ship was Queen Mary, which he was right!). I had read about the long queues in the restaurant in the park and wanted to settle for lunch as soon as we arrived. Seeing there was no information about the queue time in the restaurants at S.S Columbia, we went inside and were surprised to find a short queue. As we were queuing, we were able to watch the Disney Parade from the windows inside the ship near the queue. After spending about 10 mins in the queue for the restaurant, we found out the queue time would take 1 hour after checking with the staff at the door. We thought it was a waste of time and gave up waiting. We walked around the ship a little before leaving the ship. The other attraction at American Harbourfront is the Tower of Terror, which has a queue time of 85 minutes. We checked the app and noticed a 5-minute queue at the Disney Sea Transit Steam Liner near S.S. Columbia. When we arrived at the attraction, we were disappointed to know that the attraction would be closed for a performance. We left the American Harbourfront and headed further into the park for our scheduled ride.

Port Discovery Area – A Place for Us to Kill Time

We came to a fortress attraction next to the American Harbourfront, which was technically the northern part of Mediterranean Harbour. We walked around this medieval fortress, which had four levels for people to walk around and explore. We mainly stayed on the upper outdoor floors of the castle, where we got a view of the roller coaster ride in Mysterious Island and the big lake we saw when we came in from the entrance. There seemed to be some treasure-hunting game ongoing, but not knowing where to queue for it, we left the fortress after taking some pictures.

We stumbled into the Port Discovery area, a little north of the Fortress, as we were walking to our ride. Other than the station for the train ride around the park and some carts selling snacks and popcorn, there was nothing much going on. We merely used this place as a thoroughfare to have some time to kill before our scheduled ride. As we walked past Miguel’s El Dorado Cantina, we saw the queue for this restaurant was short, so we settled for lunch. Miguel’s El Dorado Cantina mainly sells Mexican-inspired food in a fast-food style. We were unsure how big the portion was and ordered all four meals on the menu. The food was mediocre, sufficient for us to fill our stomachs. We found a seat in the corner of the restaurant next to the staff entrance and were surprised that Chip and Dale came past us and even tapped on our shoulders when they were going for their show. What a surprise we had.

Mysterious Island – Time for our First Ride

After the meal, we made our way for our Journey to the Centre of the Earth ride scheduled at 2.30 pm in the Mysterious Island area. Mysterious Island is the largest structure around the park, consisting of a man-made volcano and a large water-filled pit in the centre. We managed to find the entrance to the Journey to the Centre of the Earth ride. The Disney Premier Access pass allowed us to skip a majority of the queue and go pretty far in front of the queue. Journey to the Centre of the Earth ride was an indoor roller coaster ride, which was mainly very mild through the centre of the earth, where we were faced with fire and thunder effects. Towards the last part of the 3-minute ride, the roller coaster shot us up a ramp and out of the volcano, ending the ride with a short, sudden drop into the volcano. Despite his first-ever roller coaster ride, my nephew enjoyed the ride.

Mermaid Lagoon – Searching for the next Ride with the Shortest Queue

After the Journey to the Centre of the Earth ride, we saw on the app that the ride with the shortest queue time was the Whirlpool ride, which had a mere 10-minute queue time. The Whirlpool ride was in Mermaid Lagoon, next to the Mysterious Island area. Rides in the Mermaid Lagoon area are mostly inside King Triton’s Castle (except for the kid’s roller coaster). The centrepiece of Disneyland around the world is its castle; while Tokyo Disneyland has Cinderella Castle, the castle featured in DisneySea is King Triton’s Castle. I thought the castle wasn’t as grand as the other castles in Disneylands worldwide. Once inside the castle, we saw the four rides in the castle. Rides at the Mermaid Lagoon mainly cater to kids. We changed our minds when we saw the Whirlpool ride being a spinning tea cup ride. Seeing that Jumping Jellyfish was the next shortest queue ride (15 mins on the app), we queued for the Jumping Jellyfish ride instead. I would say this ride is equally boring as it merely hoists and controls release riders from a cable suspended from the ceiling. The height at which we were hoisted up was not too high. Even my nephew thought it was a boring ride. After the ride, my friend and I headed to the Lost River Delta for another roller coaster ride while my sister’s family remained in the Mermaid Lagoon as my nephew wanted to get onto the Whirlpool ride.

Lost River Delta – The only Loopy Loop Roller Coaster

The Lost River Delta was just across a bridge from Mermaid Lagoon. This area is modelled after the jungles of Central America, and I thought the rides here were the most exciting at Tokyo DisneySea. This area has two roller coaster rides, one indoor and one outdoor. We went onto the outdoor roller coaster – Raging Spirits, which had a shorter queue time than the indoor roller coaster ride. We spent 40 mins in the queueing for the ride. Raging Spirit is built with an Inca theme, featuring high drops, and is the only coaster with a 360° loop. Despite having a high drop at the beginning of the ride and a 360° loopy loop, I thought the ride was not that exciting. The roller coaster did not feel fast enough, and the drop wasn’t that scary tall. I think the short 1½-minute ride also contributes to the lack of an exhilarating feel on the roller coaster.

Back to Mysterious Island – Our Last Ride of the Day

We returned to Mysterious Island for the 20,000 Leagues Under the Sea ride that we booked under the complementary priority pass. As our booking was at 4.15 pm and we were there early, we spent the next 20 minutes walking around to wait for our QR code to show up on the app. The QR code appeared about 10 minutes before our time slot. The 20,000 Leagues Under the Sea ride is a submarine-themed ride, where we descend a spiral ramp to the bottom of the water-filled pit in the centre of the area. The ride started with us being whipped into an elevator down to the lower pit, and subsequently, water filled the submarine’s glass, giving us the illusion that the pod we were in was submerged in the water. Along the ride, we spotted some animatronics of deep sea creatures and some aliens. We felt the ride was surreal, like riding in a real submarine.

After the ride, we decided to call it a day at DisneySea and did not bother to stay for the fireworks show. I felt DisneySea was rather crowded; on average, the queue for more exciting rides takes more than one hour. We managed to take only four rides out of the 14 rides. We did not feel the Disney vibe when we were there, partly because we did not bother to watch the parades or the meet-and-greets with Disney Characters.

Dinner at Yurakucho

Leaving DisneySea, we headed for Yurakucho, mainly for the Bic Camera shop, as my phone camera lens protector was scratched. Yurakucho is an area dominated by a handful of shopping malls. As it was already late, we limited our stay at Yurakucho near the JR station. The Bic Camera sits next to the JR station and has lots to offer. Besides electronics, the 5-storey Bic Camera at Yurakucho also sells goods found in medical shops and toys. After getting what I wanted, we settled for dinner at Mos Burger, as my nephew wanted to eat nuggets. After dinner, my friend and I explored the area a little while my sister and her family returned to the hotel. The shops around here were already closed as it was already past 8 pm. The only shops we saw that were still operating were the restaurants dotted around this area. Seeing that there was nothing much to see around here, my friend and I headed back to the hotel after walking around for about 10 minutes.

Tokyo Day 4 (22 May 24): Nikko – An Oasis of Nature and History

Nikko is a quaint mountain town about a 2½ hour train ride from Tokyo. This town is famed for its nature and historical sites and onsens. The two main areas in Nikko lie West and North of Nikko train stations. As we will only spend a day here, our trip focuses mainly on the sites west of Nikko train station.

Map of Nikko (Source: JNTO)

Getting to Nikko

There are two ways to get to Nikko from Tokyo: using the Limited Express Trains or the Shinkansen. Two types of Limited Express trains depart for Nikko. The first one, the Spacia X Limited Express, departs from Asakusa Station. This newer train, with a variety of seating types and its caveated cockpit suite, whips travellers to Nikko in style. The other Spacia Limited Express (not to be confused with the newer Spacia X) uses an older train that seems to have been in use since the 80s and departs from platform 5 of Shinjuku Station. The JR Tokyo Wide pass that we have gotten is only valid on this older Spacia Limited Express. Nikko is also reachable by Shinkansen from Tokyo Station, but a transfer to a local train is required at Utsunomiya Station. The Shinkansen to Utsunomiya takes about 50 minutes, and the local train from Utsunomiya to Nikko Station takes around 30 minutes. The Shinkansen option, including the local train, is also covered by the JR Tokyo Wide Pass. We took the Spacia Limited Express for our trip to Nikko and the Shinkansen back from Nikko.

Getting Around Nikko

There are several bus lines that run to the popular tourist sights in Nikko. There are three main buses –
Y, YK, C and W that run to the sights to the west of Nikko Train Station. We mainly used YK and C for sights up to Lake Chuzenji, while the W bus line mainly runs to the three temples in Nikko and stops nearer them (compared to the Y, YK and C busses). Bus stops are marked with numbers and announced in Japanese, English, Mandarin and Korean at every stop, ensuring travellers do not miss our stops. The more significant stops for sights to the west of Nikko Station that we were alighted in were stop #24 – Akechidaira for Akechidaira Ropeway, stop #26 – Chuzenji Onsen for Lake Chuzenji and Kegan Falls, and stop #9 – Nishisando Iriguchi for Toshogu Shrine, Nikko Futarasan jinja Haiden and Nikkozan Rin’nōji Temple. There are two train stations in Nikko. Spacia Limited Express train stops at Tobu-Nikko Station, about a 3-minute walk from the Nikko Station. The first thing to do was to confirm whether the local buses accept Suica Card payments. We attempted to ask about the Tourist Information Centre in Tobu-Nikko Station but gave up due to the long queue.

Akechidaira Ropeway – Views of the Lake and the Waterfall

Nikko is a fairly large area with sights spread out in the town, as we have only one day at Nikko, we have to be very specific about the sights we want to visit. To avoid making the day too rushed, I picked out three sights to visit in Nikko. From my research before our trip to Japan, I matched the bus timetable to the sights we visited. I found the order to Akechidaira Ropeway, Kegan Falls, and Toshogu Shrine, which allowed us to maximise our time. We took the YK bus from the bus stop in front of Tobu-Nikko Station to Akechidaira Ropeway and alighted at stop #24. We took some time to admire the scenery before taking the ropeway. The gentle, cool mountain breeze with the cloud-covered views of the mountain ranges, coupled with the thin crowd, gave us a tranquil feel. The big rock with the mountain view behind gave us a great spot to take pictures.

The Akechidaira Ropeway that we took

We proceeded to buy tickets for the ropeway. Staff at the ticketing booth informed us that views of Kegan Fall might be disappointing as there is not much water flowing from the lake. He helped us purchase the ropeway tickets from the vending machine after we told him we did not mind the water volume at Kegan Falls. Akechidaira Ropeway departs from the base station every 10 minutes, so we did not have to wait too long for our ride to the observation platform. The ride up to the observation platform took around 3 mins. Along the ride, we were treated to views of the surrounding mountain; I could even spot a waterfall amongst the mountain ranges.

The observation deck is a small area offering 360° views of the surroundings. Other than Lake Chuzenji and Kegan Falls, we were also able to see the town that Nikko Station sits on and beyond. The main view we were after was the Lake and the waterfall. From the observation platform, we were able to see Lake Chuzenji sitting on a higher plain and feeding water to Kegan Falls. However, as we were told earlier, there is no water flowing at Kegan Falls; it appears as if someone placed a plug between the lake and the waterfall, causing little water flowing at Kegan Falls. I thought we were able to appreciate how tall Kegan Falls is without the water draining from Lake Chuzenji. As there were very few people here, we were able to enjoy the tranquillity the surroundings brought. The view opposite Lake Chuzenji was vast mountain ranges that seemed to stretch into the horizon. I liked the view of Lake Chuzenji’s side better. As the observation platform was small and there was nothing much to do besides looking at the views, we spent about 30 minutes here and left on the next cable car after taking some photos.

Chuzenji Onsen – Quiant Town next to Kegan Falls

Our next stop is to visit Kegan Falls. From the Akechidaira Ropeway bus stop, we took the next bus that came along for two stops and alighted at stop #26 Chuzenji Onsen. The bus stop at Chuzenji Onsen looked more like a bus terminal. There are bus bays dedicated to each bus service that passes through here. There is even a terminal building where we were able to top up our Suica Card (as mine was running low). Chuzenji Onsen is the small town next to Lake Chuzenji, the lake we just saw from the Akechidaira observation platform. This town is also home to the famous Kegan. Chuzenji Onsen was very quiet, with a handful of travellers walking on the main streets, making their way to Kegan Falls. As we were walking on the streets of Chuzenji Onsen, we could spot Mt Nantai towering over the town. We settled our lunch at one of the restaurants in the town, opposite Kegan Falls.

After lunch, we headed for Kegan Falls. There seem to be more people here at Kegan Falls. As we were already pre-empted that there wasn’t much water flowing down Kegan Falls, we forgo our original plan of taking the paid lift to the lower platform. The lower platform would be a perfect spot to view Kegan Falls when the waterfall flows. Since it wasn’t flowing today, we did not see a point in spending the money for the lift. The way to the upper viewpoint at Kegan Falls was very well-marked. We spotted a two-level concrete structure that seemed to jag into the waterfall. This upper platform is free of charge, and we were still able to catch a glimpse of the waterfall. We spotted water falling at the lower part of Kegan Falls, but it wasn’t anywhere near the majestic when the waterfall was in its full glory. As there was not much we could do here, we returned to the bus terminal and caught the next bus to the Shrines.

Toshogu Shrine – The Shrine in the Forest

As we were walking to the bus terminus at Chuzenji Onsen, we spotted a bus route Y pulling into the stop. The driver indicated that it was going back to Nikko. We took the bus and alighted to stop #9 Nishisando Iriguchi, the nearest stop to Toshogu Shrine. Despite being the nearest, we were still required to walk 10 mins upslope to the shrine. Toshogu Shrine is a UNESCO World Heritage site; its stone main entrance, together with the stone Torii gate, gave it an ancient look. The forested surroundings gave us a sense of adventure, akin to going into some forest shrine looking for treasure. This flight of stairs towards the Torii gate was just the entrance to the forecourt of the shrine. Its entrance is after the ticketing booth.

The Fore Court – The Three Monkeys and the Elephants

Pass the red wooden main entrance to Toshogu Shrine, and a pathway leads to the main shrine building. The forecourt of the shrine is a vast area with temple buildings built on both sides of the pathway. There are two buildings here that have interesting carvings. Walking towards the entrance, the building to the left had three monkeys carved onto the beam. This building looks unfinished with an unpainted basewood. However, the carving of these monkeys was vividly painted in a black and gold frame sitting above a window. The carvings of these monkeys can be easily missed if we are not deliberate in looking for them. Diagonally opposite the building with the three monkeys is another building with carvings of elephants. This building is decked in red and looks more vibrant than its neighbour opposite. Pass another Torii Gate, and after a short flight of stairs, we came to the iconic golden gate that is representative of Toshogu Shrine.

The Mausoleum Behind the Shrine

We did not pay much attention to this (Yomeimon) gate adorned with white walls and golden roofs. We walked past the Yomeimon Gate to the entrance to the main part of the Shrine. Instead of exploring the shrine, my friend and I followed a path that led to the right buildings of Toshogu Shrine. Here, we spotted a sign that guided our attention to the beam above it, where we spotted a carving of a sleeping cat. Here, we bumped into a staff that urged us to go through the gate as they closed. Not knowing what was behind this gate, we followed the instructions of the staff. After a small flight of stairs and a bend later, we saw a long flight of stairs. There are 207 steps up the back of the temple. As it was nearing closing time, just a handful of us were at the stairs. My friend and I scaled up the stone stairs and spotted a lone building perched at the top of the stairs in a large open area. A sign at the side of this short pagoda made from an alloy of gold, silver, and bronze informed us that this is the resting place of Lord Tokugawa, the founder of the Tokugawa dynasty of Shoguns.

The Golden Gate and the Main Shrine

We descended the stone stairs from which we came to explore the main shrine. As it was closing time, plus we were too lazy to remove our shoes, we only saw the main shrine in Toshogu from the outside. The main shrine is enclosed by a set of short-walled fences. The front gate to the shrine was adorned in white and gold with elaborate carvings on its beam. As the front gate to the shrine was closed, we couldn’t really make out what was inside. After exploring another building to the left of the main shrine, we hastily headed for the main entrance of Toshogu Shrine (as the shrine was closing). As we were walking past the Yomeimon Gate, this time around, we paused momentarily to admire the intricate carvings on this gate. The lower level under the roof was decorated in black and gold; taking a closer look, we could spot some characters carved onto the beam. The carvings of the white dragons on the beam above looked very lively, as though they were fiercely guarding Toshogu Shrine. The roof of the top level was full of carvings of dragon heads adorned in gold and black. I can see the amount of hard work that went into creating such a beautiful piece of work.

Back to Tokyo

As the shrine was closing and seemingly most of the shops and attractions in Nikko were calling it a day, we headed to the nearest bus stop for our bus ride back to Nikko Station. There is a bus stop about a 3-minute walk from the main entrance of Toshogu Shrine. This was where Bus Route W stopped, the bus route I originally wanted to take. As we were taking the Shinkansen (the last Limited Express had already left) back to Tokyo, we boarded the local train from Nikko Station, the other station in the Nikko area about 3 min walk from the Tobu-Nikko Station we arrived in this morning. The local train took about 30 mins to reach Utsunomiya station, and transferring to our 50-minute Shinkansen ride back to Tokyo was a breeze. We settled for dinner at Tokyo Station before calling it a night. After all, we had Tokyo DisneySea planned for tomorrow.

Tokyo Day 3 (21 May 24): Karuizawa – Views from Usui Pass Observation Platform; Outlet Mall Shopping at Prince Shopping Plaza

I added this trip to Karuizawa as an afterthought, partly looking for places to maximise the Tokyo Wide Pass we bought before our Tokyo trip. My sister wanted to visit an outlet mall, and it happens so that there is one at Karuizawa. Other than outlet mall shopping, Karuizawa has other attractions such as Kyu-Karuizawa Ginza, Shiraito Waterfall and Usui Pass Observation Platform. As I wanted to cater the afternoon for outlet mall shopping (the very reason we came here in the first place), we had only time for one other attraction. Getting to Karuizawa is easy and convenient, and we only have to spend 1 hour on the Shinkansen from Tokyo Station.

Usui Pass – View of the Mountains and an Ancient Shrine

Usui Pass Observation Platform is accessible by a 50-minute uphill hike from Kyu-Karuizawa Ginza or the red Karuizawa Aka Bus. We took the bus option, which costs ¥500 per person (round trip). The Aka Bus does not stop at Karuizawa. Instead, it starts from Tokyu Harvest Club, a 15-minute walk from the north exit of Karuizawa Station. Karuizawa came across as a sleepy, quiet town as we walked to the bus stop. This town seems to be a great place for someone seeking a relaxing environment away from the hustle and bustle of Tokyo. The bus ride took about 30 mins from Tokyu Harvest Club, with its final stop at the Kumano Kotai Shrine, the stop where we alight for the Usui Pass Observation Platform.

Usui Pass Observation Platform – The Centre Two Prefectures

From the bus stop at Kumano Kotai Shrine, we turned right and took a 5-minute walk to the observation platform. The Usui Pass Observation Platform was a small garden-like open area, not a wooden platform that protruded into the mountain ranges as I imagined. There is only a small opening at the Usui Pass Observation Platform that allowed us to look out into Mt Asama and the mountains of Gunma prefecture. From this small opening, we could see rows and rows of mountain ranges beaming with greeneries that seemed to stretch forever. The other significant sight at the Usui Pass Observation Platform was a sign and some stones that demarcated the centreline of Gunma and Nagano prefectures. We did not spend too much time here as there was nothing much we could do other than take pictures from the small opening of the mountain ranges; we headed back to the shrine while waiting for the next bus back to Karuizawa.

The Historic Kumano Kotai Shrine

Kumano Kotai Shrine is unique that it is one of the few shrines in Japan that sits on the border of two prefectures. The shrine is perched atop a small hill, and a staircase lined with red lanterns on both sides leads to the shrine. Kumano Kotai Shrine comprises three shrines housing three gods in the same compound. The wooden shrine Shinto-style wooden shrines seem to have seen the ages of time, yet they were very well preserved as though time had stopped. We did the prayer in Japanese style, paying respect to the deity installed in the centre shrine and spent the rest of our time here looking around the shops that sell charms. Behind the charm shop rests a 1,000-year-old tree that the locals would pray for marriage. As there was nothing else we could do here and the bus heading back to Karuizawa was about to arrive, we left the temple and joined the queue for the bus ride back.

Prelude to our Shopping Experience – Kyu-Karuizawa Ginza

Kyu-Karuizawa Ginza Street is one of the main attractions in Karuizawa. The Kyu-Karuizawa Ginza is a shopping street with neo-classical Japanese buildings. The bus stop was conveniently located at the northern end of the street, which made perfect sense for us to alight and continue our journey towards the JR station on foot. There did not seem to be a lot of visitors to this part of the street, but we noticed it gets busier towards the southern end. When it comes to dining options, the choices are very limited on this street. There are many cafes offering desserts and bread on Kyu-Karuizawa Ginza, but only a handful of Western-Japanese infusion restaurants. Most of the eateries are located at the southern end of the street. There are several small alleys from Main Street that are worth taking a look at. Most retail shops on Kyu-Karuizawa Ginza Street sell Japanese souvenirs and omiyage. Occasionally, we would find clothing and lifestyle shops and some shops selling artwork. It took us about 30 mins walking down Kyu-Karuizawa Ginza Street as we were mainly window shopping on the street.

Outlet Mall Shopping at Karuizawa Prince Shopping Plaza

Karuizawa Prince Shopping Plaza is a large outlet shopping complex at the doorstep of Karuizawa JR Station. The south exit (turn left as we exit the gantry) leads right to the shopping complex. Rather than calling it a mall, Karuizawa Prince Shopping Plaza sits on a huge plot of land with the stores spreading out over the vast area. The large pond in the centre of the shopping plaza makes the plaza look more like a garden than a shopping mall. The shops are very well laid out and grouped according to their category, like luxury brand shops surrounding the lake, eateries located on the northern part of the plaza, etc. We spent the rest of the afternoon shopping at Karuizawa Prince Shopping Plaza. I thought some of the things on sale here were very competitive. However, not all the items we found here are exactly outlet mall prices. Like most outlet malls, there is a limited range of goods in each store (maybe except Gucci and Burberry), and most stores sell off-season items. I found a huge selection of items for sale in almost all sporting goods shops. Despite being unable to find the things that appealed to us here, we spent the rest of the afternoon shopping around. Shops at Karuizawa Prince Shopping Plaza close at 7 pm; we left the shopping plaza at around 6.30 pm to catch our Shinkansen back to Tokyo.

Tokyo Day 2 (20 May 24): Kawaguchiko – Home of Mt Fuji, the Icon of Japan

Our Alternate Plan to Kawaguchiko

Kawaguchiko is the nearest town in Japan to visit the Mt Fuji region. Two main ways to get to Kawaguchiko from Tokyo are via the JR or the interstate bus. For the train option, we could take the Fuji Excursion Express train, which whips travellers from Shinjuku to Kawaguchiko in under 2 hours, or the non-express services, mainly for those who did not manage to snag a ticket for the Limited Express trains. For the bus option, there are numerous services from Tokyo to Kawaguchiko daily, departing from the Bus Terminal opposite Shinjuku Station. These buses can be boarded from the bus station opposite Shinjuku Station.

We originally planned and booked seats on the Fuji Excursion Limited Express to Kawaguchiko. Limited Express trains to Kawaguchiko sell out very fast (ours sold out within 2 days of release). As we woke up late and missed the train we had booked, I had to look for alternatives to get to Kawaguchiko. We initially wanted to take the bus option to Kawaguchiko. At the Bus Terminal, we were told the next available bus would leave at 11.45 am, which meant we would arrive at Kawaguchiko close to 2 pm. The ticketing staff advised us to take the next non-express train and transfer to Otsuki, where we would reach Kawaguchiko earlier. We heeded her advice and managed to catch the 10.30 am train to Otuski.

The non-express train took 1 hour to reach Otsuki Station. At Otsuki Station, the way to the platform for the local train to Kawaguchiko was very well marked. We followed the white sticker on the floor that said “Fujikyu Railway”, which brought us to another gantry where we just had to show the station staff our Tokyo Wide Pass for the ride on the local train. The local Fujikyu Railway took another 1 hour to reach ShimYoshida Station, our first to see Mt Fuji with the iconic Chureito Pagoda.

The Iconic View of Mt Fuji and Chureito Pagoda

The viewing platform in Arakurayama Sengen Park is perched on top of 398 steps hill. Exiting ShimYoshida Station, we followed the well-marked signs to the park, about 5 minutes on foot to the base of the hill. The base of the hill was a gentle slope decorated with red lamps on either side of the path. Further up, we spotted a red Torii Gate, which splits into two paths to the top of the hill. The one on the left leads to the Arakura Fuji Sengen Shrine and a sloping path leading to the top of the hill for those who prefer a leisurely and not too strenuous stroll up. The path on the right leads to the faster 398-step climb to the viewing platform. Initially, I was worried that the climb was too much for my 8-year-old nephew, but it wasn’t as bad as I had thought. My nephew and I completed the climb in around 15 minutes (his parent took a little longer but completed it within 20 minutes). The iconic 5-storey Chureito Pagoda, a peace memorial built to commemorate the people of Fujiyoshida who died in wars from the mid-1800s (from the First Sino-Japanese War in 1868) to World War II, sits at the top of the stairs waiting for visitors.

The platform where one could view Mt Fuji and the Chureito Pagoda is a short walk up the path on the right of the pagoda. We were sorely disappointed to learn that Mt Fuji was hiding from us. Due to the low clouds, we could not see the peak of the iconic volcano. We spotted some visitors sitting at the platform as though waiting for the clouds to dissipate to get the iconic pagoda and Mt Fuji shot. As it wasn’t overwhelmed with visitors at the time of our visit, we managed to get some shots with the pagoda with no people in it. Despite being unable to see the peak of Mt Fuji, we were still rewarded with a commanding view of the town below.

We decided to visit the Arakura Fuji Sengen Shrine, established in the 9th century as a place of worship dedicated to the Shinto goddess Konohanasakuya-hime. This deity, often associated with Mount Fuji and the blooming of cherry blossoms, symbolizes renewal, beauty, and the transient nature of life. The Arakura Fuji Sengen Shrine, built mainly with wood, wasn’t that massive of a shrine. The single-building shrine occupies a relatively small corner at the base of the hill. There was a small crowd here, and people mostly came to pray after visiting the viewing platform. I taught my nephew the rituals of hand cleansing and how the Japanese did their prayers at a shrine. After praying, we continued our journey towards Kawaguchiko.

The Lake and the Volcano – Kachi Kachi Ropeway

Returning to ShimYoshida Station, we took the next train (using our JR Tokyo Wide Pass) to Kawaguchiko. Originally, I planned to get tickets to the Fuji Shibazakura Festival, then head to Kachi Kachi Ropeway and return after the ropeway ride for the flower show. We arrived at Kawaguchiko Station at around 2 pm and tried to purchase the tickets to the festival from the ticketing booth next to the gantry at Kawaguchiko Station. However, we were saddened to learn that the tickets for the day had been sold out. We had to change our plan again to head to the Kachi-Kachi ropeway first and do a cruise on Lake Kawaguchiko afterwards. Kachi-Kachi Ropeway takes about 20 minutes on foot from the Kawaguchiko Station, and we used a combination of Google Maps and the signs posted around the area to find our way. Along the way, we stopped by a restaurant for lunch.

After our meal, we continued our walk towards Kachi-Kachi Ropeway. By the time we arrived at the base station, we learned that it was 30 minutes before closing time (the ropeway closes at 5.30 pm). I read online that the queue for the Kachi-Kachi Ropeway would take up to 1 hour during peak hours; we were lucky that there was no queue at the ropeway station. I guess it was a blessing in disguise that we missed our earlier train to Kawaguchiko. I thought the ride up Mt Kachikachi on the ropeway was superb. From ground zero, Lake Kawaguchiko looked like a body of water that seemed to stretch forever, and we had no idea what the entire lake looked like or how big it was. As the cable car slowly made its way up to the mountain, we were able to appreciate Lake Kawaguchiko. The mountain ranges surrounding Lake Kawaguchiko looked like they were protecting the lake. The view was peaceful and calming.

The ride up to the top station took about 3 minutes. As we walked out of the station towards the viewing platform, we were pleasantly surprised to see Mt Fuji’s snow-capped peak peeping out of the clouds, rewarding us with her full glory. Instead of taking the long walkway towards the viewing platform, we could not hold back our excitement for Mt Fuji and used the faster staircase route. Seeing Mt Fuji in her full glory felt like our trip here was well worth it. There are two viewing platforms at the top station of Kachi-Kachi Ropeway, and both platforms were constructed to face Mt Fuji. The lower platform is the larger one, where we saw many people gathering, busy taking pictures with the icon of Japan. However, the upper platform has a better view of Mt Fuji. Here, not only were we treated to an unobstructed view of the icon of Japan, but we were also able to get a 360° view of the surroundings, from Mt Fuji to the town below and Lake Kawaguchiko.

Mt Fuji finally showed her face.

We rode down to the base station as it was approaching closing time. Shops around Kawaguchiko seem to close at around 5.30 pm. When we reached the base station, most shops were already closed. As we were too lazy to make that 20-minute walk back to Kawaguchiko Station, we took a bus (there is a bus stop right in front of Kachi Kachi Ropeway base station) instead. As we boarded our ride back to Tokyo on the Fujikyu Railway, we were still treated to the view of Mt Fuji. The last Limited Fuji Excursion trains left at around 4 pm, and we followed our original plan to take the longer train ride via Otsuki back to Tokyo.

Tokyo Day 1 (19 May 24): Ueno – Starting our Tokyo Trip with Shopping on the Historic Ameyoko Street

My maiden trip to Tokyo was planned around visiting the major sights outside Tokyo for the first three days to maximise the JR Tokyo Wide Pass we had gotten before the trip and spending the last three days around Tokyo city. As we had a redeye flight, I did not pack too many itineraries on our first day.

Arrival at Narita Airport

There have been several changes to the immigration to Japan in recent months. Due to the recent depreciation of the Japanese Yen, Japan has seen a large inflow of tourists, resulting in ridiculously long wait times at immigration. To manage the situation at immigration, the Japanese Government encourage visitors to register on the Visit Japan Web. The latest change to the web service now only generates one QR code for faster immigration clearance. I thought there would be two queues for the immigration process, one for those who had registered on the Visit Japan Web and another for those who hadn’t. However, we found out that wasn’t the case at Narita Airport. There was only one queue at the immigration, regardless of registration status on the Visit Japan Web. Although only one flight landed before ours, we spent the next 1½ hours waiting in the queue to clear immigration. Only four counters were open to handle the large influx of visitors waiting to clear the immigration, contributing to the lengthy wait times. The immigration situation felt more chaotic when we spotted airport staff randomly picking people in the queue to register our fingerprints. I felt registering on Visit Japan Web did not improve the immigration process since everyone was made to fall into a single queue.

Sorting out our Transportation at Narita Airport

Just when we thought clearing the immigration was the end of the chaos at the immigration. We were in for another shock when we arrived at B1 to settle our transportation tickets. We wanted to collect our JR Tokyo Wide Pass and get our Suica cards simultaneously before collecting and making seat reservations for the Skyliner tickets I bought online. The way from the airport arrival hall to the subway counters was well-marked. When we arrived, there wasn’t much of a queue in all the counters. The JR East Travel Centre was easy to locate, marked with oversized fonts on its door. We were third in the queue but had to wait around 10 minutes as only one counter served passengers who had pre-booked passes online. We would spend the next 15 minutes at the counter collecting our tickets and purchasing a Suica Card. But when we enquired about the child Suica Card, we were told to join another queue across from the JR East Travel Centre.

When we settled our JR tickets, a long queue had formed at Counter C. We spent another 30 mins queuing at the counter and finally got the child Suica Card for my nephew. The Skyliner train service is the fastest way from Narita Airport to downtown Tokyo. I had previously bought our Skyliner tickets on their official website, as we would have saved around ¥200 for each adult. There are two counters and three queues for the Skyliner ticketing. Not knowing which queue was for what, we initially queued at the blue-coloured counter next to the gates with a huge “Keisei Ticketing Counter” written on it. There are two queues formed at this counter, one for the automated ticket purchasing machine and another for the manned counter for assistance. We queued up at the manned counter as we had already bought our tickets. After queueing for about 15 mins, we were told by the staff at the counter we were in the wrong queue, and we could only redeem our tickets at the shop opposite (next to JR East Travel Centre) that says “Skyliner & Keisei Information”. We spent another 1 hour queuing up to get our reserved seats. By the time it was our turn, we could only catch the 12.15 pm train to Ueno.

I thought the ¥200 saved by buying the tickets online was not worth it, and we spent more time queuing to get the tickets than buying tickets on the spot (the queues seem to move faster). One good tip we got from the staff at the information centre was to alight at Nippori Station instead of Ueno Station when switching to the Yamanote Line. We were told that at Nippori Station, we were only required to move from one platform to another, whereas at Ueno Station, we would be required to switch stations.

Change in Plan – Scrapping Tokyo Tower Visit for Ueno

I had originally planned to visit Tokyo Tower and Asahi TV station in the afternoon before heading to Ueno in the evening. However, the long queue times at the immigration and the ticketing counters took up 4 hours of our time. It was around 1.45 pm by the time we reached our hotel. It was already 2.20 pm by the time we settled into our room and got ready to explore Tokyo. Our Tokyo Tower visit was the 2.30 pm timeslot; factoring in the time required to make our way (it would take us around 30 mins), we would have missed our timeslot for entrance. We ended up cancelling our original plan of visiting the sights around Roppongi and opted to go shopping at Ueno instead.

The Historic and Vibrant Ameyoko Shopping Street

Yamanote Line is our go-to JR line for the next few days, as it covers most of the popular areas in Tokyo. It took 30 minutes from our hotel to Ueno by Yamanote Line. Ueno has several attractions, such as the zoo and the Ueno garden. As we had a long day, I kept the to-visit list only to the Ameyoko Shopping Street this evening. Ameyoko Shopping Street dates back to the post-World War II period and started as a black-market selling things from the soldiers. This place subsequently transformed into a marketplace selling candies and sugar (its original name, Ameya Yokocho, translates to Candy Store Alley). To Ameyoko Shopping Street, we should have taken the south exit – Hirokoji Exit, directly across from the street. As we were rather overwhelmed with the number of exits (nine total), we barged towards whatever exit popped up and took the east exit – the Iriya Gate exit instead. This exit took us another 15-minute walk to Ameyoko Shopping Street.

After some navigation, we found ourselves in one of the back alleys of Ameyoko. This small street is populated with restaurants. After another 5 minutes of walking, we came to the main street of Ameyoko. On top of the restaurants, we spotted many more shops selling various goods, from clothing to shoes to medical stores. There are several smaller alleyways that branched out from the main Ameyoko Shopping Street, and it seemed nothing much was going on in these streets. The main actions and more “shoppable” stores are on the main street, where there are two large drug stores on the main street alone. Nearer to the end of the street opposite Ueno Station, the main street merges with its neighbouring street, where we found eateries dominating this part of the street. Numerous seafood eateries lined up on either side of the street with outdoor seating, where patrons can choose their live seafood from the tanks, and the chef would whip up a dish. On top of these cooked food stores, stores sell from omiyage to dried food. The neighbouring street was dotted with stores selling desserts.

[Accommodation Review] – Airbnb – Mitz’s Apartment (1-Bedroom Apartment), Osaka, Japan (19 – 26 May 18)

IMG_9074

Facade of Mitz Apartment

When I was planning for my trip to Osaka, I wanted an apartment that has a separate bedroom from the living room which provides space for me to throw my shopping and have sufficient space to do the packing on the night before I depart Osaka. The apartment has to be near to Namba area as this is where I will be taking the train to Kansai International Airport on the day of my departure. Numerous listings on Airbnb around Namba area, but these listings are studio apartments and are very small. I found Mitz’s apartment on Airbnb that fits all my requirements. The price is very reasonable for the location and size of the apartment.

Location

Mitz’s apartment is very well located. It is within 5 mins walk from the nearest subway station, Nippombashi Station, which is 1 stop away from Namba Station. It is also with 3 mins walk from Kuromon Ichiba Market (commonly known as Black Market). There are 2 convenient stores within 2 mins walk from Mitz’s apartment. The apartment is also within 7 mins walk to Dotonbori. Link to Mitz’s apartment can be found here: Mitz’s Apartment Listing on Airbnb.

The Apartment

Porch

The first thing that I come across as we entered the apartment is a small porch where I take off our shoes. It is customary that one takes off one’s shoes before entering any Japanese house. A small cabinet by the wall is where we found in-room slippers and where I can store my shoes as well. There is another cabinet where umbrellas are stored beside the shoe cabinet.

Bathroom

A little further from the porch are the bathroom and the toilet. The toilet is a separate room on the left of the corridor. The toilet is equipped with a wash bidet and has a sink on top of it that saves water. The bathroom is located opposite the toilet, on the right side of the corridor from the porch. The dry area of the bathroom comprises a sink, which Mitz placed a cabinet on top of the sink to create more storage space. Next to the sink is a washing machine. The wet area has a shower head and a bathtub. The bathroom in Mitz’s apartment looked modern and clean. As with most Japanese Bathrooms, Mitz’s bathroom has a heating function which can dry the bathroom in no time.

DSC08273

Toilet

DSC08272

Dry Area of the Bathroom

DSC08271

Wet Area of the Bathroom

Bedroom

Mitz’s apartment has a separate bedroom, which is rare for housing in Osaka at this price point. The bedroom is just next to the toilet. The bedroom is rather small in size, Mitz has placed 2 king size bed in the bedroom, leaving it hardly any space to move around. However, there are 2 doors, one by the kitchen and another by the living room, which makes the bedroom rather accessible. There is a cabinet inside the bedroom, but this cabinet is not usable as the owner has used this as a storage space. The sleep quality on the beds is excellent. I had a great night sleep every night every night. The pillows are not too soft for my liking.

DSC08268

The bedroom that has 2 king size beds

Kitchen

Further down the corridor from the main entrance to the apartment, opposite the bedroom lies the kitchen. The kitchen is small but is well equipped with stove and a fridge. Mitz has readied some coffee and tea as well as some condiments that we could use.  The kitchen is well stocked with utensils and pots and pans which allows one to cook some simple meal. There are a microwave oven and an electric kettle in the kitchen that we used to make hot water every day.


Living Room

Mitz’s apartment has a separate living room, which is fantastic for us to put our shopping and pack on the last day. The living has an L-shaped couch that is capable of sitting up to 5 adults comfortably. There is a sizable coffee table in front of the couch which is very useful in putting out stuff onto. There are also 2 power sockets by the wall near the coffee table, which is perfect to charge our lifestyle devices. As the wardrobe in the bedroom was not usable, we used the living room to store our luggage.

DSC08269

Living room in Mitz’s apartment

Dining Room

The dining room in Mitz’s apartment is in front of the kitchen and beside the living room. There is a dining table good for 4 pax with 4 chairs placed at the dining table. Mitz is very thoughtful as he has placed a box of tissue as well as a box of wet tissues on the dining table. There is a full-length mirror placed by the wall next to the dining table. A TV is placed at the corner of the dining table, which is visible from the dining table as well as the couch in the living room area. A clothing rack is placed at the other corner of the dining room next to the kitchen.

DSC08266

Dining Room where the TV is placed

Balcony

There is a balcony in Mitz’s apartment where a small table and 2 chairs are placed. This is an area where we can chill out and take in the sights of this area of Osaka City. There are some clothing racks in the balcony where one can hang their clothes to dry.

DSC08274

Balcony

DSC08275

View from the Balcony

The Owner – Mitz

Mitz is a wonderful host. He is very responsive when communicating via the Airbnb app and he always responds to my questions within 1 hour of posting. Mitz is very accommodating towards our timing of checking in. We originally agreed to check in at 6pm, however, due to our travels, I arrived at Mitz apartment at 8pm. Mitz is very patient in waiting for my arrival at his apartment. Mitz is also very helpful in offering suggestions on where I can visit in Osaka as well as the amenities in the vicinity of his apartment during our conversation with him when checking into his apartment. Mitz even left a message on Airbnb app asking how was I doing in Osaka and if there is anything he can help to make our stay comfortable.

Overall

Mitz’s apartment is very well appointed. The location is superb, it is within 3 mins walk to the Black Market, and 5 mins walk to the subway station as well as 10 mins walk to Dotonbori. The apartment is very large for Japanese standards, I particularly like the separated bedroom from the living room, which gave me a lot of space. The bathroom is very modern. Mitz’s apartment is a very value for money for its location and the size. We are very comfortable staying in Mitz’s apartment. Highly recommend for anyone coming to Osaka. Link to Mitz’s apartment can be found here: Mitz’s Apartment Listing on Airbnb.


Kansai (Kyoto/Osaka) Day 8 (25 May 18) – Shopping In Namba Area and Night View of Osaka City from Umeda Sky Tower


DSC09578

Namba Shopping District

Our shopping day today lands us at Namba area. At the time we arrived at Namba area, most of the shops are still closed. Shops in Namba area opens at 10am. As we still have time, my friend and I went over to the Nankai Train Station to attempt to redeem our train tickets to Kansai International Airport for tomorrow when we depart Kansai. We had previously purchased the tickets online. However, at the station, we were told to head over to OCAT Building to redeem the vouchers and come back here for the tickets. Since the shops are still not opened yet, we headed to OCAT Building which took us about 10 mins walk from Nankai Train Station. After redeeming the vouchers, we headed back to Nankai Train Station and sorted out the tickets. I told my friend we were lucky that we had decided to settle our train tickets on today rather than on the day of our departure, as it would be too rush to have to sort out the tickets the next day. On the hindsight, we should not have ordered the tickets online and should have purchased the tickets at the train station instead, this will save us the time walking back and forth.

Other than the Takashimaya Department store above Namba subway station, I find shopping in Namba a tad confusing. The shops seem to be arranged overall the place, feels very different from Osaka Station (might be due to the fact that we were rather familiar with the shopping in Osaka Station, after all, we have been passing through there since day 1 of our arrival in Kansai). Unlike most departmental stores, which has only at most 2 levels dedicated to men’s section, Takashimaya in Namba has men’s section in every floor, occupying a corner of each floor. Walking through Takashimaya seem no different from the other departmental stores we have visited. We left Takashimaya and headed to Carnival Mall. Carnival Mall does not have departmental stores, it is like HEP5 Shopping Mall we visited the day before. There are independent stores in Carnival Mall. Most of the men’s stores are located on the top 2 floors of Carnival Mall.

Shinsaibashi Shopping Street

After we were done with Carnival Mall, we headed for Shinsaibashi Shopping Street. We originally wanted to take a subway from Namba to Shinsaibashi but upon seeing a shopping street across from Takashimaya Departmental store, we decided to check it out. Ebisubashi-Suji is where we ended up. Ebisubashi-Suji is a covered shopping street with shops on both sides of the street. Most of these shops are pharmacies. There seem to be a pharmacy on every street and spaced out every few shops. Most of the products offerings are about the same, some shops do not offer tax refund here.

As we were walking, suddenly the place seems familiar. We ended up in Dotonbori without us realising. That is the food street that we have been coming for the past few days. As we were a little hungry, my friend and I got the takoyaki balls that was sold out shortly after we gotten ours a few nights ago. From Dontonbori, I told my friend we do not have to take the subway after all Shinsaibashi Shopping Street is just right across the bridge.

We got to Shinsaibashi after eating our takoyaki balls. Shinsaibashi is another cover shopping street that seems no different from Ebisubashi-Suji. There are the same pharmacies that seem to be everywhere and shops selling sports shoes. The price of the goods is not any different from Ebisubashi-Suji. My friend has gotten a pair of shoes and we had gotten backpacks from the Adidas shop. After some walking, we thought the shops are getting repetitive and decided to head back to our accommodation to leave our stuff before heading out for dinner. My friend had to collect the pants that he bought the day before near Osaka Station.

Umeda Sky Building

After collecting my friend’s pants, we headed for dinner. We ended our trip to Kansai, Japan by visiting the Umeda Sky Building. Umeda Sky Building is a 10 mins walk from the nearest Osaka Station. It is pretty out of the way compared to the rest of the attraction. Umeda Sky Building Observatory is also covered under the 2-Day Osaka Amazing Pass. Most visitors come here for the sunset over Osaka City and that is also the time when it is most crowded. The journey observation deck is one of the highlights when visiting the tower. The iconic floating escalator that connects the 2 building towers had us feel as though we were floating in the sky. The observation has 2 levels, the lower level is the enclosed area where we had a 360º view of Osaka city. However, the view from the upper open observation deck is more stunning. From the upper deck, we had an almost unobstructed view of the city. The view here is much better than that from the HEP5 Ferries Wheel. As it was at night at the time we arrived, the upper level is illuminated with ultraviolet lights. These lightings have the floor illuminated looking like stars in the sky. It is windy here and from here we could see the floating escalator that we have travelled on. Looking out into Osaka City, this is a great way to end our trip to Kansai. Ironically our trip to Hokkaido last year also ended up with a night view of Sapporo. We headed back to our accommodation to pack our luggage for tomorrow’s flight home. After visiting 2 Japanese Cities 2 years in a row, we are unlikely to return to Japan until some time later. It is off to explore other countries and other cities in the world.

DSC09598

Panoramic shot of Osaka at night from Umeda Sky Building

DSC09614

Our last wefie in Osaka

Kansai (Kyoto/Osaka) Day 7 (24 May 18) – Creating Instant Noodles and Shopping Around Osaka Station


DSC09532

View of Osaka City from HEP5 Ferries Wheel

We spent the last 2 days of our Kansai trip in Osaka. Unlike my previous trips where I did not cater time for shopping, we dedicated 2 days to shop around in Osaka. There are 2 main shopping areas in Osaka, 1 at Osaka Station and another at Namba area. Today we shopped around in Osaka Station Area.

Cup Noodles Museum

Our first stop today is the Cup Noodles Museum. There are 2 Cup Noodles Museum in Japan, one of which is located in Osaka. To get to the museum, we took the train to Ikeda station (this station is not covered under the 2 day Osaka Amazing Pass) and walked for about 5 mins. The Cup Noodle Museum is relatively empty at the time of our visit. Entrance to the museum is free. Once inside the museum, there are exhibits on the origins of cup noodles and cup noodles were prepared and sold in the early days. There is even a mock-up shed where the world’s first instant noodles were created and how it was created. Down the hall, there is a tunnel display of the instant noodles that was sold in Japan throughout the decades.

DSC09435

Nissin Cup Noodle Museum in Ikeda

The highlight of this place is that we get to make our own cup noodles. My friend and I each bought an empty cup (at ¥300 each) and was escorted to a table where we start doodling on the cups. After we were done drawing our cup, we approached the end of the room where we customised our cup noodles with ingredients and flavouring. Our customised cup noodles were sealed right before our eyes before they were given to us as a souvenir for us to bring back. We headed to the 2nd floor of the museum where there is a class for visitors to make the ramen noodles from kneading the dough to the finished product of the noodles. My friend and I did not participate in this activity. It took us about 1 hour to finish visiting the Cup Noodle Museum.

Shopping in Osaka Station

We headed for shopping at Osaka Station. There are a number of shopping malls in the vicinity of Osaka JR Station. We headed for the HEP5 Shopping Mall, which is across the road from Osaka Station. The HEP5 Shopping Mall has 6 levels and sells mainly clothing and shoes. We saw the ferries wheel on top of this building and will be back later in the evening after the shops are closed. After shopping around in HEP5, we headed to the departmental stores right on top of Osaka station. The Daimaru store occupies 15 storeys while the Lucca occupies 10 storeys. There is another Hankyu Departmental Store across Osaka Station. We did not go into this store as the product offerings are the same in all these departmental stores.

HEP5 Ferries Wheel

One good thing about getting the Osaka Amazing Pass is that other than allowing us to take the subway for free, we can also visit 36 spots for free. Some of these include riverboat ride, entering the Osaka Castle and taking a ride on HEP5 Ferries Wheel. My friend and I returned to HEP5 at about 8pm, after most of the shopping malls have closed to ride on the Ferries Wheel. The HEP5 Ferries Wheel is located on the 7th floor of the building. The ride on the ferries wheel takes about 15 mins, with the highest point being 106m from the ground. The views on the ferries wheel aren’t that great as the glass looks blurry and we did not have a good view of Osaka city. I would not have ridden on it if it is not covered under the Osaka Amazing Pass. After taking the ferries wheel, we headed back to our accommodation to rest.

DSC09539

HEP5 Ferries wheel is located on top of a shopping mall

DSC09537

On the streets of Osaka at night