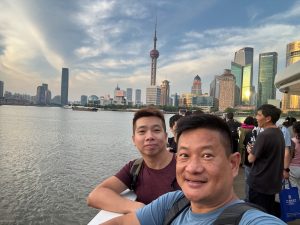
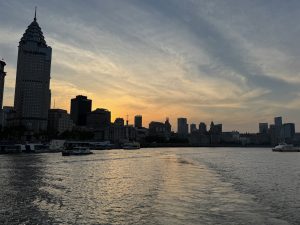
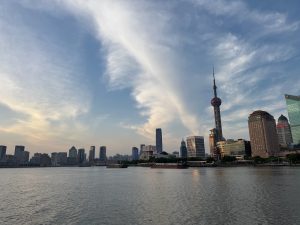
Shanghai Day 4 (17 May 25): Longhua Temple and City God Temple – From the Oldest to the Guardian Temple

We initially planned to visit Yuyuan (豫园) in the morning and spend some time strolling along Yuyuan Old Street before visiting People’s Square in the afternoon. The staff at our hotel’s lounge, whom we spoke to last night, highly recommended that we visit Longhua Temple, which is popular amongst the locals. We changed our plan today to prioritise Longhua Temple and leave Yuyuan as an option if we had the time.

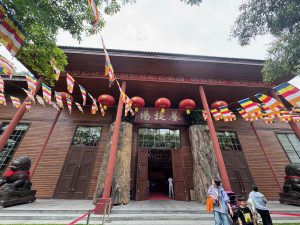
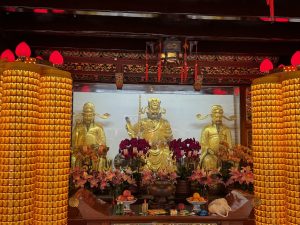
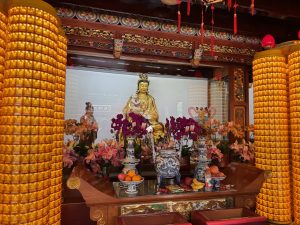
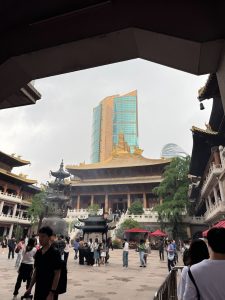
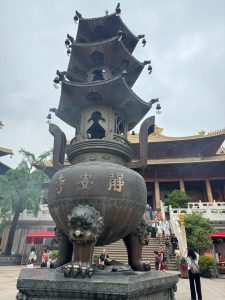
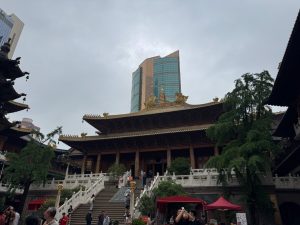
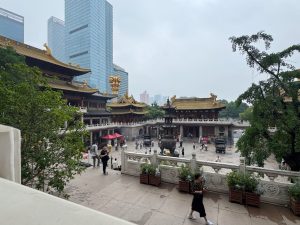
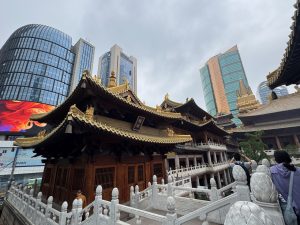
Longhua Temple (龙华寺) – The Oldest Temple in Shanghai

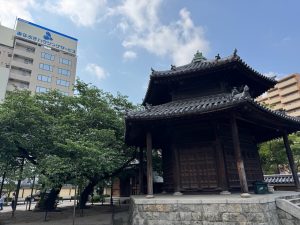
As Longhua Temple is slightly further away from our hotel, we made it our first stop of the day. Getting to Longhua Temple is a breeze; we hopped onto the metro Line 2 and changed at Jingsu for Line 11. Longhua Station is well served by both Lines 11 and 12. There are signs in the metro station that point to Longhua Temple (in both English and Chinese). One cannot miss the ancient wooden tower upon emerging from the metro station.
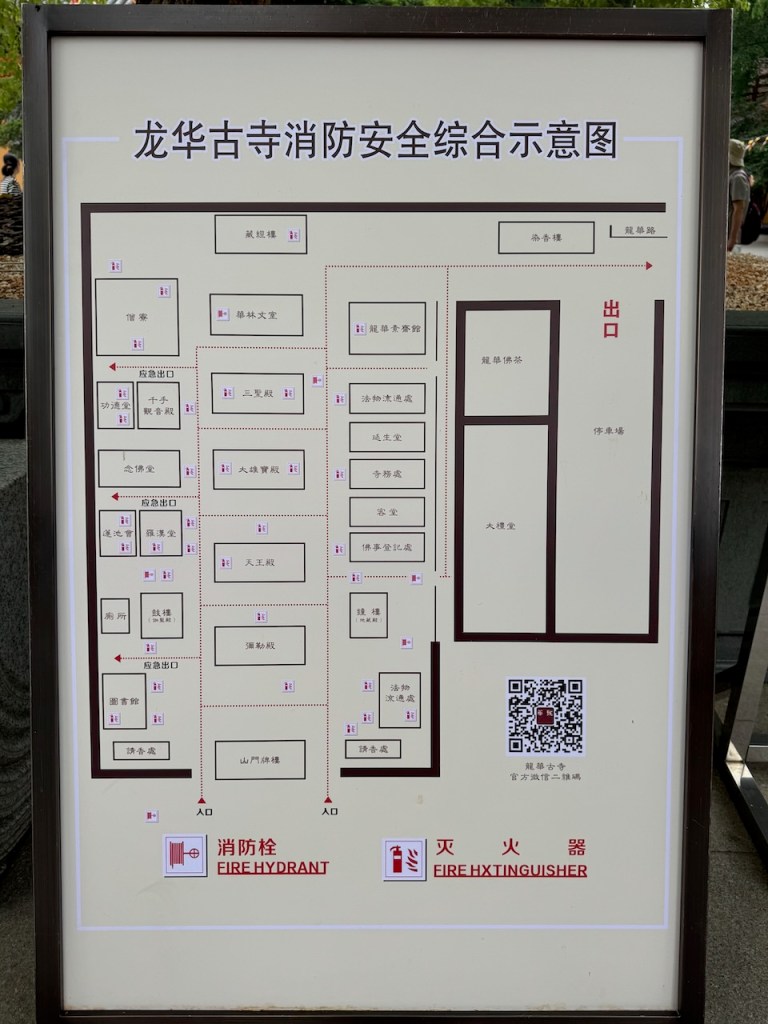
Layout of Longhua Temple

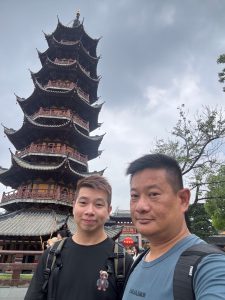
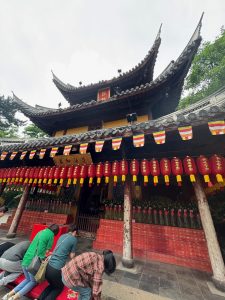
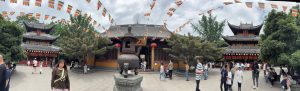
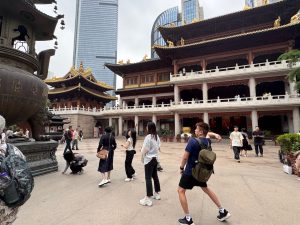
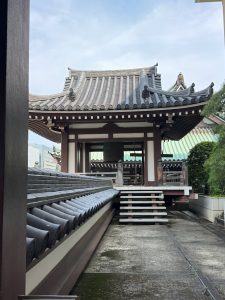
At 1,700 years old, Longhua Temple is the oldest temple in Shanghai and one of the oldest in China. The temple was first built during the Three Kingdoms era in 242 AD and has undergone several rebuilds over the years. Today, the present design of the temple was inherited from the Song Dynasty (960-1279), and Longhua Temple is the largest temple in Shanghai. Entry to Longhua Temple costs RMB 10, which includes a set of three incense sticks for devotees to use during prayers for prosperity and safety. Upon entering the grounds of Longhua Temple, the first thing we saw was the wooden seven-storey Longhua Pagoda. We saw locals walking around the pagoda with unlit incense in their hands. Upon asking, we were told this is a customary procedure when praying in the temple. When in Rome, do what the Romans do. We followed the locals in their prayer procedures. As we walked round the temple, I could catch a glimpse of the interior of the pagoda. The interior of the pagoda appears to retain its original structure, dating back to 977. Other than a set of stairs that lead to the upper level of the pagoda, there seems to be a statue of a man inside the pagoda. We entered the Longhua Temple grounds after doing our three rounds around Longhua Pagoda.
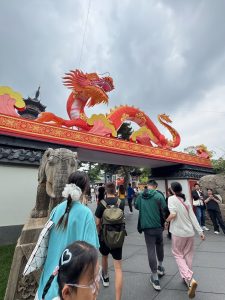
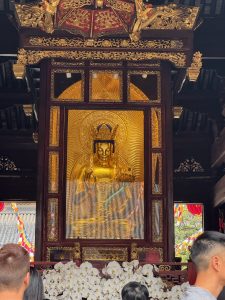
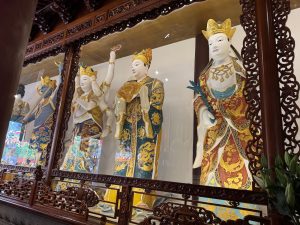
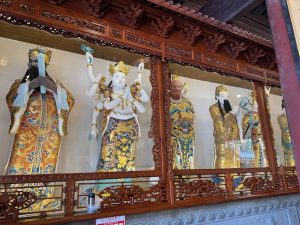
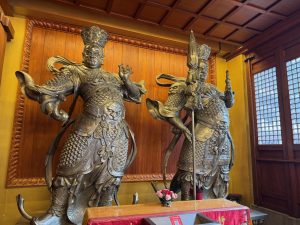
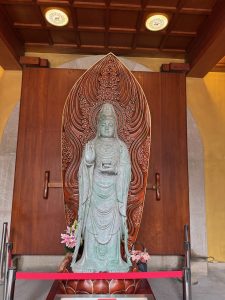
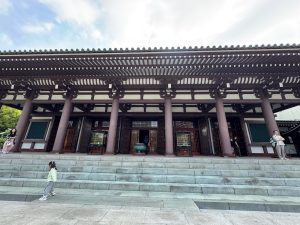
Longhua Temple comprises four main prayer halls, arranged in a straight line along a north-south axis, with several smaller prayer halls situated at the sides of the main halls. Legend has it that it is here the Laughing Buddha attained his Buddhahood. The first prayer hall, the Maitreya Hall (弥勒殿), houses the Maitreya Buddha (also known as the Laughing Buddha) in his manifestation as a monk wearing a cloth bag. The gold-painted Maitreya Buddha, with his signature kind smile, seems to welcome visitors to his temple. The next hall in line after the Maitreya Hall was the Four Heavenly Kings Hall (天王殿). The main Buddha installed in this hall is the Maitreya Buddha in his Buddhahood appearance. This version of the Maitreya Buddha features a calm and kind appearance, a notable departure from the Laughing Buddha image popular in Chinese culture. In addition to the Maitreya Buddha, this hall is also home to the Four Heavenly Kings. The third hall, located behind the Four Heavenly Kings Hall, is the Mahavira Hall (大雄宝殿). This is the main prayer hall in Longhua Temple, where the Buddha, seated on a lotus, and his two disciples, Manjusri Boddhisattva (文殊菩萨) and Samantabhadra (普贤菩萨), are installed at the centre of the prayer hall. The Buddha statues installed in this hall exude a calm and solemn look, as though they are patiently listening to the sorrows of visitors. The Three Sages Hall (三圣殿) is the final hall, the furthest away from the entrance of Longhua Temple. The Buddhas installed here are the Amitabha Buddha (阿弥陀佛), Guanyin Bodhisattva (观音菩萨) and Mahasthamaprapta Bodhisattva (大势至菩萨). The Buddha statues here had a gentle smile on their faces, as though reassuring visitors that everything will be alright.
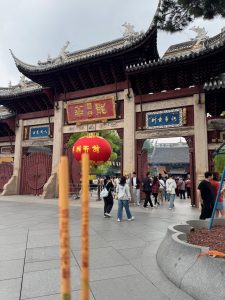
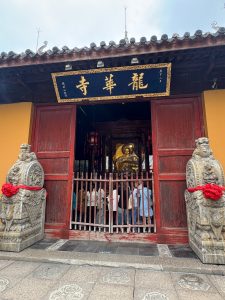
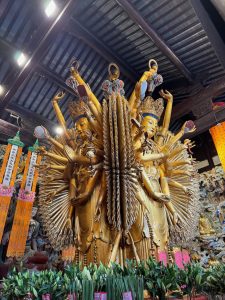
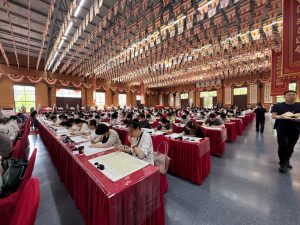
After visiting and offering our prayers in the four main halls, we spent the rest of our time at Longhua Temple retracing our footsteps back to the entrance and visiting the side prayer halls. A hall beside the Three Sages Hall had the statue of Thousand Hands Guanyin (千手观音) installed. Instead of having only one statue, there are three statues of the Thousand Hands Guanyin with their backs against each other, which seems to represent seeing all from all directions. In addition to the Guanyin statue, this hall is also adorned with carvings of Bodhisattvas and Gods cast on the walls of the hall. The other hall that I like is the Arhat Hall (罗汉堂). In the centre of the hall is a dark brown wooden statue of Guanyin, with her lifelike merciful appearance. There are an impressive 500 smaller arhats on the walls surrounding the Guanyin statue in the centre. The two side halls between the first and second main hall are the Drum and Bell Towers, where statues of Guangong (关公) and Earth Store Bodhisattva (地藏王菩萨) are installed respectively. After paying respects to all the Buddha and Bodhisattva statues in the prayer halls, we wandered around the grounds of Longhua Temple. We found a huge hall filled with people quietly sitting in rows copying Buddhist sculptures. Copying these sculptures is a Buddhist practice that trains one’s patience and a calm mind. It was a spectacular sight to see so many people sitting quietly in a large hall doing their things calmly. Leaving Longhua Temple after spending 1½ hours here praying and walking around, we headed for lunch in one of the shopping malls nearby.
City God Temple (城隍庙)- Temple of Guardian God

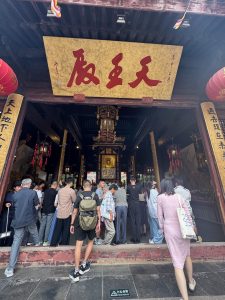
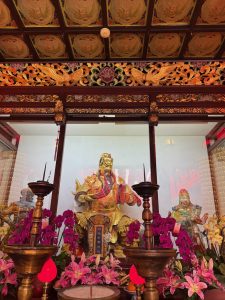
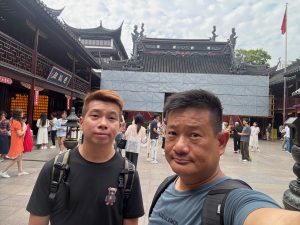
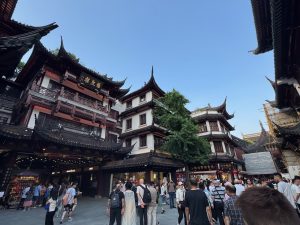
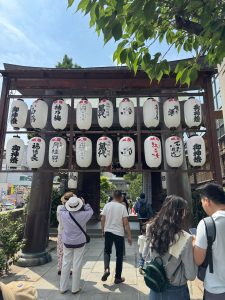
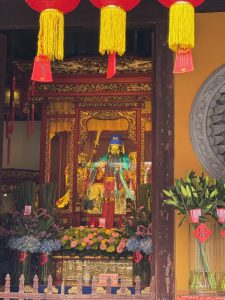
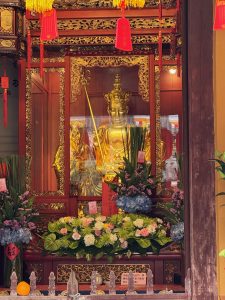
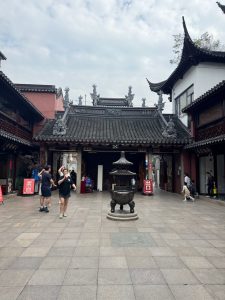
No visit to Shanghai is complete without visiting the City God Temple and Yuyuan Old Street. The City God Temple has been regarded as the guardian temple by the Shanghainese. Entry to City God Temple costs RMB 20. The City God Temple is served by Yu Garden Metro Station on Lines 10 and 14. The City God Temple is compact compared to Longhua Temple. There are three entrances to the City God Temple, the main entrance facing the road, the side entrance that is directly linked to the Yuyuan Old Street shopping arcade and a back entrance at the second prayer hall that serves more like an exit (we are not too sure if this is also used entrance as we did not went up close to explore this area). As we came from the Yuyuan Shopping Arcade, my friend and I used the side entrance. From the side entrance, we immediately arrived at the second and largest courtyard in the City God Temple. This is where the main prayer hall is located, housing one of the two City Gods in this temple. We later learned from one of the staff members that Shanghai has three City Gods, two of which are located in this City God Temple. After offering our prayers, we proceeded to the back of the temple and arrived at the third courtyard. In a relatively small prayer hall, the second City God is housed. At the sides, we found smaller shrines housing Guangong and WenCang (the God of Wisdom).

After offering our prayers, we retraced our footsteps and headed back to the second courtyard to offer our prayers to the gods installed in the side shrines there. The God of Fortune and Guanyin were among the more popular gods in the second courtyard, where we saw more people praying. We headed to the first courtyard after praying and shopped for some charms for my family members. The staff advised us to return to the ceremonial hall located between the two City God halls to have our charms blessed. The cleansing ceremony involves a Taoist priest chanting and sprinkling holy water onto our charms. We had pretty much covered everything in the City God Temple in about 45 minutes.

Yuyuan Old Street (豫园老街)

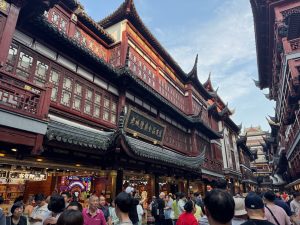
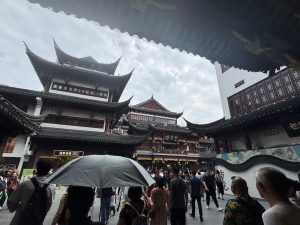
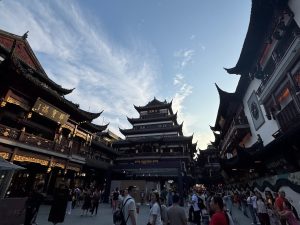
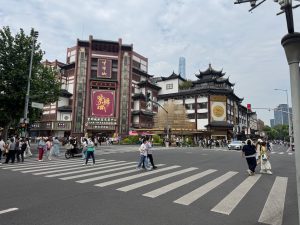
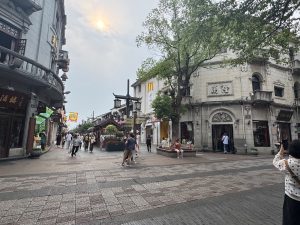
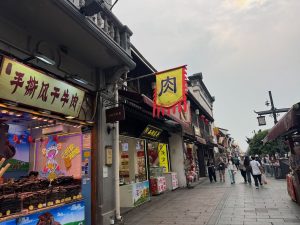
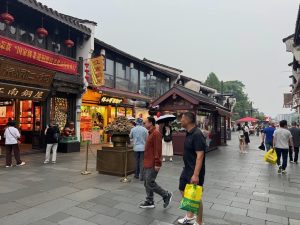
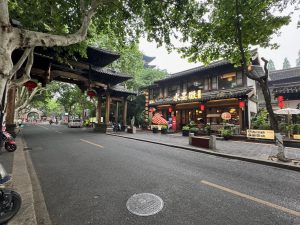
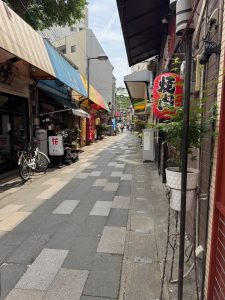
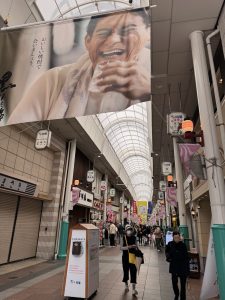
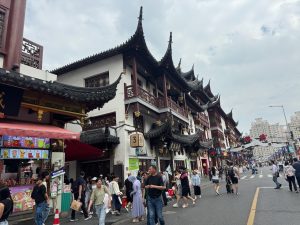
We spent the rest of the afternoon wandering through the labyrinth of Yuyuan Old Street. I thought this was a great place to dive into the vibrancy of Shanghai, with many locals coming here to spend their weekends wandering through shops to buy souvenirs or to eat from the many food street stalls. As we were here on a weekend, we even spotted some local artists coming here to promote their films and shows. We also saw a traditional Chinese dance performance in one of the many open spaces within the shopping arcade. The main Yuyuan Old Street is essentially a huge shopping arcade, housed in ancient Chinese buildings that feature numerous shops, mainly selling souvenirs and snacks, as well as a small number of gold shops. Yuyuan Old Street is also where the locals come to buy gold, where the gold price is generally lower. Most of the gold shops congregate in the area across the road from the main shopping arcade. Despite being a highly touristy spot, we found that the prices of items on Yuyuan Old Street are generally cheaper than those on East Nanjing Road.

Back to Pudong – Our Attempt to Visit Oriental Pearl Tower

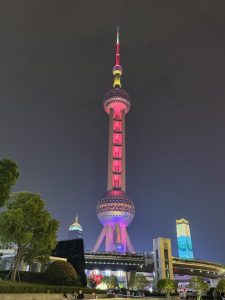
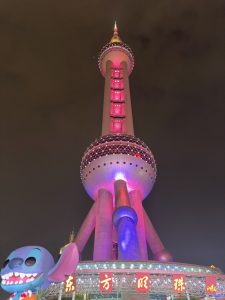
We returned to our hotel to offload some of the stuff we bought from Yuyuan Old Street and headed out across the Huangpu River via the metro to Pudong. Since we had some time before dinner, we wanted to visit the Oriental Pearl Tower, something I had wanted to do 30 years ago when I first visited Shanghai. Back then, the tower had just been completed and had not yet been opened to the public. To get to the Oriental Pearl Tower, we alighted at Lujiazhui Station (since the ferry service had stopped for the day), one stop along Line 2 from East Nanjing Road Station. We emerged from one of the shopping malls and walked the circular overhead pass connected to the mall to arrive at Oriental Pearl Tower. The ticketing booth for the tower is not located on the ground floor of the tower; instead, it is found about 20 m away from the tower. However, by the time we arrived at the tower, admissions had ceased as the tower was closing soon. Other than taking pictures with the tower up close, there was nothing much we could do here.

Dinner Hunting on East Nanjing Road

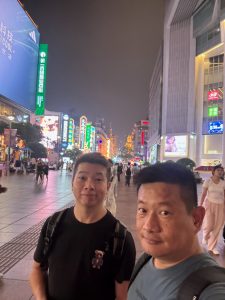
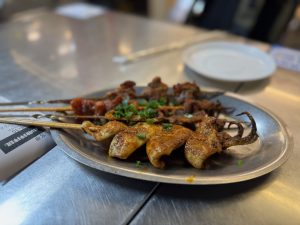
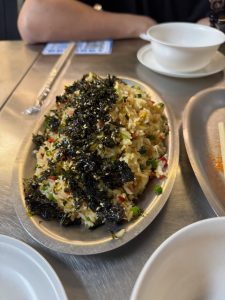
Since it was way past dinner time, we returned to the Western part of East Nanjing Road (opposite People’s Square Station) to look for dinner. I thought I saw some restaurants on this stretch of the road a few days ago when we walked to this part. We came across a stretch of roadside stalls selling snacks and purchased some tasty lobster dumplings. Most of the restaurants at this hour (it was already approaching 10 pm when we arrived) seem closed. We settled our dinner at a BBQ restaurant in one of the small alleyways; we spotted some restaurants that were still open till late at night. As it was getting late and we had an early flight the next day, we headed back to our hotel on the Bund after dinner. The shops below our hotel were still open, so we bought some street snacks to take back to our room to eat while we packed our luggage for our departure tomorrow morning.

Shanghai Day 3 (16 May 25): From Jing’an District to French Concession

Shanghai is a large city with 18 districts. Today, we planned to visit the sights a little further away from the Bund where we were staying. As it was raining in the morning, we started our day around noon, after the rain stopped.

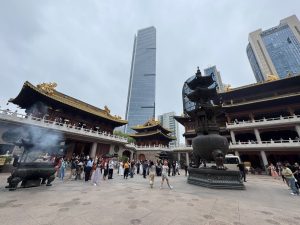
Jing’an Temple (静安寺) – The Golden Roof Temple

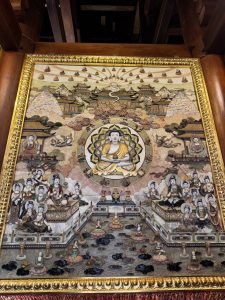
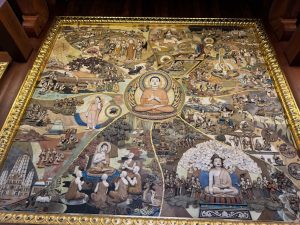
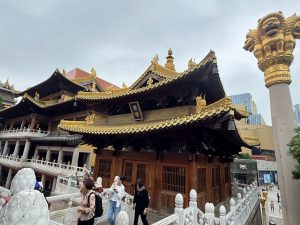
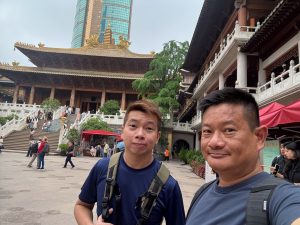
Our first sight today is Jing’an Temple, the principal temple regarded by the Shanghainese. Jing’an Temple is one of the most expensive temples in China, with a construction cost of RMB 2.8 billion. Jing’an Temple is well served by the Jing’an Temple Station, which is an interchange of Lines 2, 7 and 14. Admission to the temple costs RMB 50. Huge shopping malls and small shops surround the temple, creating a bustling scene. However, as we entered the temple grounds, the bustling of the surroundings faded into peace and tranquillity. The only sound came from visitors tossing coins into the two-storey tall furnace in the centre of the courtyard. The roofs of the temple and the mystical animal adorned on them were gold-plated. The bright yellow walls painted on the temple walls enhance the illusion that the temple is made of gold. After offering our prayers, we proceeded to the main prayer hall, which housed a 15-ton, pure silver Buddha. The Buddha statue sits in the middle of the hall, solemnly blessing those who came to offer their prayers. Behind the silver Buddha statue are three painted wood carvings of Buddha. I find the centre carving more significant as it depicts the birth and attainment of nirvana of Buddha.

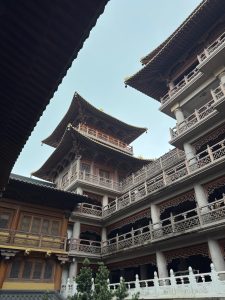
There are two towers on the facade of the temple: the left is the Drum Tower and the right is the Bell Tower, both of which are accessible from within the temple. Exiting the main prayer hall from the back, we walked on the second level of the adjacent building and came to the Bell Tower. Legend has it that a well is located beneath the Bell Tower, allegedly linked to the sea, with water sprouting from the well. It was believed that the water brought evil, and the locals built Jing’an Temple to ward off these evils. Both the Bell and Drum Towers are closed to the public these days. As the door to the Bell Tower was left ajar, we were able to peek inside the Bell Tower, where we saw a huge bell (hence the name Bell Tower) hanging over what seemed to be a well. The two towers were linked by a central structure, which was formerly used as the main entrance to Jing’an Temple. It is here that we got a great view of not only the inside of Jing’an Temple, but also the outside. The contrast between tranquillity and bustling is especially pronounced here. A gold-plated Laughing Buddha called the centre building on the second level home, together with the statues of the four heavenly kings, guardians of heaven in Chinese mythology. We felt a sense of happiness by looking at this Buddha. The drum tower occupies the left building (seen from the main road of the temple). Compared to the Bell Tower, the Drum Tower appears dull. Peeking through the windows, we could see the solo drum placed inside.

We headed back to the ground level of the temple and found a 3.8m Burmese white jade Buddha statue in a room along the Drum Tower side of the temple. The Buddha statue exudes a compassionate expression. At first glance, one would think that the robe on the jade Buddha was made of cloth, but this is actually part of the jade used for the statue. There is another hall opposite the Jade Buddha statue, where we find a 6.2m tall statue of Guanyin (the Goddess of Mercy), made from a 1000-year-old camphor wood. The lower level of the former entrance has another statue of Guanyin, installed in front of the now-closed entrance. We spent the rest of our time here at Jing’an Temple, exploring the many rooms open to the public, and discovered a prayer room with three Buddha statues located at the back of the temple. As this is a secluded part of the temple, we were the only ones here offering our prayers to the Buddha statues. Before leaving the temple, we spent some time tossing coins into the large furnace in the middle of the courtyard.

Before heading to our next sight, we had lunch in one of the restaurants nearby Jing’an Temple. We were initially attracted by the pastries and rice dumplings sold at the front of the restaurant. Since it was past lunchtime, we settled in for a meal at this restaurant. We only found out that this restaurant is a Michelin one-star establishment after eating there. With our stomachs filled, we are off to our next sight – the French Concession.

French Concession (法租界)

The French Concession was an area administered by the French Government for almost 100 years. To date, the area is still filled with buildings left behind by the French from yesteryear. We were drawn to this area by the former site of the French Concession Joint Courts (法租界公审会廨旧址), which appears to be the only notable attraction in this vicinity. Little did we know that there were more historical buildings in this area. We took the metro from Jian’an Temple Station to Dapuqiao Station and walked along the streets. Our first impression of the French Concession is that the streets in this area have a rustic charm reminiscent of China in the 50s. The trees planted on both sides of the street reminded us of the Champs-Élysées, which we had visited in Paris. Despite heavy traffic, the streets of the French Concession remained peaceful. Our plan was to visit the former site of the French Concession Joint Courts and then head to Tianzifang. As we were walking along the street, we discovered Tianzifang was just to our right. Since we were already here, we made some last-minute changes and took a detour to Tianzifang.

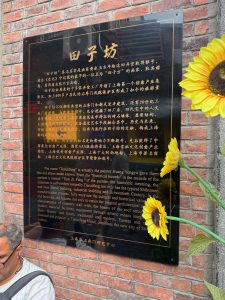
Tianzifang (田子坊)

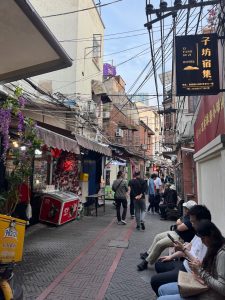
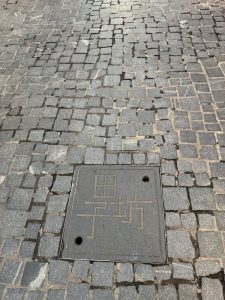
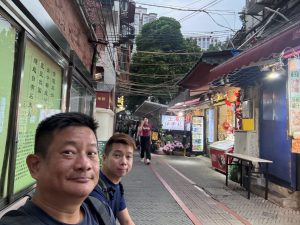
Tianzifang is very well concealed from the outside. Gates surround the area, giving it a residential appearance. We would have missed it if not for the sign hung on the outer gates. Tianzifang is essentially a shopping district comprised of traditional residential buildings that do not conform to any city planning regulations. Walking in Tianzifang gave us the impression that these former residential buildings were built on sites at the will of their former owners. These buildings were not uniform either; we saw different facades of these buildings, some with their bricks exposed, while others were plastered in cement. Some of these buildings even span across the pavement below. It is this irregularity that gave Tianzifang its character and charm. Relinquished of its former role as residential buildings, the buildings in Tianzifang have been repurposed to house boutique shops, souvenir stores, bars and restaurants. Walking in Tianzifang not only felt like strolling through old Shanghai, but it also felt like navigating a maze. Although we are not big shoppers, we still managed to spend an hour browsing through the shops and eventually found a shop selling locally designed T-shirts, which were reasonably priced for their high quality. Generally, we thought the prices in Tianzifang were lower compared to those on East Nanjing Road.

Sinan Open Air Museum (思南露天博物馆)

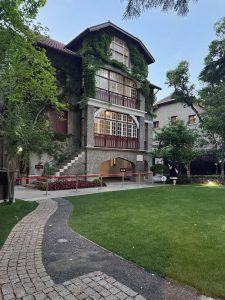
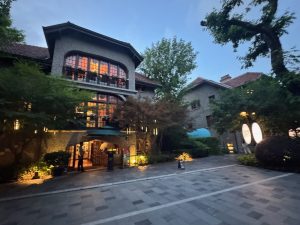
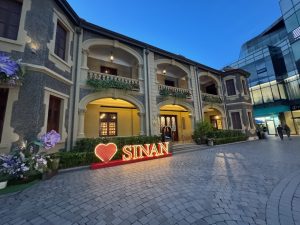
Leaving Tianzifang, we continued our leisure walk to the former site of the French Concession Joint Courts, which lies across the street. When we arrived at the building, it seemed to be a police station and closed to the public. We did not bother entering the premises or asking if the building was open to the public. Seeing it was getting late, we headed to our final destination for the day – Xintiandi. As we followed the directions on our AMap app (China’s equivalent of Google Maps) towards Xintiandi, we came across some European buildings that were very well-preserved. Unknowingly, we have wandered into the Sinan Open Air Museum. Walking amongst the buildings here felt like we were transported to some small town in Europe; we almost forgot we were in Shanghai. Sinan Open Air Museum does not display relics. Every building, every street lamp, every cobblestone street is a relic that showcases European influence in Shanghai’s history. These buildings were once residential mansions but have been converted into restaurants and cafes. As there were not many people walking in this area, the stroll in the Sinan Open Air Museum felt peaceful.

Xintiandi (新天地)

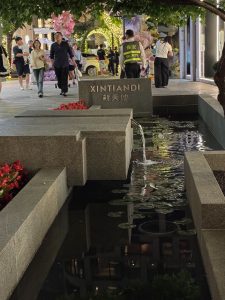
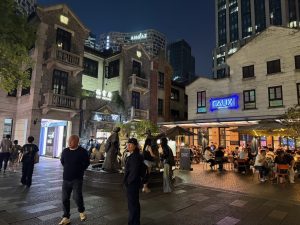
Leaving Sinan Open Air Museum and 15 minutes walk later, we arrived at Xintiandi. Xintiandi is a relatively small area compared to Tianzifang, primarily comprising restaurants and bars, as well as a handful of shops, housed in stone and brick buildings. As it was dinner time, Xintiandi was especially lively with diners chatting and the clinking of wine glasses. Several large shopping malls occupy the land adjacent to Xintiandi. Filled with luxury boutiques and billboards so bright that they illuminated the street. As there wasn’t much for us to do here, except watch people eating and drinking, we didn’t stay long and headed back to our hotel via the subway.

Night View of the Bund

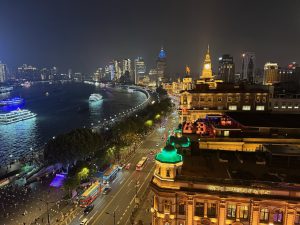
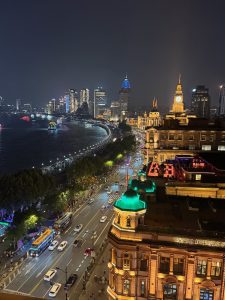
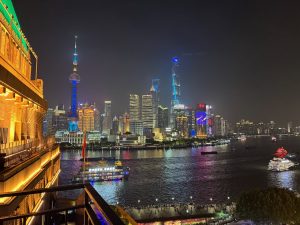
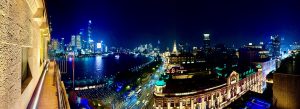
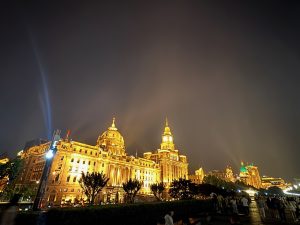
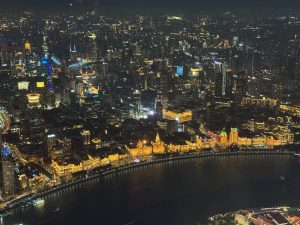
We returned to the hotel around 8:30 pm, before the lounge in our hotel closed. Our butler had pre-arranged for us to visit the rooftop terrace. The staff at the lounge escorted us to the rooftop terrace, where we were treated to a stunning night view of the Bund and Pudong area. Being located on the Bund, facing the Pudong area, the rooftop terrace of our hotel provided an unobstructed view of the buildings in Pudong, illuminated by neon lights. From the roof terrace, we were also able to catch part of the buildings on the Bund dressed in their orange garb. In contrast to the large crowd below at the Bund, the view up here was peaceful.

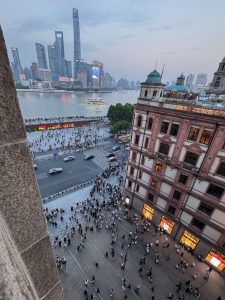
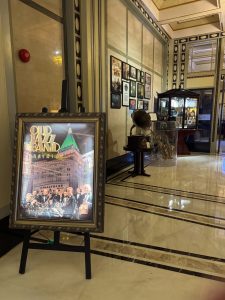
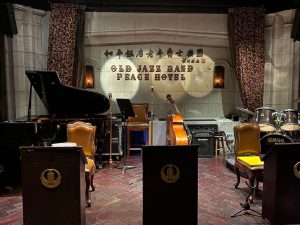
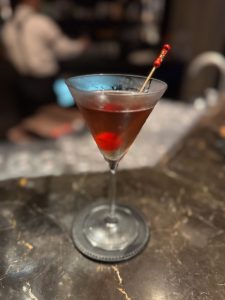
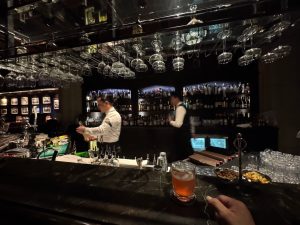
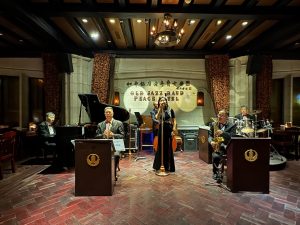
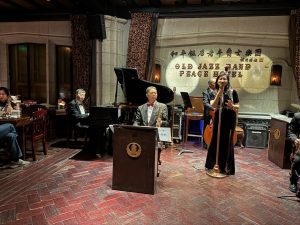
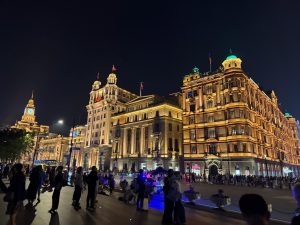
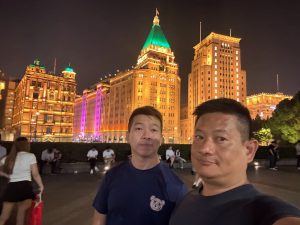
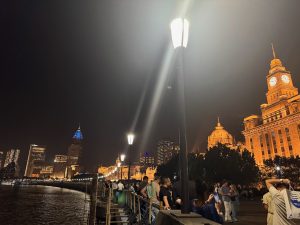
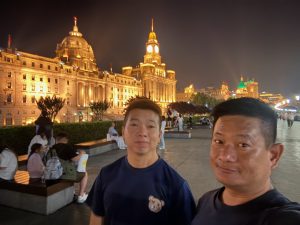
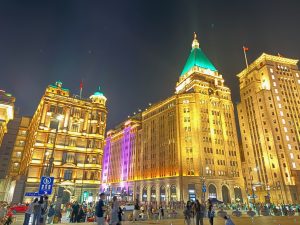
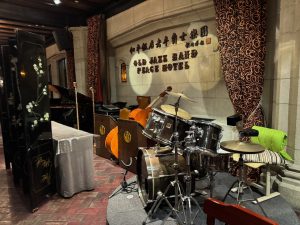
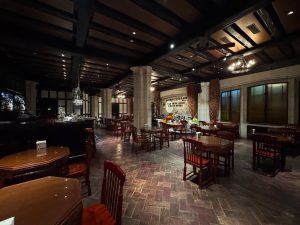
After visiting the roof terrace, we headed to the famed Jazz bar in the Peace Hotel. Our butler had made a reservation for us at the bar to watch the world’s oldest band perform. We were privileged to be given front row seats with an unobstructed view of the band performing. As we did not have a good shot of the Bund, we headed out to the promenade after the jazz performance to take some pictures of the Bund. The buildings on the Bund were especially beautiful at night with the orange light cast onto them. The promenade was bustling with life, with visitors taking pictures of the Pudong skyline and street vendors trying to sell their photography services despite being late at night. We returned to our hotel to rest for the night after taking our fair share of pictures.

Shanghai Day 2 (15 May 25): Day Trip to Hangzhou – Heaven on Earth

There is a Chinese saying: while there is Heaven above, there are Suzhou and Hangzhou on Earth (上有天堂,下有苏杭). This saying compares the scenery of Hangzhou and the gardens in Suzhou to heaven. Since we had some time in Shanghai, we decided to take a day trip to Hangzhou.

From Shanghai to Hangzhou

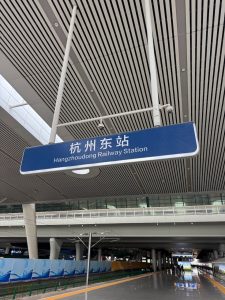
Hangzhou is approximately 179 km from Shanghai, and the fastest way to travel from Shanghai to Hangzhou is by high-speed train, which takes about 1 hour. Shanghai has two train stations: Shanghai Station and Shanghai Hongqiao Train Station. Although slightly farther from where we stayed, we took the train from Shanghai Hongqiao station as there are more connections between the two cities here. Three train stations serve the city of Hangzhou: Hangzhou Station, HangzhouDong Station, and HangzhouXi Station. Hangzhou Station is in the centre of the city, but connections between Shanghai Hongqiao Station and Hangzhou Station were few. HangzhouXi Station is far from the city, while HangzhouDong Station offers more connections and is closer to the city. Train tickets can be bought at the train station or via Trip.com. We purchased our tickets through the Alipay app, which includes a link to the Trip.com microsite.

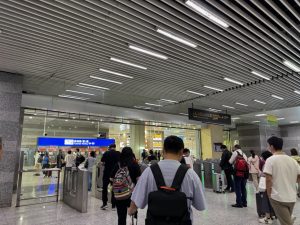
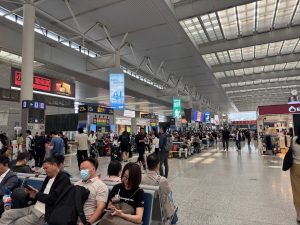
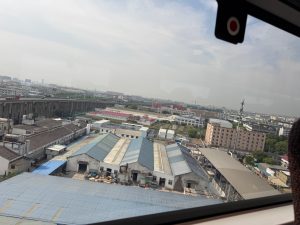
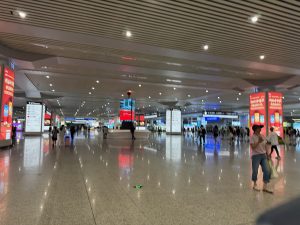
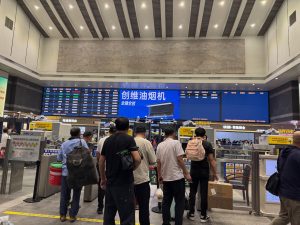
Shanghai Hongqiao Train Station is well-connected to Metro Lines 2 and 10, both of which pass through East Nanjing Road Station, where our hotel is located. It took about 50 minutes on the metro from our hotel to the train station. We set out from our hotel at 7:00 a.m. to catch our 8:15 a.m. train, taking into account the transit time between our hotel and the train station, as well as any other potential delays that might occur along the way. Our train to Hangzhou departs from level 2 of the train station. There are marked signs in both Chinese and English throughout the station that guide us to our destination. We were also not required to collect any tickets before boarding our train. Our passport details have been entered into the train ticketing system. We just need to scan our passports at the manned counter to gain access to the platform. The ride on China’s high-speed train was very smooth and comfortable; we were even given a bottle of water and some snacks for the duration of the ride. To get to the city from the HangzhouDong train station, we can take the metro or hail a cab. As we have limited time in Hangzhou, we went for the cab option. Getting a Didi (China’s Uber equivalent) was super easy. Although we didn’t have a local number, we were still able to use Didi through the Alipay app. There are designated areas in the train station for Didi pickups. At the pick-up point, a large display shows the cabs already pulled in, and we just need to look out for the car’s plate number and head to the parking lot.

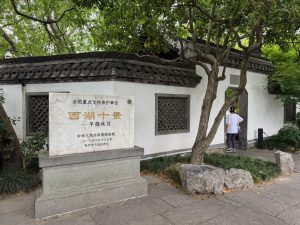
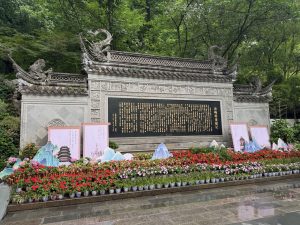
West Lake (西湖)

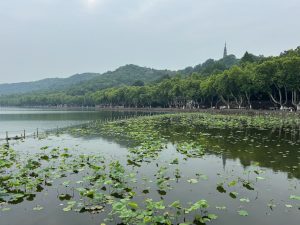
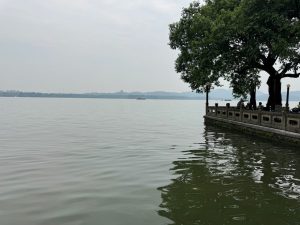
Visiting Hangzhou without coming to West Lake is like going to Paris and not visiting the Eiffel Tower. West Lake is the main attraction in Hangzhou, and it is this lake that gives Hangzhou its title of “Heaven on Earth.”

The West Lake upclose

Baochu Pagoda (保俶塔)

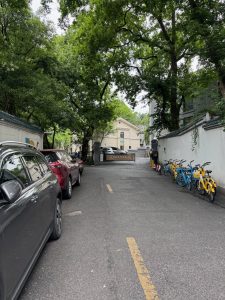
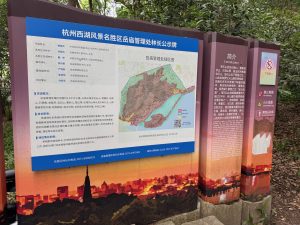
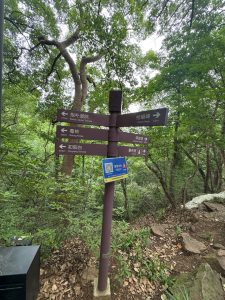
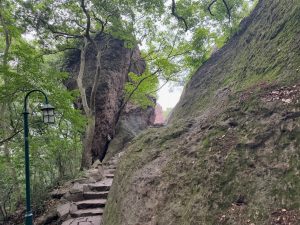
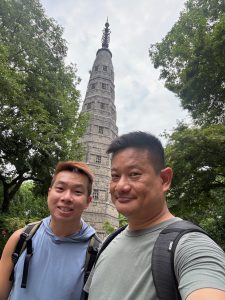
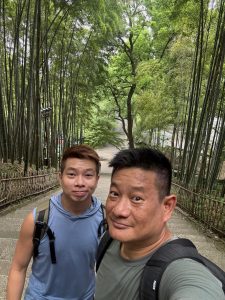
The first sight we visited in Hangzhou was Baochu Pagoda, one of the two pagodas in West Lake. Perched on top of a hill, we thought scaling up this pagoda would give us a great view of the entire West Lake. As our Didi ride came to a stop, we were dropped off at a neighbourhood-looking area. It took us 30 minutes to travel from our drop-off point to Baochu Pagoda. The walk to Baochu Pagoda requires a short hike up a small hill through a forested area. Occasionally, we saw groups of elderly people having fun in the open spaces along the path. As we walked along the path with signs pointing to the pagoda, the forest scenery gave way to rocky formations. The pagoda is not far from a pavement that seemed to wedge between narrow rocks.

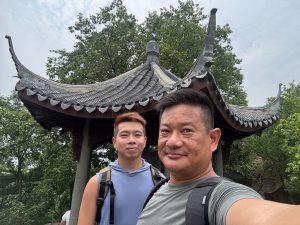
Past the rocks, we arrived at an open area, where we could see the pagoda sitting in one corner. From here, we were treated to a view of West Lake. We could see the mountains surrounding the lake as though they were protecting it. The view would be better if not for the trees from the forest below, which partially block the view. Nonetheless, we were able to see the Broken Bridge from one of the many viewpoints here. We wasted no time and approached the Baochu Pagoda. The moment we arrived, we were disappointed to find that the slender pagoda was closed to the public, and we were not able to climb to the top of the pagoda. Since we made it up here, we visited a nearby rock and pavilion before heading back down. As we walked down the staircase next to the pagoda, we noticed that this path was an easier climb. This is when we realised that we should have put the Baochu Pagoda car park as the drop-off point.

Broken Bridge (断桥)

Our next stop was the Broken Bridge, about a 10-minute walk from the Baochu Pagoda. We had a brief rest at Starbucks on the southern part of the lake to escape the heat. The weather was rather humid when we did the climb to Baochu Pagoda. After resting briefly, we walked across the road to the Broken Bridge. The Broke Bridge was essentially a series of three sandbars connected by bridges. This place was given the name “Broken Bridge” as these bridges connecting the three sandbars appear to be broken when viewed from a distance during winter due to the snow. The Broken Bridge was the setting in the Chinese folklore “Legend of the White Snake” (白蛇传), centred around the romance between a man and a White Snake Spirit. Walking on the sandbars of the Broken Bridge brought us close to the West Lake; it felt like walking on the lake itself. We could see Baochu Pagoda sitting atop the hill we were on moments ago, as though she was flexing her beauty on the shores of the lake from the Broken Bridge. Locals taking their leisurely walk along the bridge, boats pulling off from the sandbar, paddling on the lake, and occasionally some locals feeding the ducks on the lake are common sights along the sandbar. Walking on the Broken Bridge was mostly relaxing, but we had to avoid the many tourist trams along the way. As our next stop, Leifeng Pagoda, was a distance away from the Broken Bridge, we initially wanted to take the tourist tram (costs RMB 80 per person). We managed to find one where the seats facing the back were empty. Unfortunately, the driver was on his way for his lunch break. We continued our walk towards the end of the sandbar, looking out for the next tram with the last row empty. Soon, we found ourselves at the end of the sandbar. We spotted some buses making a U-turn. We approached a lady who appeared to be a staff member, and she recommended that we take one of these buses to Leifeng Pagoda, which costs only RMB 2 per person.

Leifeng Pagoda (雷峰塔)

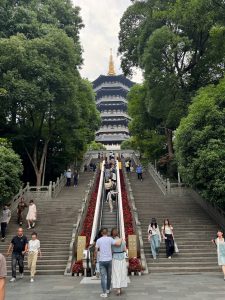
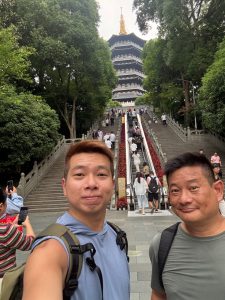
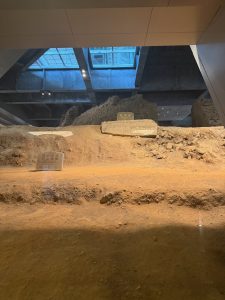
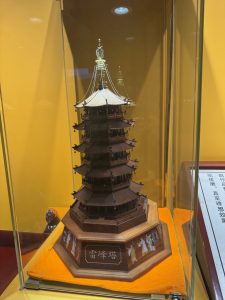
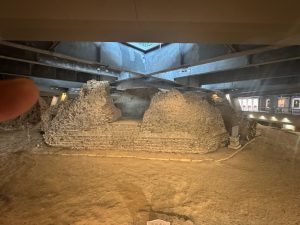
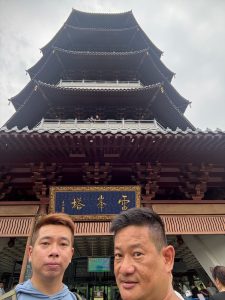
The bus ride to Leifeng Pagoda took only 10 mins, saving us time and a lot of walking. To get to Leifeng Pagoda from the Broken Bridge, we rode the bus for eight stops and alighted at Sutinankou (苏提南口). While the Baochu Pagoda was often described as the beauty of West Lake, in contrast, the bulky appearance of the Leifeng Pagoda was often associated with a monk. The entrance to Leifeng Pagoda costs RMB 40 per person. We visited the basement level first, followed by heading to the ground floor and taking a lift up to the top floor of the pagoda, and slowly making our way down the pagoda. The basement of the Leifeng Pagoda exhibits its original structure. Leifeng Pagoda was originally built in 977 AD as a monument to house the hair of Buddha. The pagoda collapsed due to excessive brick theft and nearby construction work. The pagoda we see today was rebuilt and reopened in 2002. Leifeng Pagoda is also the setting of the story in “Legend of the White Snake”, where the white snake spirit was trapped under the pagoda for years until her son released her. From the original structure on display in the basement, I wonder if the locals linked the collapse of the pagoda to the efforts of the white snake’s son in saving his mother. In addition to the original structures, the basement also features the original bricks and some Buddhist relics.

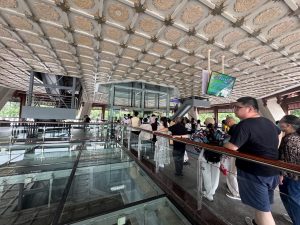
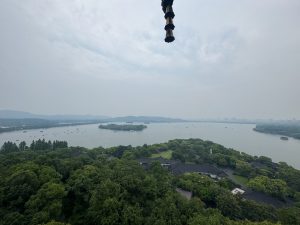
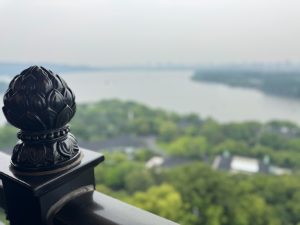
We headed to the ground floor to take one of the lifts to the top of the pagoda. The lift only stops at level 5 of the 7-storey pagoda; visitors must walk up the remaining two levels. As we emerged from the lift on level 5, we were captivated by the golden underdome of the level, but didn’t spend time looking at it. Our goal is to go to the top of the pagoda. At the top of Leifeng Pagoda, we were treated with an unobstructed view of the West Lake. This offers a far better view of the lake compared to the hills where the Baochu Pagoda is located. From here, we can see the Baochu Pagoda, seemingly emerging from the ground like a needle being stuck, as well as the numerous bridges on West Lake and the islets within the lake. Most of the visitors on this level focus on the view of the lake, and we found fewer crowds at the side facing the hills behind the pagoda. Although not as scenic, the hills stretching to the horizon evoke a certain tranquil vibe. It is a pity that today was a hazy day.

On our way up, via the lift, we saw numerous carvings on each level. We were able to take a closer look at them while walking down the pagoda. Each level depicts carvings of different scenes. The most memorable ones are those on the 5th floor and the 1st floor, depicting the birth and enlightenment of the Buddha, and scenes from “Legend of the White Snake”, respectively. These carvings, other than being a work of art, tell a story on their respective levels. The carvings are intricate, and one can spend hours looking at them. I thought the RMB 40 for the Leifeng Pagoda was worth it, as we got a better view of West Lake compared to the hills of Baochu Pagoda.

QingHefang (清河坊)- The Historic Commercial Centre of Hangzhou

It was already 3 pm by the time we were done with Leifeng Pagoda. We spent the remaining 4 hours in Hangzhou shopping on the iconic Hefang Pedestrian Street (河坊街). As we were feeling a little peckish, we hailed our ride using the Didi app in Alipay, which took us to Hefang Street in 20 minutes, instead of taking the bus (which would have taken us 1 hour). Hefang Street, one of the ancient streets in the Qinghefang commercial centre, is an ancient street where the business and political centre was located. Qinghefang comprises three streets: Hefang Street (河坊街), Wushan Square (吴山广场) and Southern Song Imperial Street (南宋御街). Today, these streets still preserve ancient buildings that have been repurposed as shops selling souvenirs to visitors. Walking along Hefang Street is like stepping right into the pages of history. Despite the numerous shops around, we thought the shops sold mostly the same things; it felt like these shops were copied and pasted, with the same order of shops selling the same things repeated over and over as we walked through the street.

We tried to cover every street on Hefang Street and found ourselves in front of an ancient gate building with the Chinese words “Drum Tower” (鼓楼) inscribed on it. This tower was used to mark time and announce important events in the past. Today, visitors can only walk under the Drum Tower to a street filled with restaurants and eateries. We traced our footsteps back to Hefang Street and came to the Southern Song Imperial Street. Compared to Hefang Street, the Southern Song Imperial Street sees less foot traffic and feels more peaceful. This street is shorter than Hefang Street, with mainly art galleries.

We had 1 hour left before our train back to Shanghai departed. Instead of the HangzhouDong Station, we managed to find a train that departs from Hangzhou Station, about a 25-minute walk from Hefang Street. As we still had some time, we chose to walk to the train station. Along the way, we encountered the peaceful and tranquil side of Hefang Street. We arrived at Hangzhou Station in time for our train, which took us back to Shanghai in one hour. We shopped for food below our hotel before returning to our room to rest for the night.

Shanghai Day 1 (14 May 25): Hello Shanghai -Marvelling the sights in Pudong and the Bund

This is a continuation of our cruise from Shanghai to Fukuoka. We were primarily in Shanghai for the cruise and decided to spend a few more days exploring the city after our cruise trip ended. The last time I was in Shanghai was almost three decades ago, and I thought it was a good time for me to return to the city. Our cruise ship was already docked when we woke up this morning. After having breakfast at one of the restaurants onboard, our Royal Genie (butler) met us at 8.30 am to escort us off the ship, ensuring that our disembarkation was smooth. After meeting the driver that we arranged with our hotel for land transfers within Shanghai, we made our way to the hotel for check-in. The plan today was to take it easy and visit the sites near our hotel.

The Bund

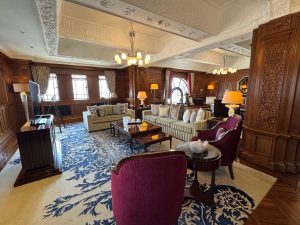
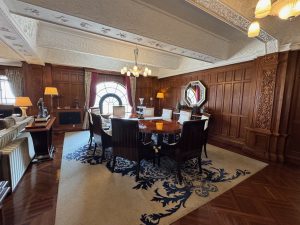
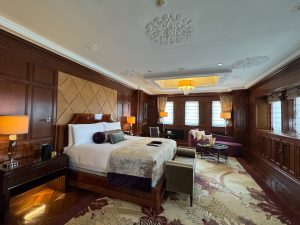
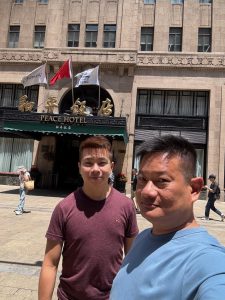
Our hotel is situated on the bank of the Huangpu River on the Bund. The Bund is an iconic stretch of Shanghai, where the old financial centre and activities for the rich and famous are located. Our driver pulled up at the iconic Peace Hotel, where we would call home for the next four nights. At the hotel, we met our butler, Gordon, who gave us a brief orientation of the hotel. Before heading to our room for in-room check-in, Gordon gave us a tour of several suites, including the River View Suite and the Japanese Suite, one of the seven national suites. The highlight of the brief tour was a visit to the Sassoon Suite, the hotel’s Presidential Suite. Perched on the 10th floor, the Sassoon Suite was originally the apartment of Victor Sassoon, the hotel’s original owner. This suite has a vantage point of the Huangpu River and directly faces the Pudong district across the river. Entering this suite, we felt immediately transported back in time to 1920s Shanghai. The suite is very well restored to its original setting. Gordon told us most of the decor we saw in this suite was restored based on the old photos of the suite. We were also told that this suite is the only one with a terrace and that President Obama was a guest in the Sassoon Suite during his visit to Shanghai. After the tour, we were escorted to our room for check-in, where our luggages were already being delivered to the suite.

Our Private Tour of the Iconic Peace Hotel

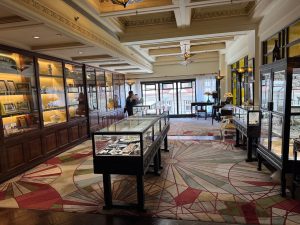
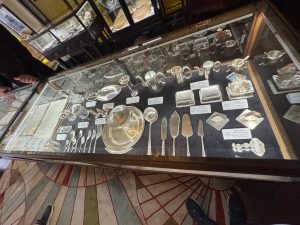
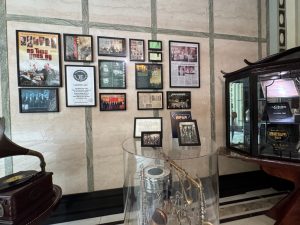
Fairmont Peace Hotel itself is an attraction on the Bund. Its green roof has been an icon on the Bund since the 1920s. Naturally, many significant events took place at the hotel. With such a rich history, the hotel offers complimentary scheduled historic tours of the hotel and its museum, conducted in both English and Chinese. Gordon organised a private historic tour of the hotel for us. We met up with our guide, Richard – the hotel’s historian, at the reception. Our tour began at the hotel’s museum, one floor above the reception. Richard took us through the exhibits in the small museum, from the famous persons who had stayed in the hotel and the suites they had occupied, to the silverware and menus crafted for specific events, to the important events and meetings hosted at Peace Hotel. Richard then brought our attention to a bill that was dated in the 1930s. Although the amount stated in the bill seems small compared to today’s standards, considering inflation and the cost of living at the time, Richard mentioned that the bill was easily equivalent to a year’s salary for a typical Shanghainese in the 1930s. Of the exhibits, the one that intrigued me the most was a small metallic disc. Richard pointed out this was a metallic vinyl record, which stored music played in the Jazz bar back in the days, and a memento for guests. I jokingly remarked that this was the predecessor of CDs.

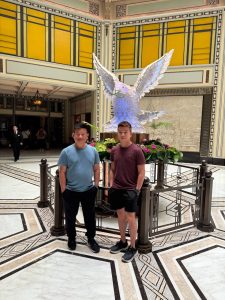
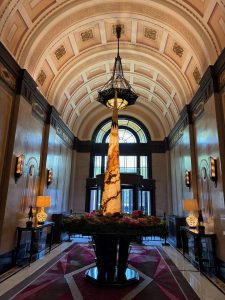
After the tour of the museum, we were brought to the octagon hall, where Richard directed our attention to the large dove sitting in the centre of the hall. This dove is made of 1,500 liuli (琉璃) crystal and weighs more than 1,000 kg to symbolise peace. We were drawn to the metallic murals hanging on the walls of the octagon hall, where Richard pointed out that they depicted the old times in Shanghai. Our tour continues through a hallway where a collection of movies and TV shows that were shot in the Peace Hotel. Our tour concludes at the small hall at the end of the corridor. Richard explained that this was the original main entrance of the hotel, but it had been closed permanently due to feng shui reasons. The significant structure in this original entrance was the split stairs, which are one of the original features since the hotel was built. We were shown a picture of Charlie Chaplin on the stairs.

East Nanjing Road – The Ever-Busy Street

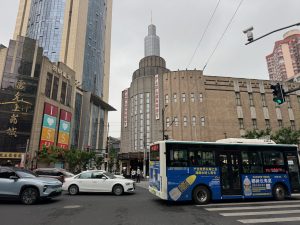
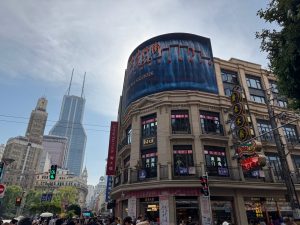
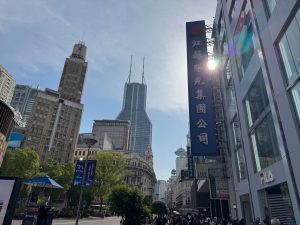
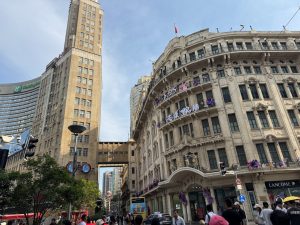
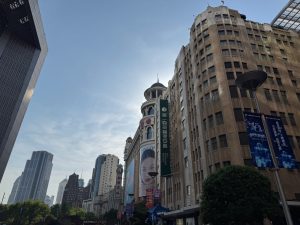
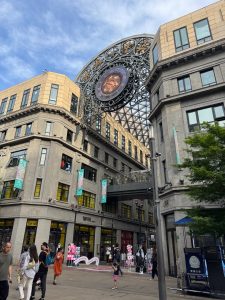
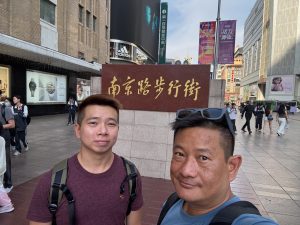
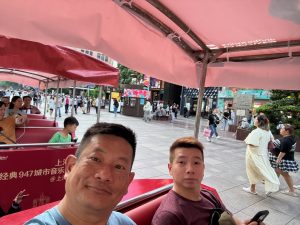
After our tour of the hotel, we returned to our room to rest a little. Soon, hunger pangs hit us, and we headed out to the restaurant that Gordon recommended near the hotel for lunch. After lunch, we wanted to purchase a stored-value metro ticket for Shanghai, which would provide convenience when taking the metro around the city. However, the nearest subway station to our hotel does not sell them, and we had to go one station further to People’s Square Station to get them, which is further down East Nanjing Road. Since we had the intention to stroll along East Nanjing Road, we took this opportunity to walk along the street towards People’s Square Station. East Nanjing Road is always crowded with people, regardless of the day of the week. East Nanjing Road is dotted with buildings that were left behind from the World War era, when the city was divided and ruled by different nations. As a result, we see some buildings with a distinctly European architectural style and others with a distinctly Chinese style. Walking along the street feels like walking in history. There are many smaller shops along East Nanjing Road, mainly selling famous Shanghai snacks and souvenirs, as well as eateries and cafes. We also spotted several larger department stores, where most of the luxury brand goods are housed, and fashion boutiques along the road. After getting our transport cards from People’s Square Station, we had the option of taking the metro one stop back to East Nanjing Road Station or walking back. As we were a bit tired after walking, we hopped onto one of the tourist tram rides (RMB 10 each) and saw East Nanjing Road from a different perspective.

Pudong (浦东) District

We wanted to catch the sunset on the Shanghai Tower, so we headed to the Pudong Area, Shanghai’s financial centre. There are two main ways to access the sights in Lujiazui (陆家嘴): by metro or ferry.

Crossing Huangpu River

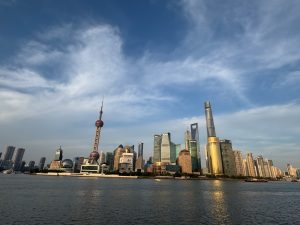
Instead of going underground, where we would miss the iconic sight of having both the Bund and Pudong area in one frame, we opted for the Shanghai Ferry ride across the Huangpu River to Lujiazui. Jingling East Road Ferry Terminal is the nearest ferry pier to East Nanjing Road. To get to the ferry terminal, we headed for the Bund and walked along the promenade. The ferry terminal is a stone’s throw from a lighthouse-looking tower along the promenade. Crossing the Huangpu River via the ferry costs RMB 2, payable with a Shanghai metro card or Alipay. Shanghai Ferry has been transporting Shanghainese since 1911, over 100 years ago. The ferry was the only means for Shanghainese to reach the Pudong area before the tunnels and bridges were built. Today, the Shanghai Ferry primarily serves sightseeing purposes, and the last ferry service across the river concludes at 6:30 pm. The best view of the Huangpu River from the ferry was from the back of the boat on the upper deck. We saw a beeline of people rushing for the upper deck and did likewise. Fortunately, we were able to secure a great spot at the back of the boat to enjoy the view of Shanghai’s iconic landmarks. As the ferry slowly pulled away from the pier, we were treated to a view of the buildings on the Bund. The view was the best in the middle of the river, where we were able to capture landmarks on the Bund and Pudong in one frame.

Shanghai Three Towers (上海三件套)

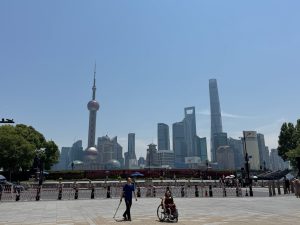
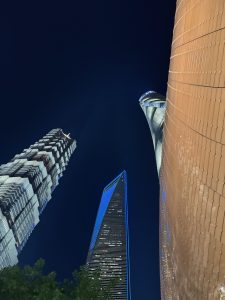
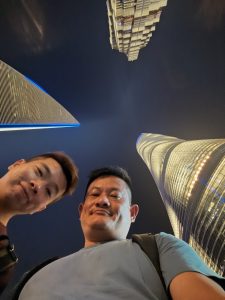
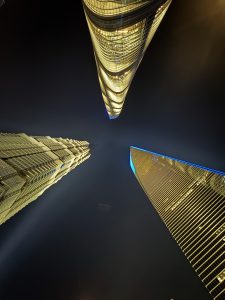
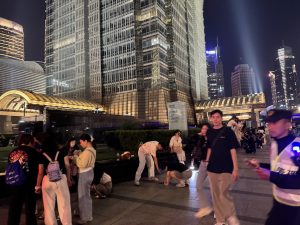
The ferry docked at Dongchang Road Ferry Terminal, and we are officially in the Pudong district. The Pudong area used to be farmland, where no one wanted to stay. Fast forward decades later, the Pudong area is one of the highly sought-after areas with skyrocketing property prices. Pudong had been transformed from farmlands to the city’s financial centre. In the centre of the financial centre lies the Shanghai Three Towers (上海三件套). Our original plan was to catch the sunset from the top of the Shanghai Tower and then return to take night shots of the three towers. Since we were walking past, we took the opportunity to take pictures of the iconic three towers. There is a specific spot where locals gather to take pictures of the three towers is the small open area adjacent to Jin Mao Tower. It is even charted on the Chinese equivalent of Google Maps, as Wang Hong da ka jing dian (网红打卡景点), which translates to a social media influencer’s picture-taking spot. One will not miss the spot, as we saw locals placing their phones on the ground, taking pictures of themselves with the three towers. This is the spot where we can capture the tops of all three buildings – Jin Mao Tower, Shanghai Tower, and Shanghai World Financial Centre, all pointing towards each other in one frame. We tried to follow the locals’ lead and took some pictures before dark. After taking our fair share of pictures, we headed to the Shanghai Tower to view the city from high up.

Shanghai Tower – Night View of the Icons at the Top of Shanghai

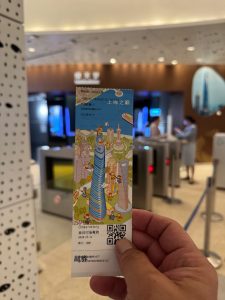
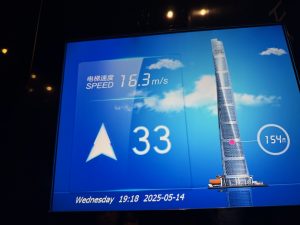
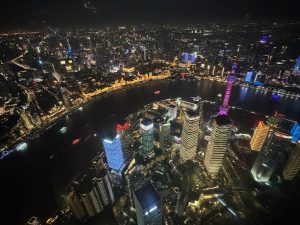
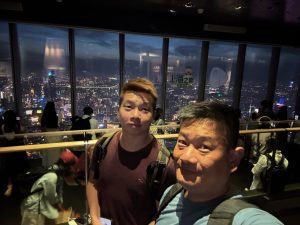
Several towers in the Pudong area offer a view of the Huangpu River and the Bund. On the one hand, I wanted to visit the Oriental Pearl Tower, as I had seen it for the first time 30 years ago. However, this shorter tower may not provide the best view of the Bund. The other tower is the taller Shanghai Tower, which features the highest observation deck in the country. The Shanghai Tower is approximately 632m tall, making it the third-tallest building in the world. Although it is not the tallest building in the world, the Shanghai Tower’s observation deck, at 546m, is higher than that of the Burj Khalifa in Dubai, at 452m. There are two prices for the entrance to the Shanghai Tower. RMB 180 only got us to the observation deck on level 118, while the more expensive RMB 268 ticket includes entrance to the light show on level 126. We bought the more expensive RMB 268 ticket, thinking we would be able to look out into the city at the tower’s highest vantage point. Our first stop was the observation deck at level 118, where a lift sped us up over 500m in under 3 minutes. The view from the observation deck on level 118 was stunning! The limits of Shanghai city seem to stretch beyond the horizon. From here, we were able to see the bend of the Huangpu River and the entire stretch of the Bund, as well as the Oriental Pearl Tower situated next to the river. The view of the city at night was especially beautiful. As we were walking around, we were telling ourselves, “This is just the beginning, the view on level 126 would be better”.

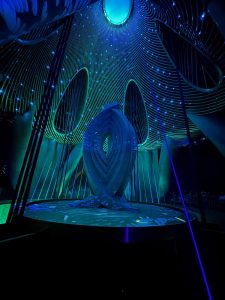
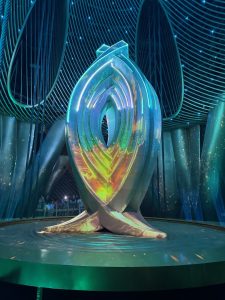
We took another lift up to level 126. Entrance to that level is scheduled at a specific time, probably for crowd control purposes. Our excitement for level 126 turned to disappointment upon arrival at level 126. Instead of the floor-to-ceiling windows we saw on level 118, there were walls enclosing this level. In the centre of the level was a large structure, dubbed the Intelligent Eye of Shanghai. This is the damper of the tower, installed to counter the lateral movement of the tower due to wind or earthquake. Unlike the damper in most buildings, which is typically spherical, the damper on the Shanghai Tower resembles the eye of a dragon. We were urged to spread out for a light show. This is when we realised the timed entrance to this floor is actually for the light show. As beautiful as it might be, we felt a little bored since we weren’t exactly into light shows. The light show lasted about 10 minutes. We felt paying the extra for access to level 126 without the view of the city was not worth the money. Unless one is into light shows, I’d rather spend the additional money on food.

We descended the tower for dinner after the light show. We only managed to find a restaurant at the tower that was still open. After dinner, we returned to the photo spot to take night shots of the Shanghai Three Towers before returning to our hotel via the metro to rest early. We had an early start tomorrow, catching the high-speed train to Hangzhou.

Fukuoka (12 May 25): One Day in Fukuoka – Sights and Shopping in the Largest City on Kyushu

Arrival at Fukuoka

We had a port day in Fukuoka. As our cruise ship was departing the port at 6:30 pm, we only had about 12 hours to explore Fukuoka. Fukuoka Cruise port is not far from the city, and is very well connected by local buses and taxis. Local buses 11, 19, and the BRT connect the port to the city at 15-minute intervals. The bus stop is not located at the cruise terminal, but in front of the Hakata Port International Terminal building, next to the cruise terminal. The bus ride to the city centre took about 19 minutes, and costs ¥260 per trip. As we are limited to Fukuoka city due to our tight schedule, we can only visit the sights within the city itself.

The Temples and Shrines of Fukuoka

Temples and shrines are the only sights in Fukuoka city, other than an old shopping street. We visited these places of worship in the morning and did some shopping after lunch.

Shofukuji Temple: Japan’s First Zen Temple

Our first stop on the temple hop is the Shofukuji Temple. Gofuku-Machi bus stop, four bus stops before Hakata Station, is the nearest to the temple. Shofukuji Temple dates back to the 12th century and is the first Zen temple in Japan. The temple grounds are huge, and without a map to guide us, we decided to walk in as far as we could and work our way out. Walking past the main gates to the temple, we can almost immediately feel a sense of zen. One would automatically soften one’s volume when walking within the temple grounds. The gardens of the temple are populated with rows of tall trees, and with the little footfall, walking in the temple grounds felt very peaceful. A wall surrounded the buildings at the back of the temple grounds. We walked along the wall in search of an entrance to these buildings. Little did we know that this part of the temple was off-limits to the public. We assumed these were the living quarters of the temple priests and did not bother looking for an alternate entrance. We spotted a large wooden structure sitting in front of the cordoned-off area and decided to investigate it.

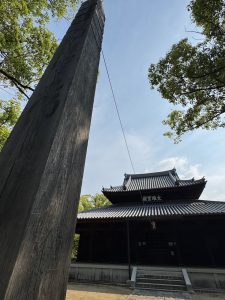
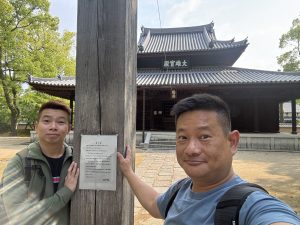
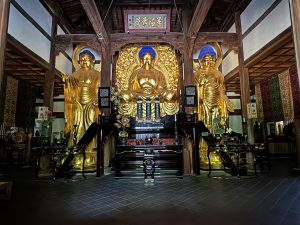
This large wooden building turns out to be the main temple in Shofukuji Temple. The main temple is also off-limits to visitors. There is a window through which we were able to see inside the temple. Three large golden statues of Buddha occupy the space inside the building. The interior of the building looked old but was very well-preserved. We spotted a string being tied to the hands of each of these Buddhas and did not think too much of it. Since there was nothing much we could do here, we left after paying our respects to the Buddha statues. As we turned around, we spotted a tall wooden pillar in front of the temple building, about 5m away. This is when my friend pointed out a string that runs from this pillar into the temple, which might mean this is how devotees connect to the Buddha statues inside. We headed back to the temple and noticed the string is indeed connected to the Buddhas inside. We headed out and prayed to the pillar, transmitting our wishes through the string to the Buddhas.

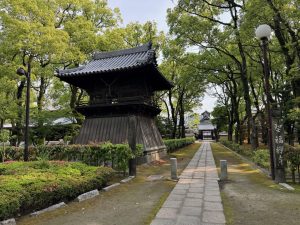
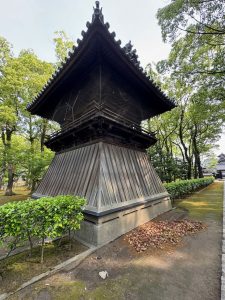
As we were walking out of Shofukuji Temple, we returned to the ancient wooden bell tower we saw earlier. However, we did not spot any entrance that we could enter to scale the tower. Seeing there was really nothing much we could do here, we headed back to the entrance of the temple, passing a small stone bridge over a koi pond and made our way to the next attraction. I thought visiting the temple via the koi pond, heading to the large temple with the Buddhas, and returning for a view of the bell tower as one is exiting the temple grounds was the most efficient way to visit the temple. Since most of the temple is closed to the public, it shouldn’t take more than 15 mins to visit the temple.

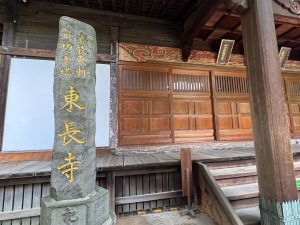
Tochoji Temple: The Oldest Shingon Temple on Kyushu

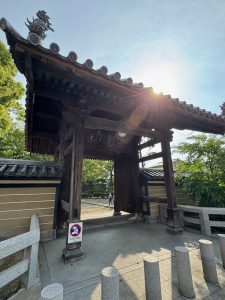
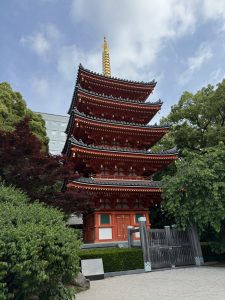
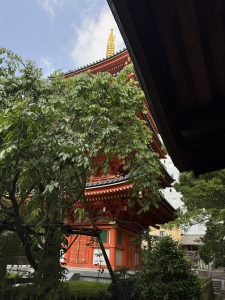
We can see our next stop right across the road from Shofukuji Temple. From the entrance of Shofukuji Temple, we can also see the five-storey pagoda. To enter the temple, we had to walk around the corner to the main road, where the temple’s entrance is located. Founded in 806 AD, Tochoji Temple is the oldest Shingon temple in Kyushu. The temple looked very well maintained, and its wooden main entrance is perhaps the oldest-looking structure here. The courtyard of the temple is a vast open space where we can see a pagoda, a large main prayer hall, and an octagonal pavilion. We were drawn to the bright red five-storey pagoda on the side. Topped with a golden spire, this pagoda is what one would typically associate with a Japanese pagoda. Like all pagodas in Japan, this pagoda is also closed to the public. Next to the pagado is a modest wooden building with its doors closed.

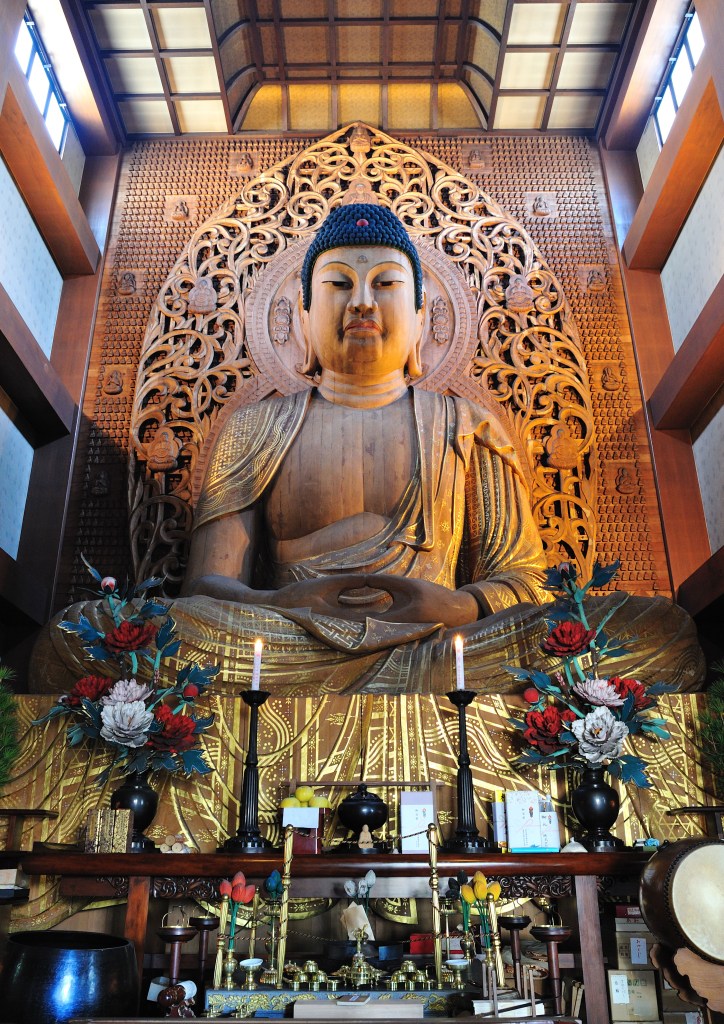
Tracing our footsteps back to the temple courtyard, we walked past the main prayer hall and arrived at an annexe building. This is what people come to Tochoji Temple for: to view a giant statue of the Buddha. The giant Buddha is carved out of wood and sits solemnly on the second floor of the annexe building. Visiting the giant Buddha attracts an entrance fee of ¥50, and photography is prohibited in this part of the temple. The giant Buddha was meticulously carved, with a lifelike, solemn expression on its face. A sign stated that there are thousands of small Buddha statues carved into the wooden wall behind the giant Buddha. One of the more interesting things to see here, besides the giant Buddha, is the Tunnel of Hell, underneath the Buddha. Through this tunnel, we were shown how the Japanese believe one would go through after death. We saw plastered statues of the levels of hell and the punishment that one would go through for the misdeeds committed in life. Nearing the end of the tunnel is a pitch black section, where we can’t even see our hands. Holding on to the walls, feeling our way through, we arrived at a light. This section of the tunnel seemingly symbolises the attainment of nirvana, with the dead meeting Buddha in a hall filled with bright lights.

The giant Buddha in Tochoji Temple (Source: https://gofukuoka.jp/spots/detail/26928)

After visiting the giant Buddha, we returned to the main prayer hall to offer our prayers. We did not see any statues of Buddha inside this prayer hall; instead, we saw some tablets. Since there is nothing else we can do here, we exited the temple and headed to our next sight.

Kushida Shrine: The Spirit Centre of Fukuoka

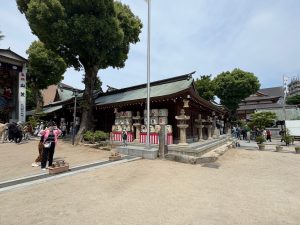
Our next stop, the Kushida Shrine, is about 7 minutes on foot from Tochoji Temple across the road. Compared to the previous two temples, this shrine is very crowded, mainly with passengers from our cruise ship. We entered the shrine through its side gate. Kushida Shrine is the spiritual centre of the residents of Fukuoka, and the locals believe the deities here protect and bless them. The main shrine features typical, elegant woodwork adorned with gold accents on the roof. In front of the roof was an ornament of hay, symbolising prosperity. Despite the crowd, everyone remained orderly as they offered their prayers to the deity installed in the main shrine.

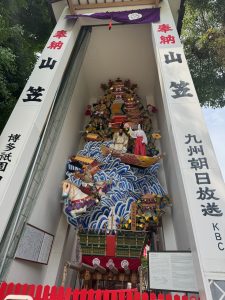
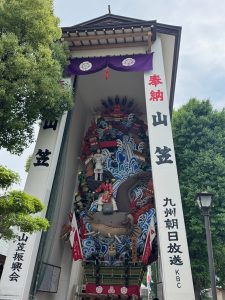
Other than the main shrine, several other smaller shrines are at the back of the main prayer hall. As we were walking to these smaller shrines, we spotted a tall structure sheltering a float. This float, adorned with figurines and animals, is used in July to parade through the streets and offer protection against the plague to the locals. We also found several Torii gates in the shrine grounds, mainly at the back of the main shrine. We spent the next 20 minutes walking around the shrine, paying our respects to the deities in the smaller shrines behind the main shrine.

Shopping In Fukuoka

Kawabata Shopping Arcade

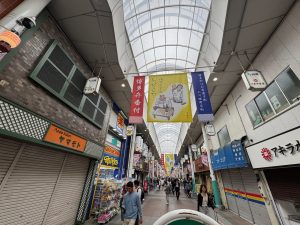
We planned to shop in one of the shopping streets in the Hakata area before heading to the Tenjin area to do more shopping. The Kawabata Shopping Arcade, one of the city’s most famous and oldest shopping arcades, is situated just behind the Kushida Shrine. Kawabata Shopping Arcade is the first merchant area to flourish in the Hakata district, comprising two arcades: Kawabata Shopping Arcade and Kami-Kawabata Shopping Arcade. The sheltered shopping arcade is home to a diverse range of shops, including Japanese-made clothing stores, numerous drugstores, souvenir shops, and bakeries. One can easily spend hours shopping in Kawabata Shopping Arcade. At the end of the shopping street sits the Takashimaya Department Store.

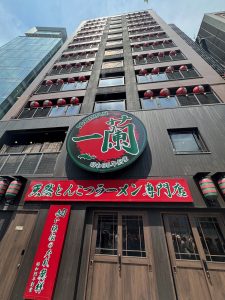
Fukuoka is the birthplace of the famous Ichiran Ramen. It would be a pity not to try the ramen in its first store since we are already in Fukuoka. The icing on the cake is that the original store is just a 5-minute walk from Kawabata Shopping Arcade. There was a queue for the ramen store, where a restaurant staff deployed to manage the queue informed us that the wait time is around 90 minutes. I was pleasantly surprised that it took us about 40 minutes to get a seat inside the restaurant. To order ramen, we were given a form by the staff outside to fill out our preferences. Once inside the store, we paid for our ramen using one of the vending machines. Instead of the traditional dining tables and chairs, Ichiran Ramen restaurant had individual booths for customers. We were led to our respective booths, which came fitted with a small wooden window. We would then pass the receipt and the form to the kitchen staff behind the window to customise our ramen. It did not take long for our delicious ramen to be served.

Tenjin Area

After lunch, we headed to Tenjin for more shopping, one subway stop from Hakata. From my research before this trip, I read that Tenjin is a better shopping spot. I would expect a longer shopping arcade, similar to the ones we saw in Kawabata Shopping Arcade. However, to my disappointment, the only shopping arcade in Tenjin, Shintencho, is confined to a small area next to the shopping mall that houses the subway station. There are fewer shops in this shopping arcade, mostly selling clothing and shoes. The Tenjin area is also home to many cafes and shopping malls. However, if one is looking for big brands or luxury goods, the Parco shopping mall, situated above the Tenjin subway station, is a good option. We left Tenjin after spending about 2 hours walking around, as the shops here weren’t exactly the places we wanted to shop. After getting the last bits of stuff, we hopped onto an Uber and headed back to the ship. I thought Fukuoka was a rather boring city; there are not many local attractions, and the shopping was rather disappointing. Luckily, we only had 12 hours here.

Austria Day 13 (20 Jan 25): Goodbye Vienna, Goodbye Austria

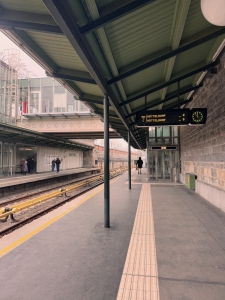
We fly out of Austria at noon today and leave for the airport at 8 am, as we were unsure about the traffic conditions and the time it would take to complete our VAT refund. There are two train options for getting to the airport from Vienna Hauptbahnhof: the cheaper, slightly longer OBB (costing €4.50) or the faster and costing three times more than the OBB (€15). We took an Uber instead, as we did not want to drag our luggage to the tram station and fumble to find the train platform in Wien Hauptbahnhof. The 30-minute Uber ride from the 3rd district to the airport costs us about €37.

VAT Refund at Vienna International Airport

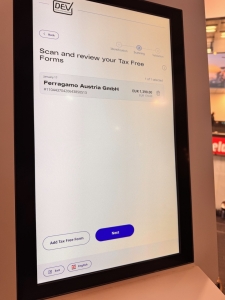
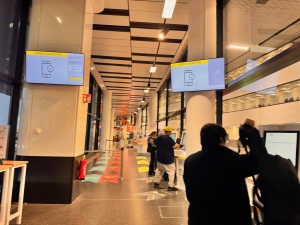
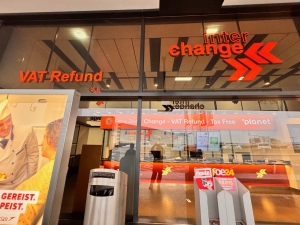
There are very few resources online on the tax refund process at Vienna International Airport. We were unsure if the VAT refund would be easy, like what we experienced at Paris Airport last year, or complicated, like what we experienced at Catania Airport two years ago. I catered additional time for our VAT refund. We had to complete our VAT refund before reporting to the check-in counters for our flight, as the customs may want to inspect the goods for which we are claiming a tax refund. To get our VAT refunded, we found the VAT refund counters (marked by a bright yellow DEV sign) by the second last door from the rightmost part of Terminal 3. For VAT refunds, we can scan a QR code at the DEV counters on our mobile phones (we need to connect to the airport wifi first) or use the kiosks. My friends and I tried using our mobile phones but found the wifi rather weak. We ended up using the kiosk, which was faster.

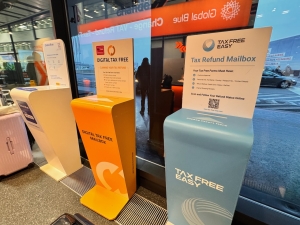
After scanning our receipts, we proceeded to the customs counter further down the lane to get our receipts validated electronically. Based on our experience, we found that the customs officer will only inspect the more expensive items. I got a Ferragamo bag for €1,350 and was not required to be inspected, whereas my friend was asked to present the €7,000 LV bag she bought. After getting our electronic stamps, for purchases that do not require inspection, we can either drop the VAT refund forms in the respective VAT refund company’s boxes (bring a pen along or fill up the receipts before coming to the airport) or claim cash from the inter-change counters after the validation counter. A small fee is charged for cash refunds. As for the items that required to be inspected, my friend had to hand carry the bag, clear immigration to the non-Schengen zone and present her bag to the DEV counter near our boarding gate. She only gets her validation stamp after the inspection.

Our Thoughts on Austria

For our 12-day trip around Austria, we thought it was more than Salzburg and Vienna, which most people used as a thoroughfare between Hungary and Germany. It was certainly more than the picturesque Hallstatt, which inspired our trip to the country in the first place. Austria is a country of musical culture, beautiful architecture, and magnificent Alps. The locals we met on our trip were mostly friendly, but some took some time to warm up. We learned a lot from this trip through the guided tours of the Alps and the museums, the different climate zones and the artefacts we saw. Perhaps we came in the low season, the towns we visited were peaceful (except Vienna), and most importantly, they were very safe. We had no problems walking at night. Most of the cities we visited offered some sort of city card that covered most of the sights and all the transportation in the city, but not all of them are worth getting (such as Graz).

Our Summarised Itinerary

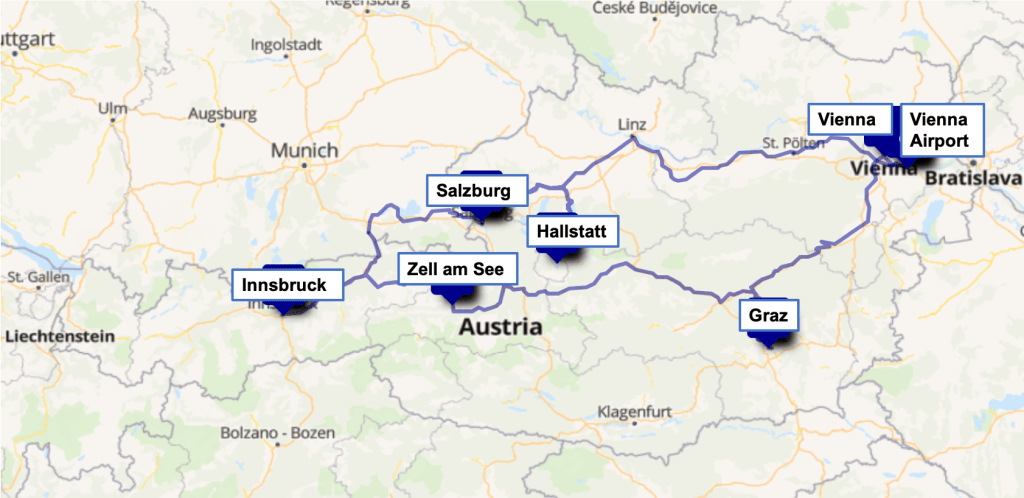
During our 12 days in Austria, we visited five towns and cities. Not all attractions are open in winter, so we went with our eyes open, knowing some of the sites would be closed. Winter in Austria is about fun in the Alps, where we see larger crowds skiing, snowboarding, or simply having fun in the snow.

Our Journey in Austria

Day 1 to 3: Salzburg

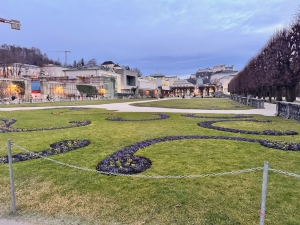
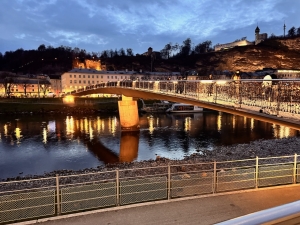
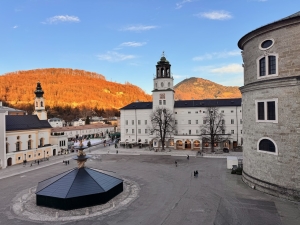
We started our trip from Salzburg, where we visited Schloss Mirabell and the gardens. We spent one full day visiting the sites in Salzburg, including Untersberg, about a 30-minute bus ride from the heart of Salzburg. I felt the sites in Salzburg city can be seen within one day as they are close to each other and the city is highly walkable. Starting from Hohensalzburg Fortress, we visited DomQuaritier, Mozart’s Birthplace, and St Peter’s Abbey and ended the night at Mönchsberg, which offered excellent night views of the city. We spent the third day in Hallstatt. The original plan was to get to Hallstatt before the closing of the Salt Mines and Skywalk. However, these attractions closed for annual maintenance before we arrived in Austria. In replacement, we went to Dachstein Krippenstein, hoping to get a bird’s eye view of Hallstatt and the lake. But the snowfall was too heavy that the attraction was closed. Hallstatt is a small town, and with the Salt Mine closed, I reckon half a day would be sufficient to see the town.

Day 4 to 6: Innsbruck

We visited Innsbruck for the Top of Innsbruck, one of the mountains easily accessible from the town. We started our Innsbruck trip with a visit to the Swarovski Crystal World. I thought the site could be skipped unless one is passionate about crystals or has an eye for art. We spent Day 5 in the Nordkette Mountains, having fun in the snow and getting a great view of the city from Seegrube. We also took the time to visit Alpenzoo, which I felt was a little boring. Before leaving Innsbruck for Zell am See on Day 6, we visited the City Tower and St. James’s Cathedral in the morning.
Day 6 to 8: Zell am See

Zell am See was a stop we visited to break the otherwise long train ride from Innsbruck to Graz. This charming lakeside town was the most enjoyable town we visited. We spent the afternoon of Day 6 strolling in the town centre but missed out on the view of the lake from the promenade (which we never got to visit throughout our stay in Zell am See). Day 7 was dedicated to visiting Kitzsteinhorn, and we felt joining the guided tour was very insightful. Not only did we visit the mountains, but we also got to know Kitzsteinhorn better. We spent the morning on Day 8 on a snowshoe hike on Schmittenhöhe. However, the snowshoe hike with our knowledgeable guide was a refreshing experience; I would think visiting the mountain peak and seeing Lake Zell from above would be ideal (which we did not have time for).

Day 9: Graz

The second-largest city in Austria was often missed by visitors to the city. Graz was charming and compact, with sites within walking distance from each other. The people in the city were genuine and friendly. We thought Schlossberg gave us a great view of the city and the iconic Clock Tower. Joining the Walking Tour through the Historic City Centre gave us a good perspective of the city and the sites we saw. We would have missed out on some of the details if not for our guide. I reckon one full day is sufficient to cover the sites in Graz.

Day 10 to 12: Vienna

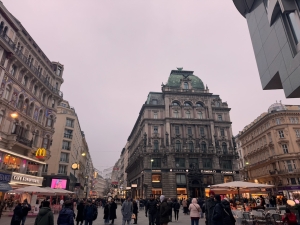
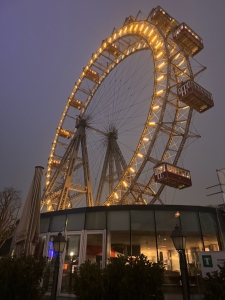
We spent our last three days in Vienna, the capital of Austria. I highly recommend joining the complimentary tour of Parliament Austria, where we learned about the country’s road to democracy and were shown places in the Parliament. We spent the rest of the evening shopping at Graben in Stephensplatz, and we were glad we did that. Shops closed earlier on Saturdays and were not open on Sundays. We had a busy day visiting the attractions on Day 11, starting with Schönbrunn Palace and Gardens, where we learned how the Habsburgs used this palace for the summer. In the afternoon, we joined a guided tour of the Vienna State Opera, visited Karlskirche and rode on the World’s Oldest Ferris Wheel in Prater Park. We started our Day 12 with a visit to the Hundertwasserhaus, followed by the Austrian National Library. In the afternoon, we joined a guided tour of Hofburg Palace; I thought touring the palace with the audio guide included in the ticket price would suffice as the guide did not add additional information about the palace. We ended our day with a visit to St Stephan’s Cathedral, where we went up the north tower, which offered a better view of Vienna from the terrace.

Austria Day 12 (19 Jan 25): Vienna – The Quirky and the Old: Hundertwasserhaus, Hofburg Palace, and St Stephan’s Cathedral

Hundertwasserhaus: The Unconventional Building

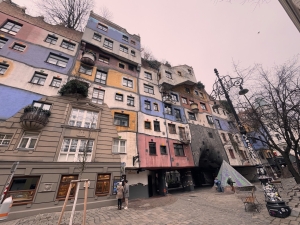
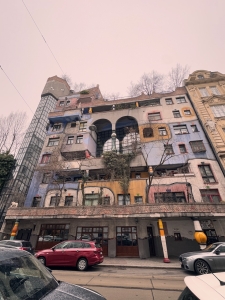
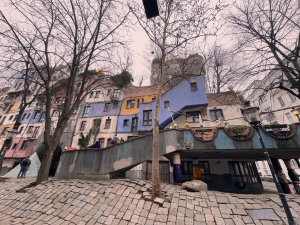
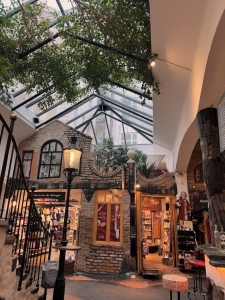
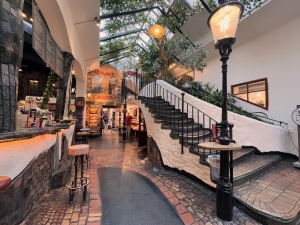
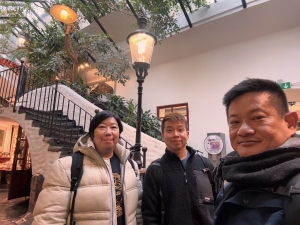
We started our final day in Austria with a bus ride to Hundertwasserhaus. The artistic and quirky building uses bold colours and irregular structure, making the building very Instagrammable. A direct bus #4 from our hotel took us to Hundertwasserhaus in under 30 minutes. We were captivated by the bold architectural style that Hundertwasserhaus offered. The building stood out from the rest of the buildings in the neighbourhood, with bright blue, yellow, and maroon colours. Parts of the building were adorned with mosaic-like tiles, although they did not form a picture, they were coherent. The Hundertwasserhaus is a small block of houses that did not take too long to visit. We also visited the Hundertwasser village opposite, an indoor space filled with souvenir shops and cafes. We hoped to get more information about Hundertwasserhaus from the village information centre, but it was closed on Sundays. After snapping a few more pictures, we left the house. Unique it may be, but I thought travelling to this part of the suburb just for the building was hardly worth the time. There weren’t any attractions in the vicinity, and the Hundertwasserhaus is just a block of private residences.

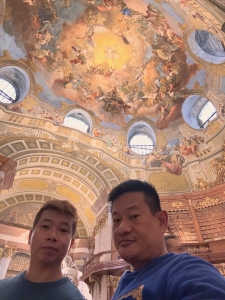
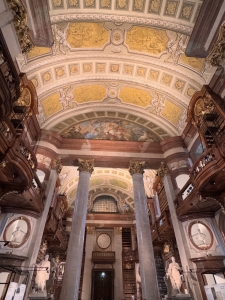
Austrian National Library State Hall: The World’s Most Beautiful Library

We were supposed to head to Hofburg Palace in the Innere Stadt, but I forgot to bring the printout of our tickets to Hofburg Palace. We hopped onto the next Bus #4 and returned to our hotel. After getting our tickets and since we still had some time before our guided tour of the Sisi Museum and Hofburg Palace, we could squeeze in some time for the Austrian National Library. The crown jewel of the Austrian National Library is the Baroque State Hall. I came to know of a guided tour to the State Hall organised by the library, and I wanted to join the tour (the tour booking can be found here). However, tours in English were not conducted in January during our visit; only German tours were conducted during this period. Entrance to the Austrian National Library costs €10, and we got €1 discount from our Vienna City Pass. The guided tour costs an additional €4.50.

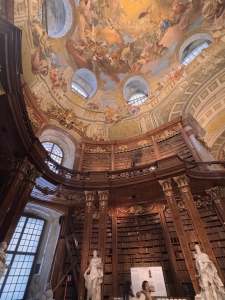
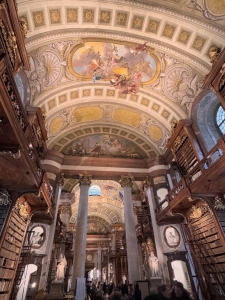
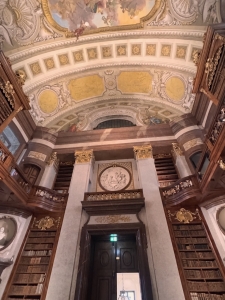
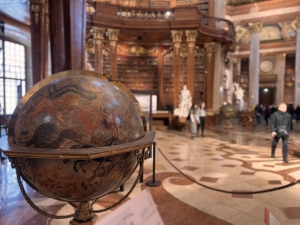
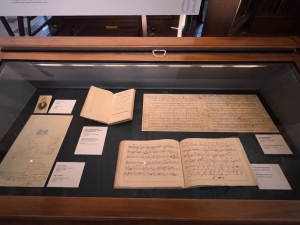
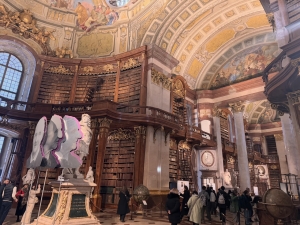
People came to the Austrian National Library for its State Hall. Built in the 18th century as part of the court library, the State Hall is Europe’s largest Baroque library, housing over 200,000 books on its richly decorated wooden shelves. Walking into the State Hall is like walking into the library featured in Disney’s animated “Beauty and the Beast”. High wooden shelves filled with books lined both sides of the hall; occasionally, we would spot a marble spiral staircase that led to the mezzanine level of the shelves. The walkway’s ceiling in the State Hall is beautifully painted with frescos alongside the patterned carvings. In the centre of the State Hall is a dome, where the frescos painted here blended in very well with the windows. There are some displays of relics and precious books along the walkway of the State Hall. However, few who came here stopped to read them. Most of us in the State Hall came for that Instagram picture of the library. As beautiful as it may be, the visit to the Austrian Library was only limited to the State Hall. I’d recommend joining the guided tour to understand more about the library or visiting only if one has the time to kill.

Cafe Demel: Experiencing the Viennese Cafe Culture

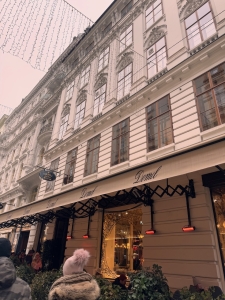
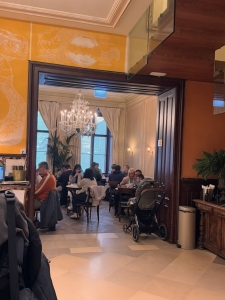
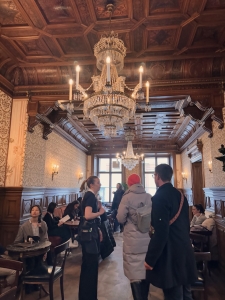
We had about 1 hour before our guided tour of the Sisi Museum in Hofburg Palace after we visited the Austrian National Library. We had time to experience the Viennese cafe culture. We walked along the street near the palace to hunt for a cafe and chanced upon Cafe Demel, which seemed to be a decent cafe with a crowd. We spotted a snaking queue that seemed to originate from the upper floors of the shop at the back of the shop on the ground floor. This queue is for those who came here to enjoy a cup of coffee and some pastries. We subsequently learnt that the cafe does not accept reservations and only entertains walk-ins. We stood in the line for about 5 minutes, and it did not seem to move. I recalled some empty tables at the front of the shop as we walked in earlier. I went up to a staff and checked on the tables. The friendly staff recommended taking the indoor seating as the cafe’s interior was worth the wait, plus sitting outdoors would be very cold in the middle of winter. The staff also told me the queue would move quickly, as a batch of 20 patrons is being let in at a time. True enough, we waited for the next 10 minutes to be shown to our table.

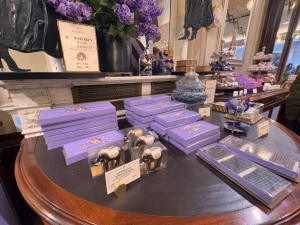
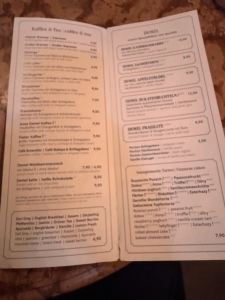
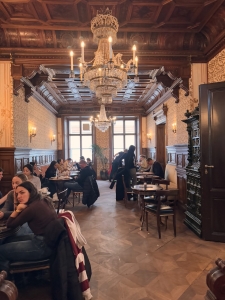
We were given a table on the second floor of the cafe. The staff recommended we take the table in the corner, as it has more space and would be better for photo taking. The room where our table is located has a rustic and cosy vibe (there seem to be different themes in each room in the cafe). Most of this room is decked with dark brown lacquered wooden walls and the ceiling. The chandelier that hangs from the ceiling adds a luxurious touch. We ordered some coffee and pastries, which tasted very good. I particularly like the walnut cake and the Kaiserschmarrn (an Austrian pancake). The vibe in the cafe was very good, with most people coming here for the Instagram-worthy shot. We left the cafe about 15 minutes before our tour of Hofburg Palace.

Hofburg Palace: The Primary Habsburg Palace

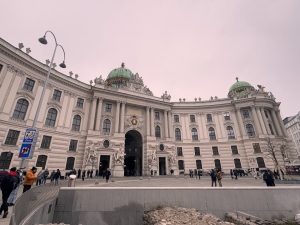
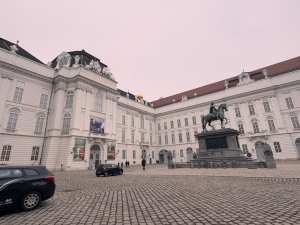
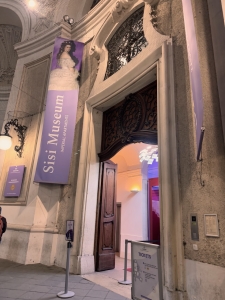
The Habsburgs, rulers of the Austrian-Hungarian empire, used the Hofburg Palace as their primary imperial residence. Today, the Hofburg Palace is the official residence and workplace of the Austrian President. There are two parts to the Hofburg Palace: the Sisi Museum and the Imperial Apartments. The tickets cost €19.50 for a self-guided tour with an audio guide and €24.50 for a guided tour through both the Sisi Museum and the Imperial Apartments. There is a €1.50 discount for both tickets by flashing our Vienna City Card. We went for the guided tour, thinking we might be able to see and understand more of the palace.

Sisi Museum: The Life of Empress Sisi

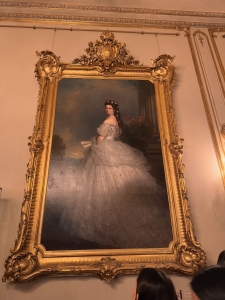
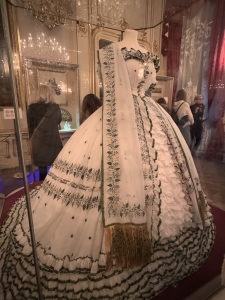
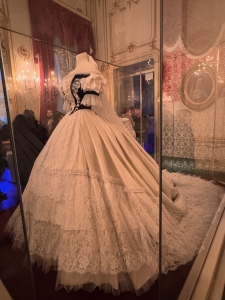
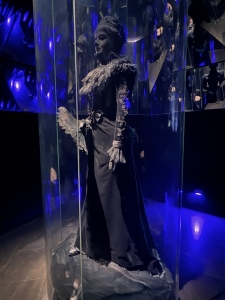
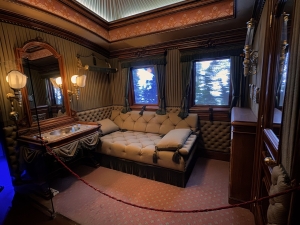
Our tour started with the Sisi Museum, which is the first part of the palace. The Sisi Museum displays artefacts and objects used by the Empress during her lifetime, from a replica of the diamond stars that we see in most of the pictures of her to her inauguration gown. There is even a replica of her train carriage. From our guide’s narration, we learned that Sisi was not happy in the court and often travelled to escape the politics of the palace. From our guide, we also learned about Empress Sisi’s daily routine and how she maintained her slender figure to maintain her title of being the most beautiful woman in the Austrian-Hungarian empire. In the last room, we were brought to an illustration of a man stabbing Empress Sisi, where our guide retold the story of how the Empress was assassinated by a psychopath in Geneva whose target was not Empress Sisi in the first place. The Sisi Museum was a small place with limited space. More often than not, we were battling standing space with self-guided tour visitors, dampening the museum visit experience. The guided tour of the Sisi Museum took about 30 minutes, and we transited to the Imperial Apartments.

Imperial Apartments: Where the Habsburgs Lived and Worked

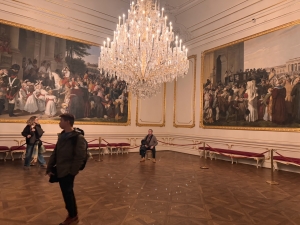
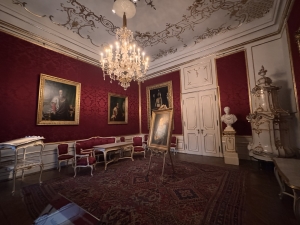
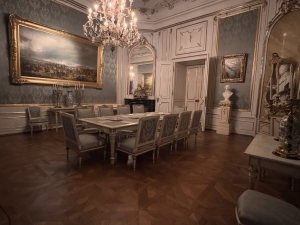
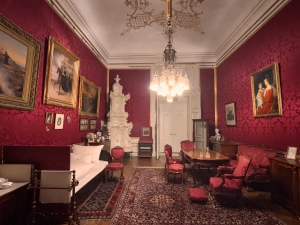
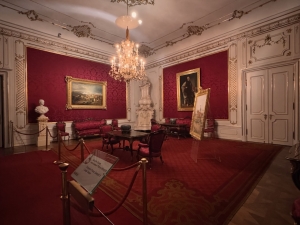
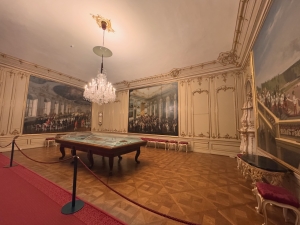
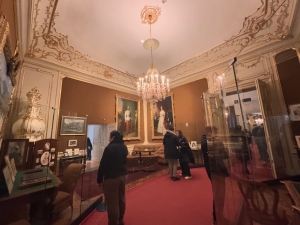
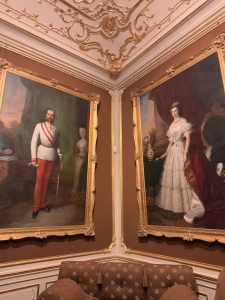
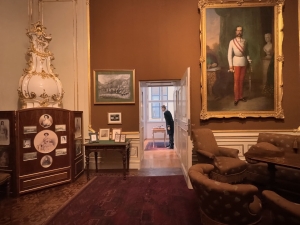
For the next 30 minutes, we were taken through the 16 rooms of the Imperial Apartments of the Hofburg Palace, with our guide narrating the significance of each room. We started with the Audience Waiting Room, where we saw huge paintings hung on the walls, two of which depicted political events during the time and one showing the emperor returning from Bolivia. The rest of the rooms displayed the audience chamber, working space, and living spaces of the royalty when they called Hofburg Palace home. Most of these rooms were filled with furniture that served the required functions and was opulently decorated with crystal chandeliers, paintings and statues. From Emperor Franz Joseph’s Study, we can see how much he loved Empress Sisi, with numerous paintings of her in her long untied hair. Whilst in the bedroom, which Empress Sisi occupied in later years, our guide mentioned how the Empress would eat small meals in her chambers to maintain her figure. The Imperial Apartments also showcased the Empress’s dressing and exercise room, where the Empress spent most of her time. Here, we could see the simple exercise equipment like bars and rings, which our guide mentioned the Empress was very disciplined in spending hours working out daily. We were also shown a passageway being sealed off with brick walls, and our guide told us that behind the sealed-off brick walls was part of the President’s workplace. Our tour ended at the Dining Room, a large room with a long table where the imperial family would gather every Sunday for dinner. This is also where the royal banquet was held. Our guide mentioned that the table setting displayed on the dining table was exactly how they were set up during the reign of Emperor Franz Joseph.

I was a tad disappointed with the Hofburg Palace visit. The palace felt a little small compared to the Schönbrunn Palace, and there were no big halls for Royal events like the Great Gallery we saw in Schönbrunn Palace. The guided tour of the palace felt a little redundant in that the guide did not offer any additional information, nor were we shown parts of the palace exclusive to the guided tour. All the guide did was replace the audio guide. I’d save the additional €5 charged for the guided tour and went with the audio-guided tour (we could have saved at least €15 if we bought the bundled Sisi Pass, which included Schönbrunn Palace, Hofburg Palace and the Furniture Museum).

St Peter’s Catholic Church: A Short Stop to the Artistic Church

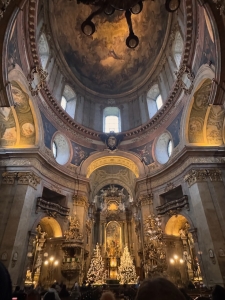
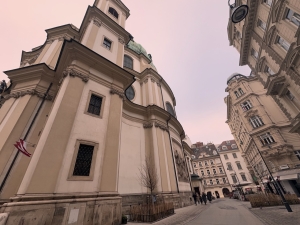
After leaving Hofburg Palace, we spotted a green dome church that sat at the end of a quiet side street along Graben while walking towards St Stephan’s Cathedral. We walked past this church two days ago. Since we had some time today, we decided to make a short detour to the church. The church’s facade is adorned with statues above its entrance and on its wall. The interior of the church surprises us. Despite its rather simple exterior, the inside of the church is decked with numerous delicately painted frescos coupled with detailed carvings on its ceilings. Every inch of the ceiling is either covered with paintings or carvings. The golden main altar stood out from the dark sand-coloured marble interiors; its lighting gave it a holy glow. As the church was not too big, we did not stay here for too long.

St Stephan’s Cathedral: The Icon of Vienna

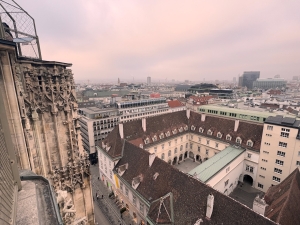
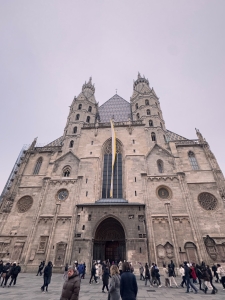
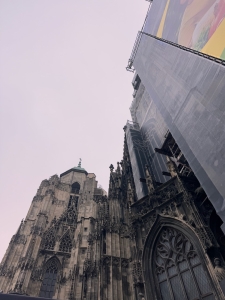
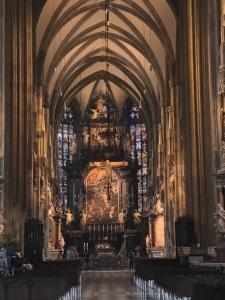
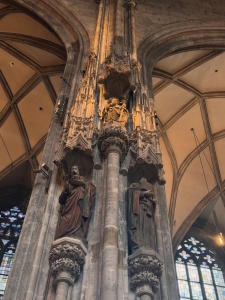
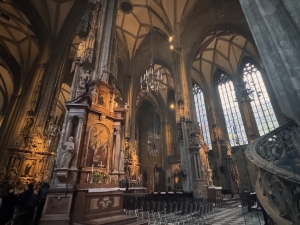
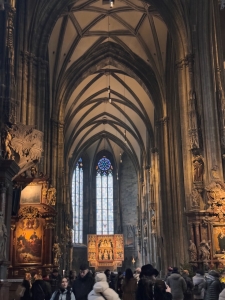
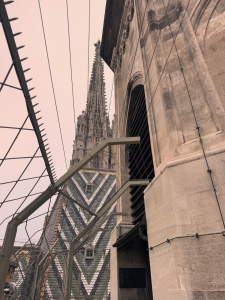
We continued our walk to the final attraction of the trip – St Stephan’s Cathedral. This was the first time we saw St Stephan’s Cathedral in the daytime. Standing by the square on which the cathedral sits, we can see the complicated exterior, as though someone has pasted different patterns on most of its facade. The exterior reminded me of the Duomo di Milano we visited two years ago. The St Stephan’s Cathedral has two towers, with the taller south tower (we jokingly referred to this south tower as the Eiffel Tower of Vienna when we first saw it last night). Legend has it that the original design of the cathedral would have the north tower being the taller of both towers. However, as the south tower was being completed, it was discovered that there was not enough funding and space to complete the north tower. There is no charge for entering the cathedral, but it would cost €7 to scale up the south tower and €6.50 for the north tower. No discount is offered for holders of the Vienna City Pass when going up the towers. The entrance to the south tower is located outside the cathedral, while the north tower is inside. We came to St Stephan’s Cathedral for the bird’s eye view of Vienna from one of these towers. While researching which tower to visit, I saw recommendations for the north tower as there is an outdoor platform on the top of this tower, while we can only look out into Vienna from small windows on the south tower. As a bonus, the north tower is the only one fitted with a lift. We were impressed with the gothic interior of St. Stephan’s Cathedral. Despite not having brightly painted frescos or carvings on the ceilings, the relatively simple interior made the stained glass on the windows stand out. We could focus our attention instantly on the cathedral’s main altar.

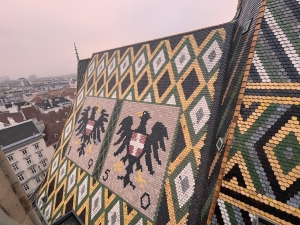
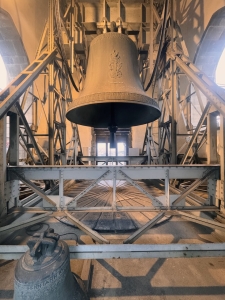
We got our tickets from the ticketing counter at the entrance of the lift to the viewing platform on the north tower. A short lift ride later, we were transported to the top of the north tower. The platform is not very large; we were able to walk from one end to the other in under 3 minutes. The first thing that caught our eyes from here was the two eagle mosaics on the cathedral’s roof, symbolising the Habsburg empire. We could see Vienna from a vantage point, from the Stephansplatz below to the Vienna Giant Ferris Wheel afar. The view up here is indeed breathtaking. A giant bell is installed at the top of the north tower. My friend and I attempted to wait for the half-hour mark to hear the bell strike. However, it did not happen. As the winter breeze was cold and we had seen what we had come here for, we headed back down and returned to our hotel to pack for our departure tomorrow.

Austria Day 11 (18 Jan 25): Vienna – Visiting the Icons in The Capital of Music: From Schönbrunn Palace to Prater

I initially planned two attractions for today: a visit to Schönbrunn Palace and a guided tour of the Austrian State Opera. As we had some time after visiting the two sites, we also went to St. Charles’ Church, which is not too far from the State Opera and ended our day with a ride on the Vienna Giant Ferris Wheel.

Schönbrunn Palace and Gardens: The Habsburg’s Summer Residence

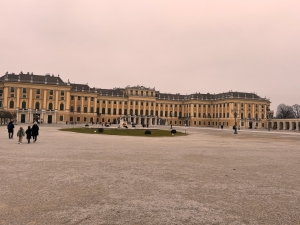
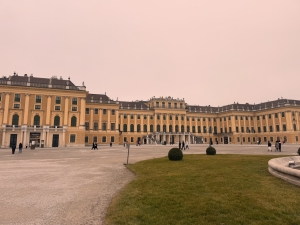
While Paris has Versailles, Vienna has Schönbrunn Palace, the summer residence of the Habsburg family and the largest of Vienna’s three palaces. The palace contains more than 1400 rooms and a large garden, but only 40 rooms are open to visitors. Schönbrunn Palace is very well connected to the local transit system, and there is a U-bahn Station (Schönbrunn Station) just across the road from the palace. The Grant Tour of Schönbrunn Palace’s ticket price is €32 (click here for ticketing), which includes an audio guide device for visitors to use for self-guided tour of the palace.

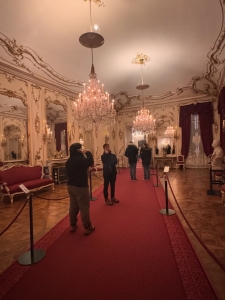
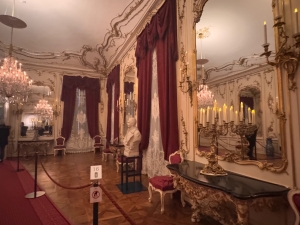
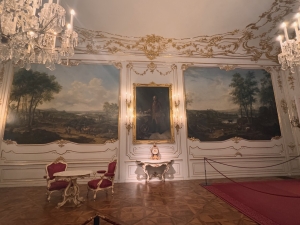
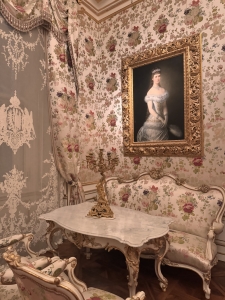
The Schönbrunn Palace

Passing through the palace’s main gates, we were immediately greeted by a large open space. The palace courtyard gave us a great view of the grandeur and the size of Schönbrunn Palace. Those who did not pre-purchase their tickets can be bought on the spot from a building to the left of the main gate. The entrance to the state apartments in Schönbrunn Palace is on the left of the main palace building. After the mandatory depositing of our bags at the cloak counter, we spotted a small chapel before the turnstiles to the state apartments. This is the Palace Chapel, which has marble interiors and golden statues that make it look grand and fitting for royalty. The chapel looked bright and airy, thanks to the high ceiling and windows fitted here, which let in natural light. The audio guide that came with the tickets to Schönbrunn Palace is very easy to use and can be collected at the counter beside the turnstile. The self-guided audio Grand Tour of the Palace covers all 40 staterooms, starting from the East Wing.

East Wing: Apartments of Emperor Franz Joseph and Empress Sisi

The East Wing mainly contains the apartments and office space of Emperor Franz Joseph and Empress Sisi, with the first few rooms used as waiting and audience chambers. The Audience Chambers are decked in brown marble, complementing the red velvet chairs. Here, we saw a table that Emperor Franz Joseph used when reading the report submitted by officials. The interesting part about this wing is the contrast between the Emperor and the Empress in the bedroom. Emperor Franz Joseph was a practical ruler and had a modestly decorated bedroom. There were no opulent engravings, golden plastered walls, or decorative furniture. The Emperor merely had a bed and a couch set in his bedroom, as well as portraits of his wife and his family. There was a painting in the Emperor’s bedroom depicting his demise on the bed on display here. In contrast, Empress Sis has three rooms: a dressing room, a study and her private chambers. These rooms were decorated with bright-coloured walls and gold-trimmed plasters on the walls. A statue on display in her dressing room shows guests the length of her hair.

The other significant room in this wing was the Imperial couple’s bedroom, which the Emperor and Empress shared during the initial years of their marriage. The seating and wall panels are covered in a deep blue silk damask with white floral garlands, making the bedroom stand out. The Hall of Mirrors was perhaps the most decorated room in this wing. This Hall of Mirrors was where the Emperor granted Public Audiences, where any subject of the empire could seek an audience with the Emperor. I think this hall got its name due to the numerous large mirrors hanging on the walls of this hall.

North Parade Court Wing: The Place where the Royals Entertain

I thought the Great Gallery would be the most impressive hall in the entire Schönbrunn Palace. This large hall, mainly used as the palace’s ceremonial hall, is decked with gold trimmings on the walls and the ceiling and adorned with three large frescos on the ceiling. The golden chandeliers hanging from the ceiling reinforce the baroque-style decoration in this hall and contribute to the luxurious vibe. This is the most beautiful hall in the entire palace, and we could stay here longer to admire the detailed massive frescos painted on the ceilings. Though not as grand as the Great Gallery, the Small Gallery felt like an extension of the Great Gallery. Here, we could look out into the Schönbrunn Gardens through one of the windows.

West Wing: Chambers of Empress Maria Theresia

The West Wing was the apartments used by Empress Maria Theresia, the great-great-grandmother of Emperor Franz Joseph. The rooms in this wing were equally opulent, mostly painted in white with gold trimmings on the walls. Most rooms here had huge paintings depicting Empress Maria Theresia and her husband on the walls. Through some of these rooms, we can see the love of Chinese-influenced art by the Empress, as seen in the Vieux Laque Room, a reception room used by Emperor Franz I Stephan. The other significant room in this wing was the Rich Room, Empress Maria Theresia’s bedroom. Covered in bright red walls, the centrepiece of this room was the restored bed of the Empress. The lace artwork on the bedframe was intricate and showed the effort that had gone into making the bedframe worthy of the Empress.

The Schönbrunn Gardens

After spending about 1 hour doing the self-guided tour of the state apartments, we went to the Schönbrunn Gardens behind the palace. Visiting the 160ha garden is free, but there are charges for visiting the palm house, zoo and garden maze, all located within the garden grounds. We came to the Schönbrunn Gardens to visit the Gloriette, a pavilion perched on top of a small hill like a crown on the head of royalty. To get to the Gloriette, we first walked through the Great Parterre, a large open space with symmetrical beds. But these beds were under maintenance during the winter time when we visited. Numerous Roman statues aligned both sides of the Great Parterre, which looked like guards welcoming the royalties whenever they stepped foot into the gardens. The Neptune Fountains sit between the Great Parterre and the Gloriette. I feel most people skipped stopping at the Neptune Fountains, where we found some great vantage points at the back of the fountains to take pictures with Schönbrunn Palace. We were nearer to the Gloriette from Neptune Fountains; after a short walk uphill, we arrived at the crown jewel of the Schönbrunn Gardens – The Gloriette. Built in 1775 as the last building constructed in the garden, the Gloriette was built to serve as both a focal point and a lookout point for the garden. It was used as the Emperor’s dining hall, festival hall, and breakfast room. Today, a cafe occupied the Gloriette. On top of the Gloriette sits a lookout terrace looking out into the gardens and Vienna, which was closed during winter. Nonetheless, we were treated to a splendid view of Schönbrunn Palace and the Gardens from the Gloriette.

Vienna State Opera

The Vienna State Opera organised regular tours of the building at €15 per pax in various languages, with more in English and German (click here for booking the tour). We booked our tour about 1 month before our trip to Austria. We arrived at the Vienna State Opera about 15 minutes before our tour and were surprised to see two queues at the entrance, one for those who had booked our slots online and the other for walk-ins (leftover tickets will be sold to walk-ins). There were no signs telling us which queue we should be standing in. Eventually, one of the staff members at the door gave directions to the queuing situation. As several language-guided tours were happening at the same time slot, each group was shown the parts of the State Opera in different sequences. Ours started from the side stairways to transit to the first floor of the building (while some others used the main Grand Staircase). We stopped by the Grand Staircase in the middle of the hallway, where our guide introduced us to the baroque architecture and the paintings we saw here. The marble Grand Staircase was indeed grand. The detailed carvings on the walls, some tastefully ornamented in gold, the two statues, and the paintings beautifully decorated this part of the building, giving it a posh and grand vibe. We were told the Vienna State Opera was bombed during World War II. Fortunately, part of the building survived the bombing. We were then brought to a small room behind the Grand Staircase. Decorated with gold trimmings, elaborate carvings on the walls and ceilings, and a fresco on the ceiling with bright colours, the Tea Salon was formerly reserved only for the Emperor and his guests. Today, anyone with the money can reserve the Tea Salon.

The next area we were shown was Marble Hall, a large space with relatively simple decor. Our guide told us this hall was rebuilt after WWII as it was one of the casualties of the war. The Royal Box was our next stop on this tour. The Royal Box was reserved exclusively for the royalty, which offered a spectacular view of the stage. We were invited to sit in the Royal Box while our guide narrated the purpose of the Royal Box and the reconstruction of the auditorium. After the Royal Box, we were guided to the Gustav Mahler Hall, a room for intermissions, concerts and special events. This room houses 13 tapestries produced over six years, depicting scenes from Mozart’s The Magic Flute. A short walk from Gustav Mahler Hall, we came to the Schwindfoyer, a small annexe beside the first floor of the Grand Staircase. Our guide told us this room was one of the surviving original parts of the Vienna State Opera. This room was elegantly decorated with paintings and carvings, most covered in gold, that left no empty spaces on the ceilings and parts of the wall. Hanging above each door that leads to the balcony are busts of famous composers. We found the busts of Mozart and Beethoven over some of these doors. Equally impressive is the balcony, which looked out into Ringstraße and served as the facade of the State Opera.

Our final stop at the Vienna State Opera was the Great Hall, the auditorium of the building. The Great Hall, decked with red velvets on the walls, looked grand and elegant. We were led to the front row of the horseshoe-shaped auditorium, where our guide told us about the different seating options and some standing rooms on the uppermost floor of the Great Hall. From where we were seated, we could see the orchestra pit lowered before our eyes (not sure if we were there at the right time or if it was raised and lowered as part of the tour). Our guide also told us that there are different performances daily, so the crew had to constantly change the setting of the stage daily. Our guided tour of the Vienna State Opera ended after the Great Hall, where we were led back to the foyer. Having gone through a guided tour of Parliament Austria, we expected the State Opera tour to be informative and insightful. However, we thought the tour was not as enjoyable. Due to the many tours taking place at the same time and the soft voice of our guide, we missed out on the narrations of our guide most of the time. While the tour of Parliament Austria issued each tour member a wireless headset to hear the guide better, the Vienna State Opera did not.

Karlskirche

As Karlskirche (St Charles’ Church) was very near to the Vienna State Opera, we visited the church after our State Opera tour. Sitting behind a large pit, the 18th-century green domed baroque church with two tall pillars by its side towers over Karlsplatz. As we walked closer to Karlskirche, we could see the engravings on the two pillars. Karlskirche was built after the last great plague epidemic, after Charles Borromeo, who was revered as a healer for plague sufferers. The entrance to the church is at its side. Entrance to the church costs €9.50, and we got a €1 discount by flashing our Vienna City Pass. Besides the church, the entrance fee gave us access to the terrace, the Church model, the Treasury and the Organ. Our strategy was first to make the 120 steps climb to the terrace and work our way down.

Despite being at an elevated point, we could only see part of Vienna from the terrace. The furthest we could see was the towers of St Stephan’s Cathedral. The park (Karlsplatz) and the pit we were on a while ago in front of Karlskirche dominated our view from the terrace. However, as we were rather close to the pillars, we could see the parts of the pillars that were being restored on top of the detailed carvings on them. Since there wasn’t much of a view, we left the terrace for the other parts of the church. We next headed to the treasury, where a small collection of relics and clothing of Charles Borromeo were being displayed. We did not stay at the treasury for too long and headed to the organ loft. Here, we were up close to the organ but were more attracted to the view of the church’s interior from the loft. Up there, we could see the carvings and the frescos on the inside of the dome clearer. Next, we headed to the ground floor of the church. The amount of artwork spread across the ceiling and the pillars made the church’s interior feel more like an art museum. Countless life-like angel statues were mounted on top of the pillars inside the church. Even the altar was a masterpiece. We did not stay in Karlsskirche for too long, as it was still early and Karlskirche was next to the U-Bahn station, so we took the U-Bahn to Prater Park to ride the world’s oldest Ferris wheel.

Prater Park: Home to the World’s Oldest Ferris Wheel

Prater Park is one of the oldest amusement parks in Vienna and opens till late at night. The park is easily accessible by the U-bahn, with Prater station being the closest to the park. Admission to the park is free, and visitors only pay for the rides they want to take. At the time of our visit, most of the outdoor rides were closed, and only a handful remained open. My friend and I first went on the haunted house ride, which is entertaining (rather than scary) at best. Our purpose for coming to Prater Park is to ride the iconic Viennese Giant Ferris Wheel. There are two Ferris wheels in Prater Park, a newer and taller one next to some roller coasters and the older one near the entrance. The 65m Vienna Giant Ferris Wheel is the world’s oldest ferris wheel, operating since 1897. Tickets cost €14 per adult (Vienna City card gave us €1 discount). Before the ride, we were made to walk through a small exhibition using the wooden cars on the ferris wheel. Sitting in one of the wooden cars, as we were slowly being hoisted up to the top of the wheel, the view of the park slowly became smaller, and views of Vienna City in the distance occupied our attention. We were treated to a great night view of Vienna at the top of the wheel. As we did not want to ride on the roller coasters in the winter, we left Prater Park after the Ferris Wheel ride.

Night View of Vienna

Vienna has a lot of beautiful buildings. As the night was still young, my friend and I wanted to see these buildings at night. There used to be a complimentary tram service around the Ringstraße, where most sights are located. However, this service has since ceased when we visited the city. A Google search revealed alternate trams around Ringstraße, which involves changing trams halfway through the Ringstraße. We took Tram #2 from near our hotel and somewhat missed the stop to change trams. The tram turned in from the Vienna City Hall and went further into a residential area. At the end of the line, we hopped onto the next tram and alighted at the City Hall. From here, we walked around to see some of the buildings further from the main Ringstraße. We called it a night and returned to the hotel after seeing these buildings.

Austria Day 9 (16 Jan 25): Graz – The City of Delight, Austria’s Second Largest City

Being Austria’s second-largest city, the sights in Graz can be seen within one full day. We started our day by visiting the Schlossberg in the morning and joined a guided tour of the city in the afternoon to understand more about the city. Like the other cities in Austria we have visited so far, Graz also offers a city card that covers all attractions and transportation within the city. The Graz card costs €30 for 24 hours, €39 for 48 hours, and €44 for 72 hours. However, we did not get the Graz card for this trip as the cost of the attractions we will be visiting is less than the cost of the card.

Murinsel: The Shell on the River

Most of the attractions in Graz lie east of River Mur, the river that divides the city into the old town and the modern town. As our hotel is west of River Mur, we had to cross the river to visit the sights in Altstadt. Several bridges along the river link the old and the new, and Murinsel is one of them. Murinsel is a landmark in the middle of River Mur, taking the form of a shell linked by footbridges. As it was near our hotel, we crossed the River Mur via the Murinsel and took the opportunity to visit this site. There doesn’t seem to be anything happening on the bridge. We saw a cafe and an amphitheatre, but the cafe was closed (it felt like it was abandoned). As the Murinsel sits near the water level of River Mur, looking out into the river, it feels as though we are directly on the river’s water.

Schlossberg: Above the Roofs of Graz

While Salzburg has Festung Hohensalzburg, Graz was watched over by the Schlossberg over 1,000 years ago when a small fortress was built on this hill. One cannot miss Schlossberg, the hill with the clock tower that dominates the city’s skyline. There are several ways to get to the top of Schlossberg: funicular, walking or using the lift. We took the funicular up Schlossberg. The ticketing was a little different from the other funiculars we have taken. Instead of charging per use on the funicular, the ticket goes by the hour, including all public transport in Graz. There are only two options for the ticket: €3.10 for one hour or €6.80 for 24 hours. We got the 24-hour ticket, as we wouldn’t want to drag our luggage 15 mins from our hotel to the train station tomorrow. We appreciate the staff’s patience in explaining the different pricing to us when selling the tickets (she was also the funicular operator). She also mentioned that the tram line stopped in front of the funicular station, which was free, even without tickets. The ride on the funicular took about 2 min.

The sights on Schlossberg are very close to each other. We originally allocated the entire morning to visit the sites but finished seeing them all in 1 hour. We skipped the Graz museum, as we thought it did not make sense to pay for the museum to see four cannons. Exiting the funicular station, we first saw the Bell Tower, home to the city’s famous 5-ton bell. We did not see the bell as this four-storey tall white tower that greets visitors coming up the hill was locked during our visit (not sure if it will ever be accessible). We followed the footpath and came to the Hacker Lion, a stone lion on the western part of the hill. The lion was installed here to honour the commander who led a handful of soldiers to defend Graz Fortress against the French invaders. The viewpoint at the Hacker Lion treated us to the “modern” part of the city. After the Hacker Lion, we walked along the path and came to the Chinese Pavilion, a shelter with vaguely Chinese architecture. There was nothing much here besides a resting point, but we could see the Clock Tower and Turkish Well from here. Our final site on Schlossberg was the Clock Tower, the symbol of Graz and the oldest building in the city. The Clock Tower was built as part of the fortification of the fortress in 1265, possibly serving as a watch tower. The tower was given its clock function in 1569 and also served as a fire alarm tower in 1645. The clock today still retains its medieval structure with a wooden corridor perched near its roof and the golden clock arms look as if they were polished every day. The view of the old town from the Clock Tower terrace was magnificent. We could see the City Hall and standing tall amongst the buildings from here. We originally planned to take the world’s tallest underground slide down to the Altstadt. However, the entrance was to be shut, and Google suggested that the slide only open at 1 pm during winter. No way we were sitting around for 2 hours to wait for the slide to open, so we opted to walk down the hill from the Clock Tower side.

Graz Historic Centre Walking Tour: Getting to Know Graz from Our Guide

Graz Tourism organised a two-hour Historic Centre Walking Tour of Graz, in English and German, at 2.30 pm daily. The tour costs €16 per adult and is covered under the Graz Card (tours can be booked here). This tour took us to the important landmarks in Altstadt, and the guide’s explanations gave us a good understanding of these sights in the city. As there was some time before the start of our tour, we headed into the city centre for lunch and had a leisure stroll of the city after picking up our tickets from the Graz Tourism Information Centre.

Landhaus Courtyard and Schlossberg – Houses of Power Now and Then

We met our guide at 2.30 pm at the Graz Tourism Information Centre. Our tour started from the Landhaus Courtyard behind the Graz Tourism Information Centre. Our guide directed our attention to a painting of a white dragon on a green wooden door in the courtyard. She explained this is the symbol of Styria, and Graz is the second largest city by population in Austria, after Vienna. She then guided us to the architectural style we saw in the courtyard behind us. Graz is very close to Italy, so we would find mostly Roman-influenced architecture in the buildings there. We were also told the Graz Parliament was housed in one of the buildings we see in the courtyard.

We were brought round the corner to the main square of Graz, in front of the City Hall, a large baroque-style building that one cannot miss. Looking towards Schlossberg, our guide narrated how there was a fortress up Schlossberg and how this fortress defended the city of Graz. For centuries, no one managed to conquer the fortress. Even Napoleon failed to conquer the fortress with 4,000 soldiers, which 800 men defended. The fortress was destroyed due to a condition in a peace treaty signed with Napleon when he captured Austria. Our guide then jokingly said the fortress was not destroyed in war but in peace. Today, we do not see the fortress any more.

We were told the story of the fortress on Schlossberg

Painted House and Glockenspiel – Houses of the Citizens

After the story of the fortress and looking at the City Hall in the main square, we were brought in front of the Painted House. Our guide told us this is one of the few houses in Graz with a painted facade. Our attention was drawn to a man with wooden sticks on a black horse, who was supposed to be Zeus. Our guide said that originally, thunderbolts were painted in his hand. However, during a restoration in ancient times, the painter couldn’t make out who the man was and painted a bunch of wooden sticks, replacing the thunderbolts on Zeus’s hands, which is how Zeus got wooden sticks instead. An interesting story. We winded through a few small streets and arrived at our next stop – Glockenspiel. We were in time to watch the clock performance. When the clock struck (it would strike at 11 am, 3 pm and 6 pm), the windows opened to reveal two wooden carved figures in traditional Austrian clothing dancing. Our guide told us this clock was made by a merchant who owned a booze shop in medieval times as a marketing tool to attract the locals’ attention to his shop to buy booze. After watching the figures dancing, we thought it was the end, but our guide again brought our attention to the golden chicken above the two figures. We saw the chicken flap its wings. Our guide then told us this is done to call the two figures “home”. Indeed, after flapping wings, the two figures retreated into the window, and the doors closed. Pointing to the green tower behind the clock, our guide told us the music we heard came from the tower and that different songs would be played at different times of the year. We would have missed these small details if not for our guide.

Graz Cathedral – The Royal Cathedral

Our walking tour continued to the Mausoleum of Emperor Ferdinand and the Graz Cathedral. Our guide told us that Emperor Ferdinand, the ruler of Austria in the 1800s, was called to Vienna to take over the throne when his uncle passed on. The Emperor wanted to be buried in Graz and built this mausoleum for himself. Today, Ferdinand was the only Emperor in Austria with his own tomb instead of burying together with the other royalties. It is a shame that the mausoleum was not open to the public during our visit, and we can only see the green roof of the mausoleum popping out of the surrounding buildings. Our attention was then turned to the cathedral next door. The Graz Cathedral was built as a court church for the dukes and looked plain from the outside, other than the colourful fresco on the wall next to its entrance. Our guide told us that this cathedral was built with a Gothic style of architecture similar to what we would see in Notre Dame in Paris. We were then given some time to look around the cathedral. The cathedral looked grand and elegant on the inside, a stark contrast to its facade. The ceilings of the cathedral were painted with flowers, and pillars were donned with dark brown wooden staircases ornated with gold. Stained glass panels were used in every window opening.
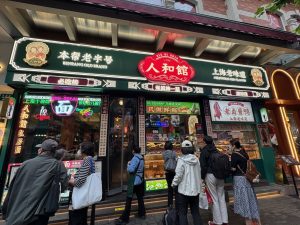
Double Spiral – The Unique Staircase

Exiting the Graz Cathedral, we took a short walk opposite the road to our next stop, the Graz castle. Unlike most palaces we have seen on this trip or any other European building, the Graz Castle looked like any other building. It can be mistaken for a normal office building as there are no guards standing outside, nor is it barricaded. Our guide told us this castle was where the dukes ruled Graz from; today, it is the office of the Mayor of Graz. We spotted a glassed-up panel and were told this was the original artwork since the castle was built. No one knows what this panel is used for and what it symbolises. The whole point of coming to this castle was the double spiral staircase. This unique structure comprises two spiral staircases that meet in the middle before every floor. Our attention was brought to the pillar, which our guide told us only the ground floor set of stairs has a pillar, and the rest of the levels do not have pillars. We spent some time walking up the staircase and taking pictures of it.
The Streets of Graz

After the double spiral staircase, we walked towards the Mur River through the oldest street in Graz. Covered with cobblestones and medieval-looking buildings, this street reminds me of Italy. We spotted a bakery with an elaborate wooden facade and a double-headed eagle crest hanging above the main entrance. Our guide told us this bakery was visited by one of the emperors of Austria once, and since then, they were qualified to use the “Hof” title in the shop name. She recommended that we try out the bread from the shop. Our guide pointed out some of her favourite shops and eateries along the street as we walked past them.

Our last stop on the tour was a bridge over River Mur. Here, our guide explained that the area we had been walking in was the old town, and the district across River Mur was the new town. In medieval times, the river was used as a defence mechanism. The duke protected people living in the old town, while the area across the bridge was left to their own defences. As such, that was where the poorer people stayed. As a result, it was filled with red-light districts with poorer living conditions. In an attempt to change the image of the new town, the government pumped in money and developed arts and culture in this new area. Most of the art museums are found in the new area. This is where our tour of the old town ended, and we bid our guide farewell. After the tour, we returned to the shops that our guide mentioned to do some shopping before returning to the hotel early. We had an early train to catch up tomorrow to our final destination for the trip – Vienna.

Austria Day 7 (14 Jan 25): Zell am See – Day on the Mighty Kitzsteinhorn

The Top of Salzburg kept popping up as I researched what to see in Zell am See. Pictures online of the breathtaking mountain ranges from the viewing platform perched 3,029m on top of Kitzsteinhorn attracted me to this mountain. We can take a cable car ride to the Top of Salzburg in Kaprun from Maiskogel Talstation or Kitzsteinhorn Talstation. Getting to the Top of Salzburg from Kitzsteinhorn Talstation is faster as it only requires three cable car rides instead of four from Maiskogel Talstation. While planning my trip, an email correspondence from the visitor centre informed me that an Explorer Tour (costs €13 per adult) is held every Tuesday during the winter. I thought it would be interesting to understand more about the mountains rather than simply going up and looking at the view. We signed up for the tour two months before our trip to Austria (click here for the link to sign up).

Kaprun: Gateway to Kitzsteinhorn

The Explorer Tour started at the Kaprun Centre in Kaprun village, about a 15-minute drive or the ½ hourly 25-minute bus ride on Bus #660 (€4.50 per pax one way) from Postplatz, the main bus terminal in Zell am See. We could also catch Bus #660 from the bus stop in front of Zell am See Bahnhof. We alighted at Kaprun Maiskogelbahn, where Kaprun Centre is about a 2 min walk from the main road. This part of Kaprun village looked lively; numerous accommodations, restaurants, and shops (mainly selling ski-related stuff and winter clothing) dotted around the village.

Explorer Tour: Getting to Know Kitzsteinhorn

The 3½ hour guided Explorer Tour meeting point is at Kaprun Centre. During the tour, our guide introduced us to the flora/fauna and their features in the four climate zones, from the temperate to the arctic climate zones in Kitzsteinhorn, as we made our way up to the summit of the mountain. We were in the temperate climate zone at Kaprun Centre, seeing more animal species and lush green vegetation. The tour group comprised mostly German-speaking visitors, and we were the only English-speaking participants. Our guide had to explain the information in two languages. After the short brief, we were led to the cable car station and took the first of the four cable car rides up to the mountain.

Map of the cable cars at Kitzsteinhorn

Maiskogel: View of the Valley and Lake Zell

The MK Maiskogelbahn took us up to 1,570m from Kaprun Centre. On the ride, we saw the alpine coaster track and people skiing down the slope below the cable car. As our guide had previously told us that we were still in the temperate climate zone, we saw a lot of needle-leaf pine tree forest. Our guide continued to talk about the vegetation that we saw around. He then brought the group to a nearby slope with a set of footprints and explained that hares and foxes inhabit this area and will only come out at night. We were then brought to the Panorama Maiskogel viewing platform, where we got an impressive view of the valley covered in snow and Lake Zell in the distance between two mountains. We could see a sea of white snow covering most of the land, with villages and towns sparsely covering parts of the land, mainly near Lake Zell. Our guide brought our attention to the river that cuts across the land. This is the Salzach River, the same river we saw in Salzburg City days ago. He explained how the river was straightened decades ago to facilitate farming activities and how this human intervention created flooding. To fix the problem, the river is now bent. We walked to the next cable car station after being given some time to take pictures at Panorama Maiskogel.
Langwied: Riding 3K K-onnection, the Longest Continous Gondola Axis

Our second cable car ride on the 3K K-onnection is the longest ride during this tour. The scenic cable car ride took us across the mountains. We could see fewer trees on the mountain, mostly bundled together, from the cable car. On one side of the cable car, jagged rocky mountainside occasionally popping out of the snow to reveal the true form of the mountain. Our guide explained that skiing is prohibited in this part of the mountain due to the high risk of avalanches. He even pointed out a part of the mountain where a recent avalanche activity was detected. On the other side of the cable car, we saw the towns sitting at the base of the mountain ranges below in the valley as though they were seeking protection from the mighty mountain ranges. The cable car ride brought us to Langwied at 1,975m above sea level. From the station, our guide led us on a short hike up a slope to a viewpoint where we could see the plains from an elevated perspective. Before his brief on the geological makeup of this area, our guide focused our attention up in the mountains and exclaimed, “That is the peak of Kitzsteinhorn”. He explained that we were in the tundra climate zone where frigid temperatures and short growing seasons hinder tree growth. We were also educated on the glacier activities in the mountains.

Alpincentre: Entering the Arctic Climate Zone

We headed back to the cable car station and walked to the next cable car station. The third cable car, Gletscherjet 2, took us from 1,975m to 2,450m. On this ride, we saw vast areas covered in snow and a couple of buildings sitting on the mountainside. Our guide brought us to another viewpoint at the end of the cable car ride. Here, he announced that we are officially in the arctic climate zone, where no tree growth and covered in snow and ice all year round. This is the same climate we will experience if we go to the North and South Pole. From this viewpoint, we got an even higher view of the villages near Lake Zell. Here, we felt as if we were on the same level as the peak of the mountain ranges before us. After a brief stay here, we headed for our final cable car ride on the Gipfelbahn to the Top of Salzburg.
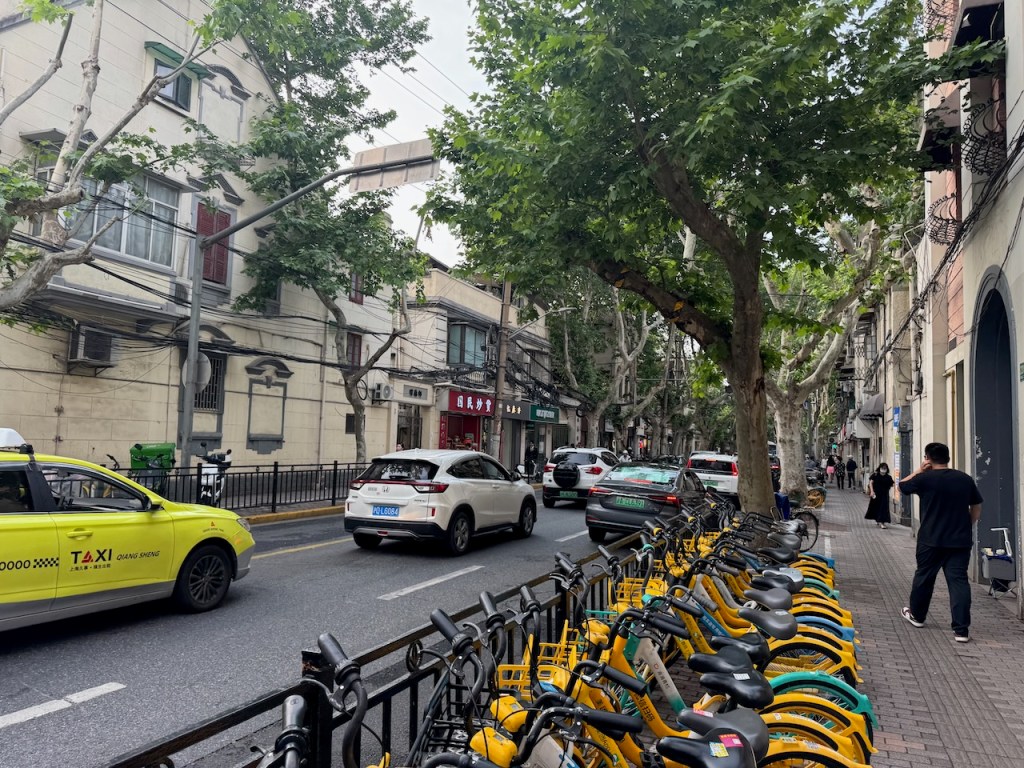
Top of Salzburg: Magnificent Views of the Mountain Ranges

The final stop of the Explorer Tour is at the Top of Salzburg, perched at 3,029m. Our guide brought us to the Top of Salzburg viewing platform, where we were treated to a magnificent view of the mountain peaks and the glaciers below. Our guide explained the glacier activities on the mountaintop and how to differentiate between live and dead glaciers. He even pointed out Kitzsteinhorn’s peak, explaining that it is only open to very experienced climbers. We were dispersed at the platform and were told to gather back here for the National Park Gallery Tour 1½ hours later. After the dispersion, we wanted to get a picture with the “3029 Top of Salzburg” sign, but as many people from the tour were trying to snap pictures with this sign, we went for lunch in the only restaurant up here. After lunch, we returned to the viewing platform and took pictures with the sign (thanks to a Russian family queuing behind us, helping us chase people away from jumping the queue and those who tried to photobomb us). After taking some pictures, we finally had a good look at the view from the Top of Salzburg platform. The view here is out of this world! We saw mountain peaks after mountain peaks, covered in snow, that seemed to stretch forever into the horizon. We were at a point that was higher than any of the mountains before our eyes. It felt so surreal. Before, we could only see these majestic mountains like giants, but today, we see them as dwarves as we tower over them from the top of the Salzburg viewing platform. I reckon the best view would be that taken from the pointy corner of the platform. Here, we felt as if we were floating in the air, looking down into the peaks of the mountain ranges.
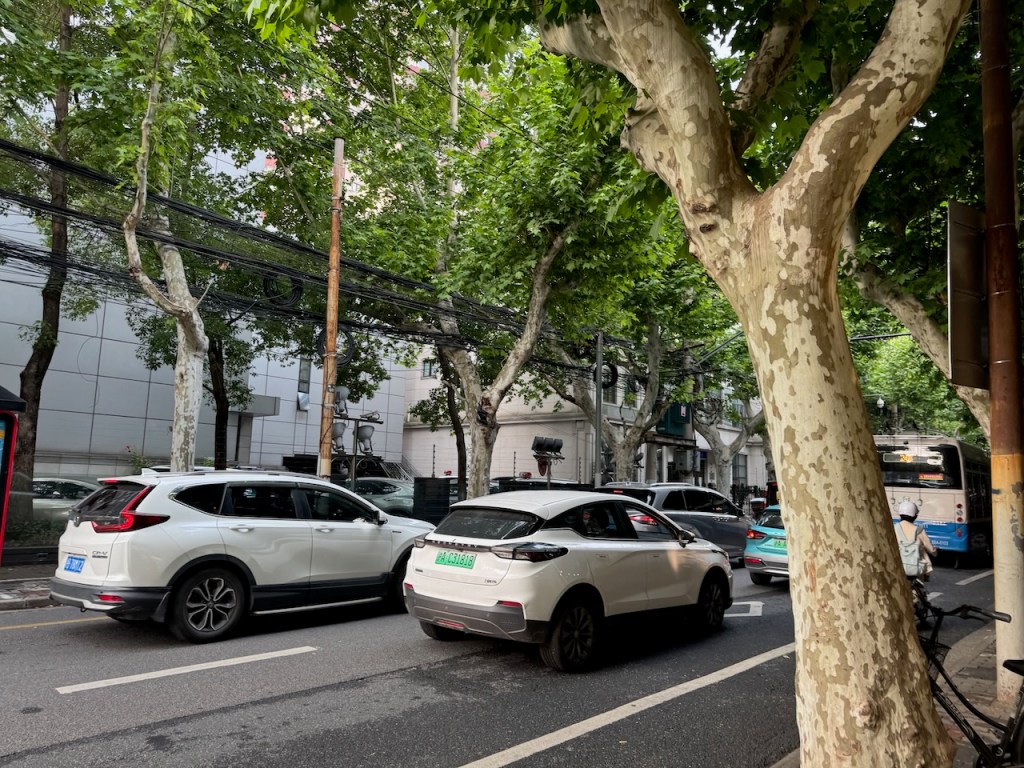
NationalPark Gallery Tour: The Tunnel in the Mountains

Our tour continues with a guided tour of the NationalPark Gallery on the top of Kitzsteinhorn. This tour is complimentary, even to those who did not join the Explorer Tour. The tour took us through a 360m tunnel used in the 60s for those who ascended the mountain to ski. We made five stops along the downslope tunnel. Our first stop was some artificial concrete slabs, which our guide explained only served to anchor the cables that the cable cars that ran up to Kitzsteinhorn. Our next stop was a crystallite, where our guide educated us on the formation of these crystals, mainly quartz, and how they were mined. These days, the mining of quartz was no longer a thing in Kitzsteinhorn.

At the third stop, our guide explained the formation of mountains, particularly Kitzsteinhorn. The fourth stop showcased the mining of gold in Kitzsteinhorn. Our guide explained gold mining has ceased because the cost of gold outweighs the amount gained. He also narrated the purpose of the chest we saw on the ground. This chest used to contain part of the gold mined on this mountain, placed outside the mines. The miner’s wife could take an amount of gold from this chest if the miner met with a mishap during work. This is perhaps the earliest form of insurance. At our last stop before the viewing platform at the end of the tunnel, our guide explained the formation of glaciers and how these glaciers are melting due to man-induced pollution. After the brief at the final stop, we were dispersed and told we could stay at the NationalPark Gallery Platform as long as we wanted.

After bidding farewell to our guide, we were free to roam onto the outdoor viewing platform jagged out of the cliff that gave us a closer look at the mountain ranges. We can see the highest mountain in Austria, the Grossglockner. We could also see the “dead glaciers” nearer to the viewing platform and the “living glaciers” in the distance. The view here is as magnificent as we saw at the Top of Salzburg. We stayed here for the next 20 minutes, looking out into the snow-covered mountain peaks and listening to the whispers the mountain breeze brought. Soon, it was time to descend the mountain (the last ride down was at 4 pm). On our way down, we did some window shopping in the sports shop at Alpincentre and caught up on the photo ops we had missed out on earlier. At Langwied, we had the choice of taking the longer 3K K-onnection or the shorter Panoramabahn route. Both routes will land at different parts of the Kaprun, and since we wanted to try out the Alpine Coaster at Kaprun Centre, we took the longer 3K K-onnection route.

Alpine Coaster Fun

It was about 5 pm when we arrived back at the Kaprun Centre. Fortunately, the Alpine Coaster was still in operation. We got tickets (which cost €15 per adult) from the ticketing counters at Kaprun Centre to ride the Alpine Coaster. Entrance to the Alpine Coaster was just across the road from the ticketing counter, behind a bar. The Alpine Coaster started from the ground level. We sat on the coaster and hoisted along the tracks to the starting point, about 300m higher than the starting point. With a loop at the top, we were driven down the slopes at 40km/h by gravity. The Alpine Coaster was a fun activity to end our day.